今天,我們要讓整個 RAG 系統「活起來」:
讓它能上傳檔案、理解內容、儲存成知識,
並最終用 ChatBot 回答問題!
這一篇的目標是讓整個流程串起來:
pom.xml)這裡我們加入 OCR 與 PDF 解析的依賴,方便從檔案中抽出文字。
<dependencies>
    <!-- OCR -->
    <dependency>
        <groupId>net.sourceforge.tess4j</groupId>
        <artifactId>tess4j</artifactId>
        <version>5.4.0</version>
    </dependency>

    <!-- PDF 解析 -->
    <dependency>
        <groupId>org.apache.pdfbox</groupId>
        <artifactId>pdfbox</artifactId>
        <version>2.0.29</version>
    </dependency>
</dependencies>
application.yml)spring:
main:
allow-bean-definition-overriding: true
servlet:
multipart:
max-file-size: 50MB
max-request-size: 50MB
server:
port: 8080
file:
upload-dir: /home/ubuntu/SpringAI_RAG/springAI_rag/temp/uploaded_file/source_file
convert-dir: /home/ubuntu/SpringAI_RAG/springAI_rag/temp/uploaded_file/convert_file
這裡設定了兩個重要目錄:
upload-dir:原始上傳檔案存放處convert-dir:抽取後的純文字暫存目錄接下來是整個 RAG 的核心:
從使用者提問 → 檢索 → 回答。
@Slf4j
@Service
@RequiredArgsConstructor
public class ChatBotImpl implements ChatBotService {
private final QdrantClient qdrantClient;
private final OllamaChatModel ollamaChatModel;
private final OllamaEmbeddingModel ollamaEmbeddingModel;
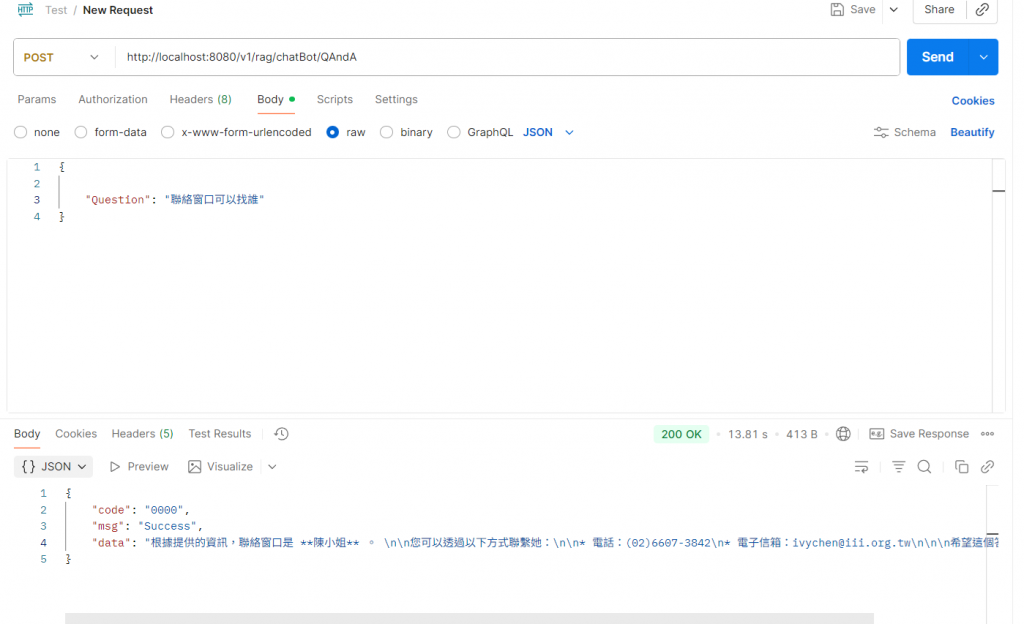
@Override
public BaseResponse askQuestion(ChatBotRequest request) {
try {
// Step 1️⃣:將問題轉換為 embedding
List<float[]> questionEmbedding = ollamaEmbeddingModel.embed(List.of(request.getQuestion()));
// 將 float[] 轉成 List<Float>
List<Float> vectorList = new ArrayList<>();
for (float[] arr : questionEmbedding) {
for (float v : arr) vectorList.add(v);
}
// Step 2️⃣:從 Qdrant 搜尋最相關內容
ListenableFuture<List<Points.ScoredPoint>> future =
qdrantClient.searchAsync(Points.SearchPoints.newBuilder()
.setCollectionName("test")
.addAllVector(vectorList)
.setWithPayload(Points.WithPayloadSelector.newBuilder().setEnable(true).build())
.setLimit(3)
.build());
List<Points.ScoredPoint> results = future.get();
// Step 3️⃣:取出檢索到的內容
StringBuilder contextBuilder = new StringBuilder();
for (Points.ScoredPoint point : results) {
var value = point.getPayloadMap().get("document");
if (value != null && value.hasStringValue()) {
contextBuilder.append(value.getStringValue()).append("\n");
}
}
String context = contextBuilder.toString();
log.info("📚 Retrieved context:\n{}", context);
// Step 4️⃣:組成 Prompt 並呼叫 Ollama Chat 模型
String prompt = """
You are a helpful assistant.
Use the following context to answer the user's question.
Context:
%s
Question:
%s
""".formatted(context, request.getQuestion());
String answer = ollamaChatModel.call(prompt);
return BaseResponse.builder()
.code("0000")
.msg("Success")
.data(answer)
.build();
} catch (Exception e) {
log.error("ChatBot error: {}", e.getMessage(), e);
return BaseResponse.builder()
.code("9999")
.msg("Failed")
.data(e.getMessage())
.build();
}
}
}
| 模組 | 功能 |
|---|---|
| OllamaEmbeddingModel | 將文字轉換為語意向量 |
| QdrantClient | 儲存與檢索語意資料 |
| OllamaChatModel | 根據檢索結果生成回答 |
| ChatBotService | 串起整個問答流程 |
這一篇讓 RAG 系統正式成為「能理解文件並回答」的智慧助理。


 iThome鐵人賽