PIXI.Graphics 官方文件:
http://pixijs.download/dev/docs/PIXI.Graphics.html
PixiJS.Graphics 是我常使用的方法,除了畫出圖像外,也使用此類別畫出來的圖像來做遮罩
例一:萬花筒
每片六邊形由六個三角形組成,
每片三角形各自畫了三角形的遮罩,三角形內則是物件本身做動態
例二:按鈕
為避免粒子效果超出按鈕範圍,畫了梯形範圍做遮罩
PIXI.Graphics 繼承自 PixiJS.Container,因此也會有前一篇提到的各個特性,可以在畫完後再調整整個 PIXI.Graphics 實體的 alpha、旋轉、座標等。
雖然可以使用 PIXI.Container 的特性,但我習慣讓 PIXI.Graphics 類別專心處理繪圖,用來互動與容器的功能還是交給 PIXI.Container 的物件處理
PIXI.Graphics 的繪圖,每次畫完一個形狀時,會放在 PIXI.Graphics 實體的 graphicsData 裡
每一個形狀, 則分為外框(line)、填滿(fill)與路徑
想法上很接近 photoshop 裡的形狀工具 
// 畫實心方塊的情形:
var testGraphics = new PIXI.Graphics();
testGraphics.beginFill(0xff0000);
testGraphics.drawRect(0, 0, 100, 100); //畫一個紅色方塊
testGraphics.endFill();
console.log(testGraphics.graphicsData); // [t]

testGraphics.beginFill(0xff9900);
testGraphics.drawRect(0, 110, 100, 100); //畫另一個橘色方塊
testGraphics.endFill();
console.log(testGraphics.graphicsData); // (2)[t, t]
// 這次不指定填色
var testGraphics = new PIXI.Graphics();
testGraphics.drawRect(0, 0, 100, 100);
console.log(testGraphics.graphicsData); // [t]

testGraphics.drawRect(0, 110, 100, 100);
console.log(testGraphics.graphicsData);
// (2)[t, t],繪製的路徑有放進 graphicsData裡
直接繪製形狀的方式有幾個:drawCircle、drawEllipse、drawPolygon、drawRect、drawRoundedRect、drawShape
很像 photoshop 裡形狀工具裡的各種功能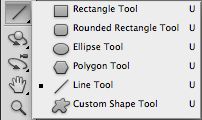
另外的方法則是 moveTo 到起始點,然後使用 lineTo、bezierCurveTo等方法一筆一筆畫出形狀
對,就是 photoshop 裡鋼筆工具的感覺
beginFill 與 endFill:
beginFill(color, alpha):指定填滿的顏色與透明度,
在最後呼叫 endFill() 前的線段與形狀會套用填滿的顏色與透明度
lineStyle:
lineStyle(lineWidth, color, alpha):
指定線段的寬度、顏色、透明度
clear:
清除掉該 PIXI.Graphics 實體上繪製的 graphicsData,但不影響本身的 children
// 畫一個方塊
var testGraphics = new PIXI.Graphics();
testGraphics.beginFill(0xff0000);
testGraphics.drawRect(0, 0, 100, 100);
testGraphics.endFill();
app.stage.addChild(testGraphics);

console.log(testGraphics.graphicsData); // [t]
console.log(testGraphics.children); // [] 繪製的物件不算 children 的成員

// 這是一隻兔子
var bunny = PIXI.Sprite.fromImage('assets/basics/bunny.png');
testGraphics.addChild(bunny);

console.log(testGraphics.children); // [e] 兔子在 children 陣列裡了

testGraphics.clear(); // 方塊不見, 兔子還在
console.log(testGraphics.graphicsData); // [] graphicsData 的內容被清除了
console.log(testGraphics.children); // [e] 清除繪製的物件不會移除 children 陣列
clone:
有時的情境是需要複數個一模一樣的物件,我會用 clone() 的方法複製
需注意的是:clone() 會複製該 PIXI.Graphics 實體繪製出來的 graphicsData,但不包含本身的children
// 這是一隻兔子
var bunny = PIXI.Sprite.fromImage('assets/basics/bunny.png');

// 畫一個方塊
var testGraphics = new PIXI.Graphics();
testGraphics.beginFill(0xff0000);
testGraphics.drawRect(0, 0, 100, 100);
testGraphics.endFill();
app.stage.addChild(testGraphics);

// 把兔子放進方塊裡
testGraphics.addChild(bunny);
console.log(testGraphics.graphicsData); // [t] 有一個方塊
console.log(testGraphics.children); // [e] 方塊裡有隻兔子

// 複製放了兔子的方塊
var testGraphics2 = testGraphics.clone();
app.stage.addChild(testGraphics2);

console.log(testGraphics2.graphicsData); // [t] clone 的 PIXI.Graphics 也有一個方塊
console.log(testGraphics2.children); // [] 複製出來的方塊沒有兔子,但有方塊
另外需注意的是,目前沒有填滿漸層的方法。
PIXI.Graphics 完整的繪圖方法還是以 PIXI.Graphics 官網 為主
我目前使用過 PIXI.Graphics 的 moveTo、lineTo、bezierCurveTo;beginFill、endFill 等方法
使用起來與其他語言或是 canvas 繪製圖形的感覺沒有太大差異


 iThome鐵人賽