Day4的文章中提到了android:layout_weight屬性可在畫面中分配views的高度或寬度,但我們也可以將view依指定方式撐開,以及在Android Studio連接實體裝置。
由child view自己處理,撐開child view本身
android:padding="8dp" (在view中對稱撐開)android:paddingLeft="16dp" (在view中對某側撐開)由viewgroup處理 (TIP: 這是layout_開頭的屬性)
所以一定需要viewgroup存在
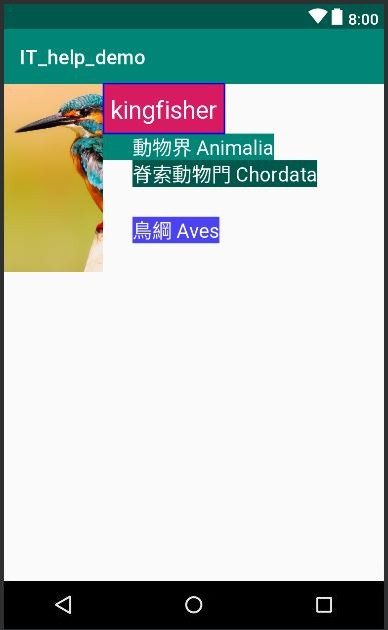
android:layout_margin="8dp" (對稱移動)android:layout_marginRight="8dp" (對某側移動)在此XML中,可注意四個TextView分別使用了android:padding、android:paddingLeft、android:layout_margin與android:layout_marginRight四種屬性後,行為之間的不同。
<RelativeLayout
    xmlns:android="http://schemas.android.com/apk/res/android"
    android:layout_width="match_parent"
    android:layout_height="match_parent">

    <ImageView
        android:id="@+id/bird_image_view"
        android:layout_width="100dp"
        android:layout_height="190dp"
        android:scaleType="centerCrop"
        android:src="@drawable/kingfisher" />

    <TextView
        android:id="@+id/bird_text1_view"
        android:layout_width="wrap_content"
        android:layout_height="wrap_content"
        android:layout_toRightOf="@id/bird_image_view"
        android:text="kingfisher"
        android:textSize="25dp"
        android:background="@color/colorAccent"
        android:textColor="@android:color/white"
        android:padding="8dp"
        android:textAppearance="?android:textAppearanceMedium"/>

    <TextView
        android:id="@+id/bird_text2_view"
        android:layout_width="wrap_content"
        android:layout_height="wrap_content"
        android:layout_below="@id/bird_text1_view"
        android:layout_toRightOf="@id/bird_image_view"
        android:text="動物界 Animalia"
        android:textSize="20dp"
        android:background="@color/colorPrimary"
        android:textColor="@android:color/white"
        android:paddingLeft="30dp"
        android:textAppearance="?android:textAppearanceSmall" />

    <TextView
        android:id="@+id/bird_text3_view"
        android:layout_width="wrap_content"
        android:layout_height="wrap_content"
        android:layout_below="@id/bird_text2_view"
        android:layout_toRightOf="@id/bird_image_view"
        android:text="脊索動物門 Chordata"
        android:textSize="20dp"
        android:background="@color/colorPrimaryDark"
        android:textColor="@android:color/white"
        android:layout_marginLeft="30dp"
        android:textAppearance="?android:textAppearanceSmall"/>

    <TextView
        android:layout_width="wrap_content"
        android:layout_height="wrap_content"
        android:layout_below="@id/bird_text3_view"
        android:layout_toRightOf="@id/bird_image_view"
        android:text="鳥綱 Aves"
        android:textSize="20dp"
        android:background="#4b42f4"
        android:textColor="@android:color/white"
        android:layout_margin="30dp"
        android:textAppearance="?android:textAppearanceSmall"/>

</RelativeLayout>

接著來把製作好的APP,安裝到手機上,大致分為兩步驟:
開啟手機的開發者模式,可參考此處
如果作業系統是Windows,則需要下載驅動程式
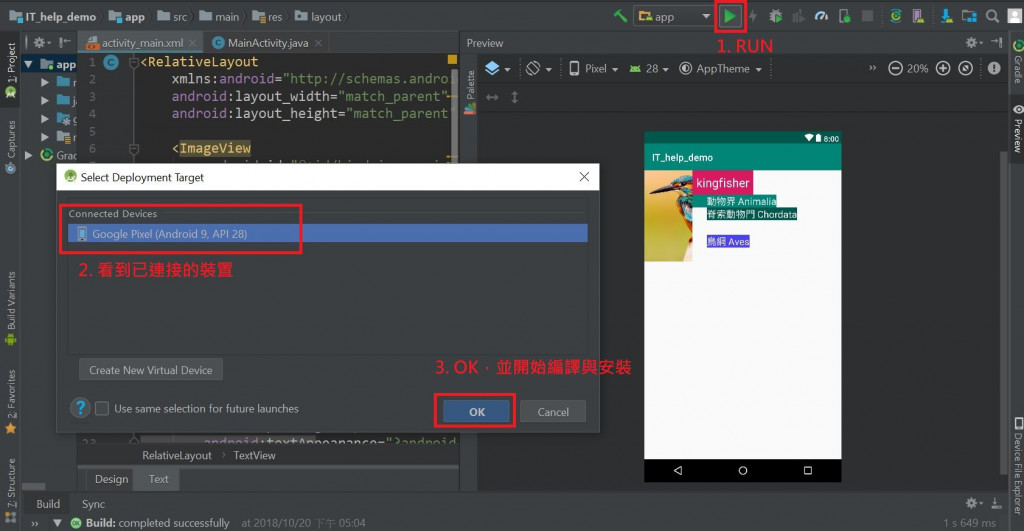
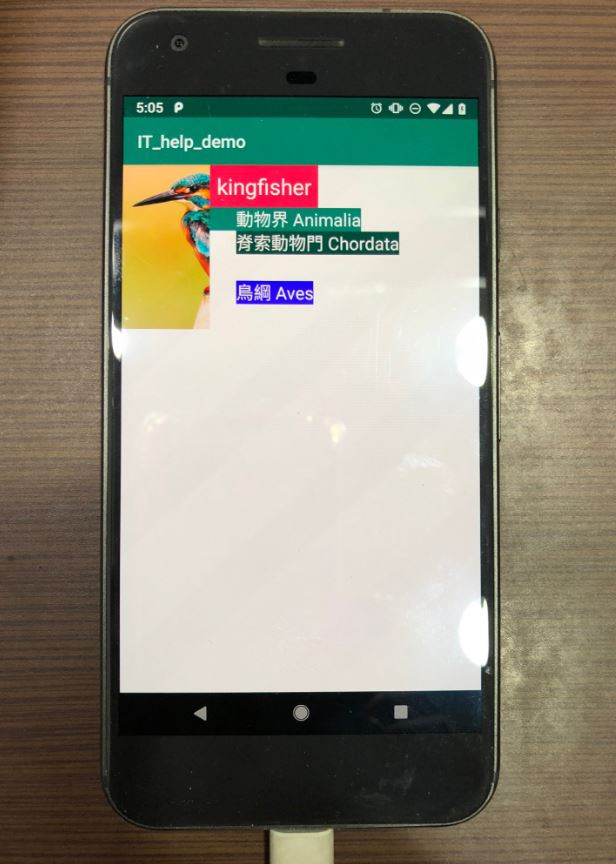
利用USB連接手機和電腦,進入USB偵錯模式,並在Android Studio按Run來編譯專案,並在手機上查看

