今天來做一些有關介面外觀改善的練習。
在手機上我們可以打開輔助線來看每個view的界限,
路徑在:設定 > 系統 > 開發人員選項 > 顯示版面配置界限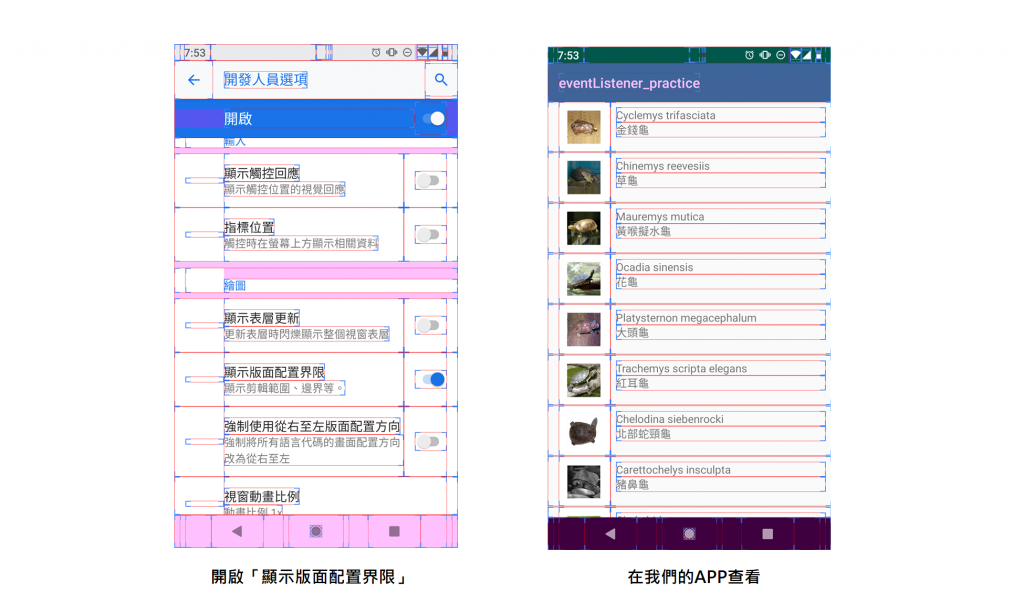
順便看一下目前的版面,逐一修改的項目如下:
開啟list_item.xml,設定各list item至少高88dp(可以更高,不能再低)。android:minHeight="88dp"
打開colors.xml(路徑在app/res/values/colors.xml),加上我們所需的顏色
<?xml version="1.0" encoding="utf-8"?>
<resources>
    <color name="colorPrimary">#193a37</color>
    <color name="colorPrimaryDark">#1d302e</color>
    <color name="colorAccent">#D81B60</color>
    <color name="colorTortoise">#6c7a75</color>
    <color name="colorBackground">#57635f</color>
</resources>
再到list_item.xml做以下更動:
android:background="@color/colorBackground"
android:layout_height="88dp"
android:background="@color/colorTortoise"
tools:textAppearance="?android:textAppearanceMedium"
android:textColor="@android:color/white"
android:layout_height="0dp",並設定android:layout_weight="1"
android:gravity="bottom" 以及 android:gravity="top"
<?xml version="1.0" encoding="utf-8"?>
<LinearLayout
    xmlns:android="http://schemas.android.com/apk/res/android"
    xmlns:tools="http://schemas.android.com/tools"
    android:layout_width="match_parent"
    android:layout_height="wrap_content"
    android:orientation="horizontal"
    android:paddingLeft="16dp"
    android:minHeight="88dp"
    android:background="@color/colorBackground">

    <ImageView
        android:id="@+id/image"
        android:layout_width="wrap_content"
        android:layout_height="88dp"
        android:paddingRight="16dp"/>

    <LinearLayout
        xmlns:android="http://schemas.android.com/apk/res/android"
        xmlns:tools="http://schemas.android.com/tools"
        android:layout_width="match_parent"
        android:layout_height="match_parent"
        android:orientation="vertical"
        android:paddingLeft="16dp"
        android:background="@color/colorTortoise">

        <TextView
            android:id="@+id/tortoises_text_view"
            android:layout_width="match_parent"
            android:layout_height="0dp"
            android:layout_weight="1"
            android:gravity="bottom"
            tools:textAppearance="?android:textAppearanceMedium"
            android:textColor="@android:color/white"
            android:textStyle="bold"/>

        <TextView
            android:id="@+id/default_text_view"
            android:layout_width="match_parent"
            android:layout_height="0dp"
            android:layout_weight="1"
            android:gravity="top"
            tools:textAppearance="?android:textAppearanceMedium"
            android:textColor="@android:color/white"/>
    </LinearLayout>

</LinearLayout>
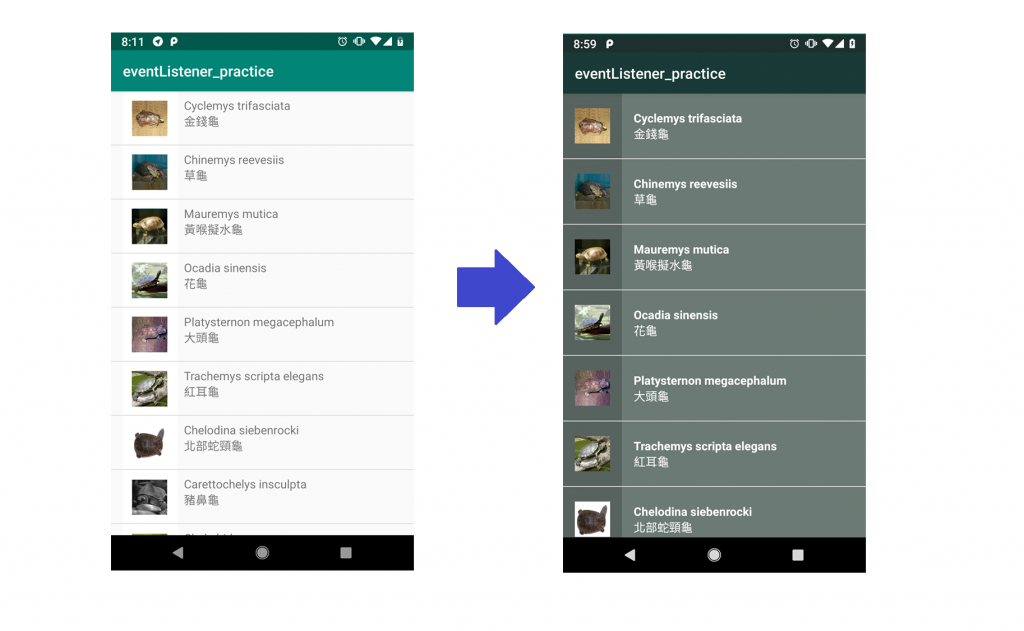
最後來個比較: