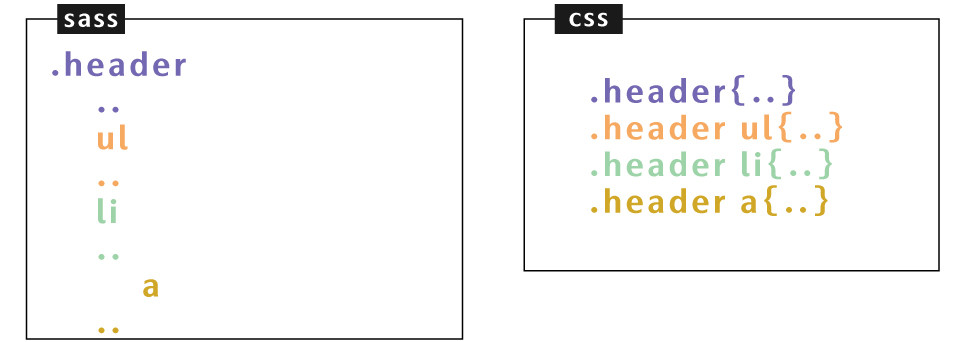
以.header為例
<div class="header">
    <ul>
        <li>
            <a href=""></a>
        </li>
        <li>
            <a href=""></a>
        </li>
    </ul>
</div>
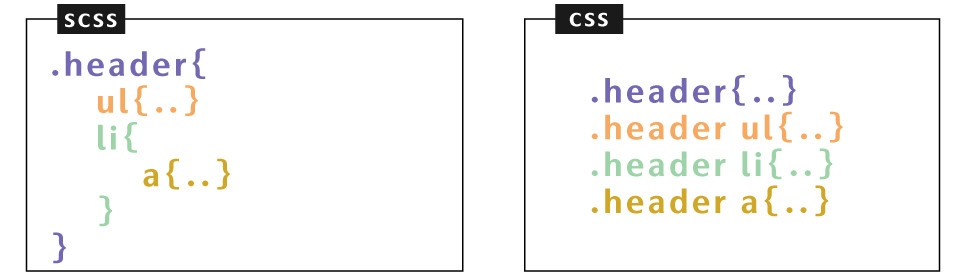
以.header為例
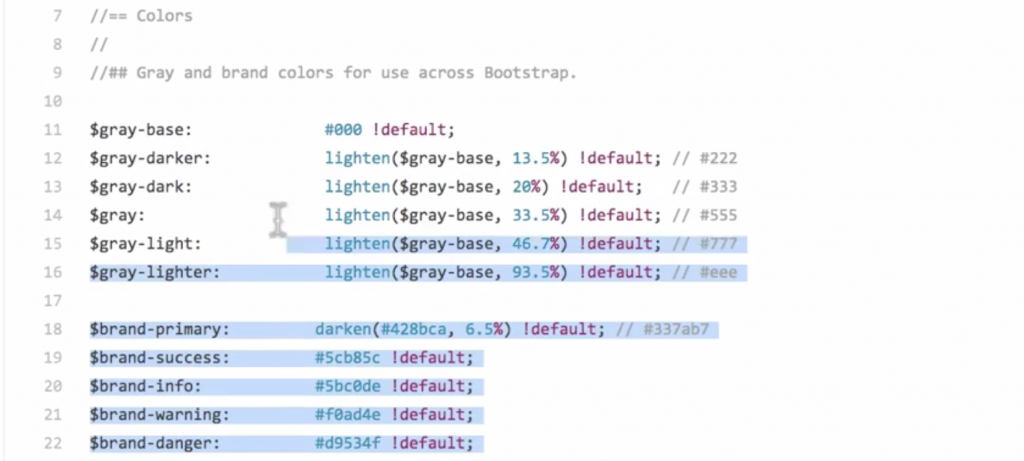
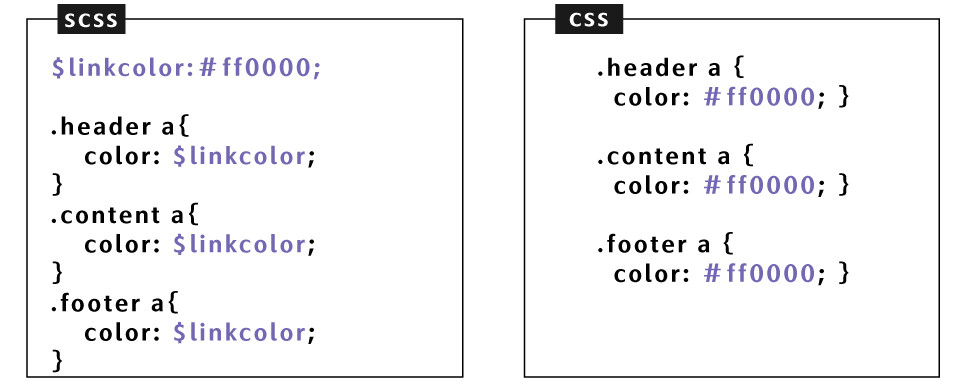
可透過變數,來去修改你今天有用到變數的名稱。變數通常都會寫在最上方,如下方屬性有需要做修改,就不用逐行去看做修改,只要修改最上方變數的東西即可
$linkcolor: #333333;
$font-l:18px; $font-m:16px; $font-s:14px;
$linkcolor:#ff0000;

.header a{
    color: $linkcolor;
}
.content a{
    color: $linkcolor;
}
.footer a{
    color: $linkcolor;
}
@import 'reset';
@import 'index';
六角課堂問與答 原出處
問|prepros+sublime 新增_reset.scss會產生_reset.css檔案(正常狀況是不會產生此檔案的)
答|在新增_reset.sass檔案後,先打入@import: "reset",prepros就會知道這是要合併的檔案,之後要怎麼改reset.sass裡面的東西,按儲存都不會產生.css檔了
能幫助你記住CSS技巧讓你不再因回想原理而中斷思緒
//scss檔案
@mixing hide-text{
    text-indent:101%;
    white-space:nowrap;
    overflow:hidden;
}
.header h1{
    @include hide-text;
}
/*css檔案*/
.header h1{
    text-indent:101%;
    white-space:nowrap;
    overflow:hidden;
}
可客製化各式各樣的效果
@mixin circle($size,$bgcolor){
    border-radius:50%;
    height:$size;
    width:$size ;
    font-size:$size/ 3;
    Background:$bgcolor;
}

.white-cricle{
    @include circle(30px,#fff);
}
.black-circle{
    @include circle(51px,#000);
}
/*css檔案*/
.white-cricle{
    border-radius:50%;
    height:30px;
    width:30px;
    font-size:10px;
    Background:#fff;
}
.black-circle{
    border-radius:50%;
    height:51px;
    width:51px;
    font-size:117x;
    Background:#000;
}
客製載具斷點
@mixin desktop{
    @media(max-width:1023px){
        @content
    }
}
@mixin desktop-top{
    @media(max-width:1024px){
        @content
    }
}
@mixin pad{
    @media(max-width:767px){
        @content
    }
}
@mixin iphone{
    @media(max-width:568px){
        @content
    }
}
@mixin mobile480{
    @media(max-width:480x){
        @content
    }
}
@mixin iphone5{
    @media(max-width:320px){
        @content
    }
}
@mixin pad{
    @media(max-width:767px){
        @content
    }
}
@mixin iphone5{
    @media(max-width:320px){
        @content
    }
}

.header{
    Width:100px;
    height:100px;
    @include pad(){
      height:auot;
    }
    @include iphone5(){
      height:30px;
    }

}
.header{
    Width:100px;
    height:100px; }
    @media(max-width:767px){
      .header{
      height:auot; } }
    @media(max-width:320px){
      .header{
      height:30px; } }

}
@mixin pad{
    @media(max-width:767px){
        @content
    }
}
@mixin iphone5{
    @media(max-width:320px){
        @content
    }
}


.header{
    Width:100px;
    height:100px;
    @include pad(){
      height:auot;
    }
    @include iphone5(){
      height:30px;
    }
    a{
      color:#000;
      @include iphone5(){
        display:none;
        }
     }
}
※註-關於bootstrap sass的mixin相關用法設定可參閱bootstrap
第一次寫SCSS建議結構(all.scss)
@import "mexin";  //所有全域變數與Mixin
@import "reset";  //reset.css
@import "index";  //首頁
@import "page/..";  //內頁
接著你可以這樣寫(all.scss)
@import "mixin";  //所有全域變數與Mixin
@import "reset";  //reset.css
@import "layout";  //共同框架,第一層(例如表頭表尾的共同區塊)
@import "module";  //buttom,form,table
@import "page/index、pages1、pages2";
※註-更多scss結構設計部分可參閱洧傑老師的Sass教學手冊導讀
工具
可使用VSCode取代sublime,並新增VSCode套件-Live Sass Compiler取代prepros |原出處
參考文章