目前在開發的這個應用沒有後端幫忙也沒有寫好的 api 可以使用,所以我們就只能自立自強了!
自己開始寫後端架server,那我可能就沒時間在這邊發文了,還好有 google 開發的平台,今天的主角
Firebase,替我省下不少時間讓我可以在這跟大家分享,上面提供了許多工具如註冊驗證、Realtime database 、functions api 等等,今天就來分享怎麼部署跟簡單的使用 database 的功能吧
已經完成部署的往這邊 --> 專案的好幫手 Firebase |使用篇
放一下之前的案子使用 firebase 的紀錄,我們是選付費方案 Blaze,自己使用的話是可以免費使用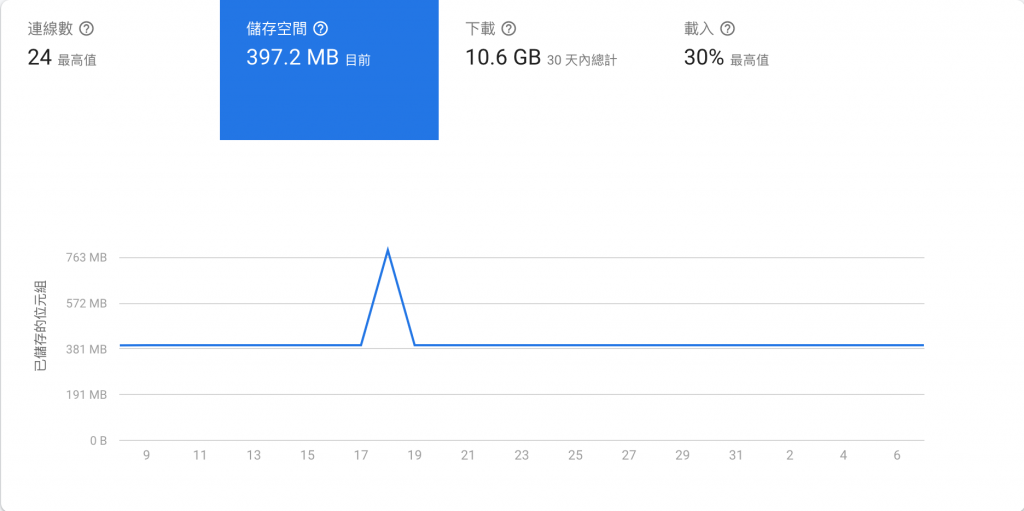

一個月不到 1 美 ?!這啥佛心事業
1.新建專案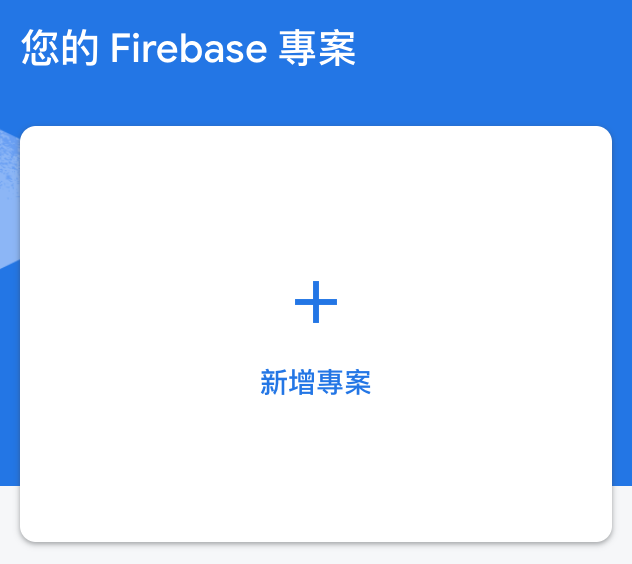
2.建立資料庫 選擇 Realtime Database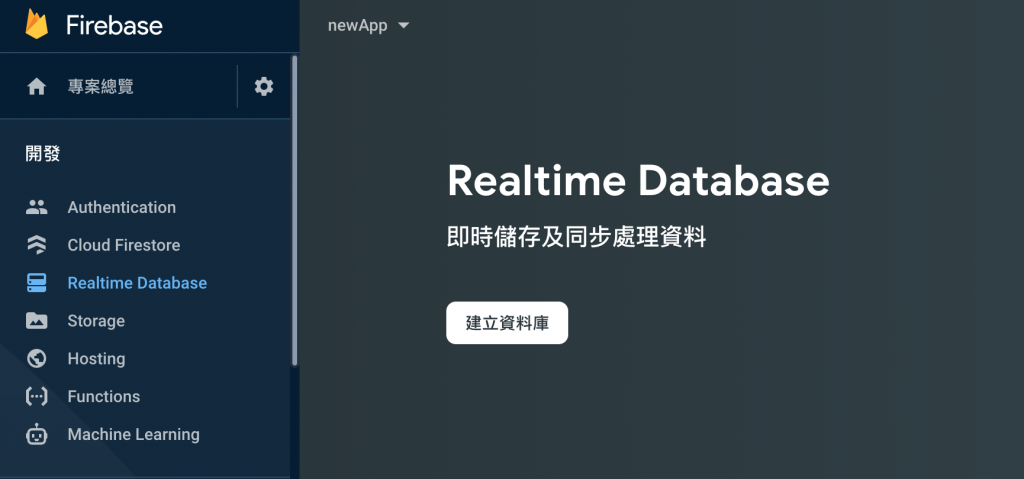
3.測試方便使用我們可以選以測試模式啟動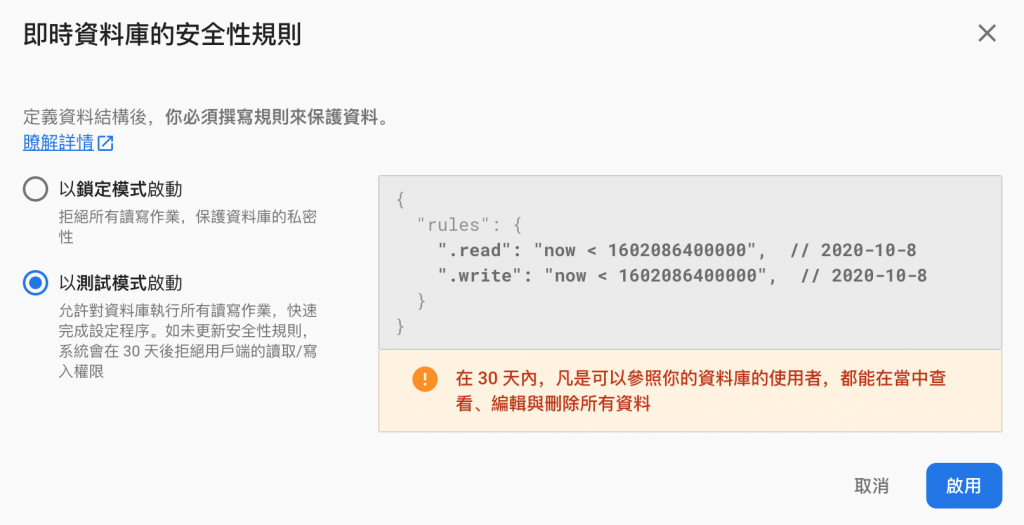
4.新增 iOS 應用程式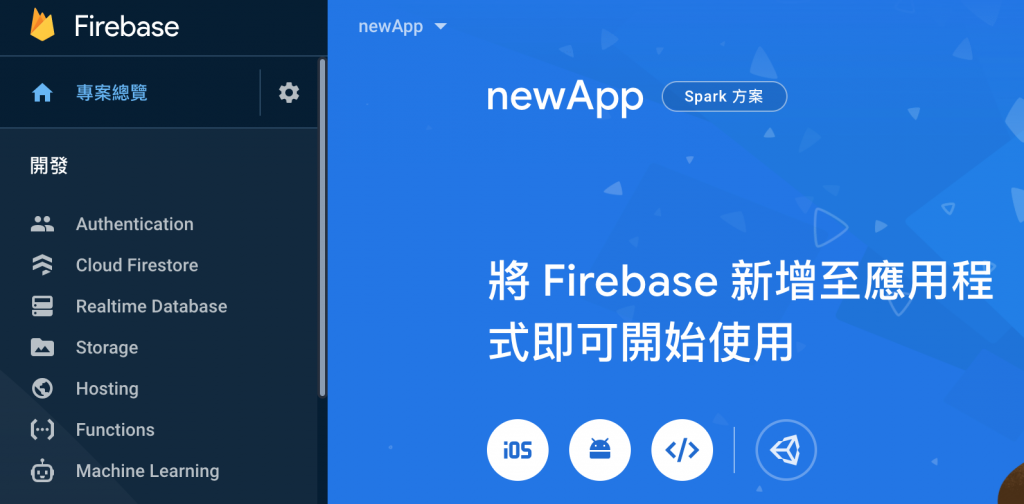
5.註冊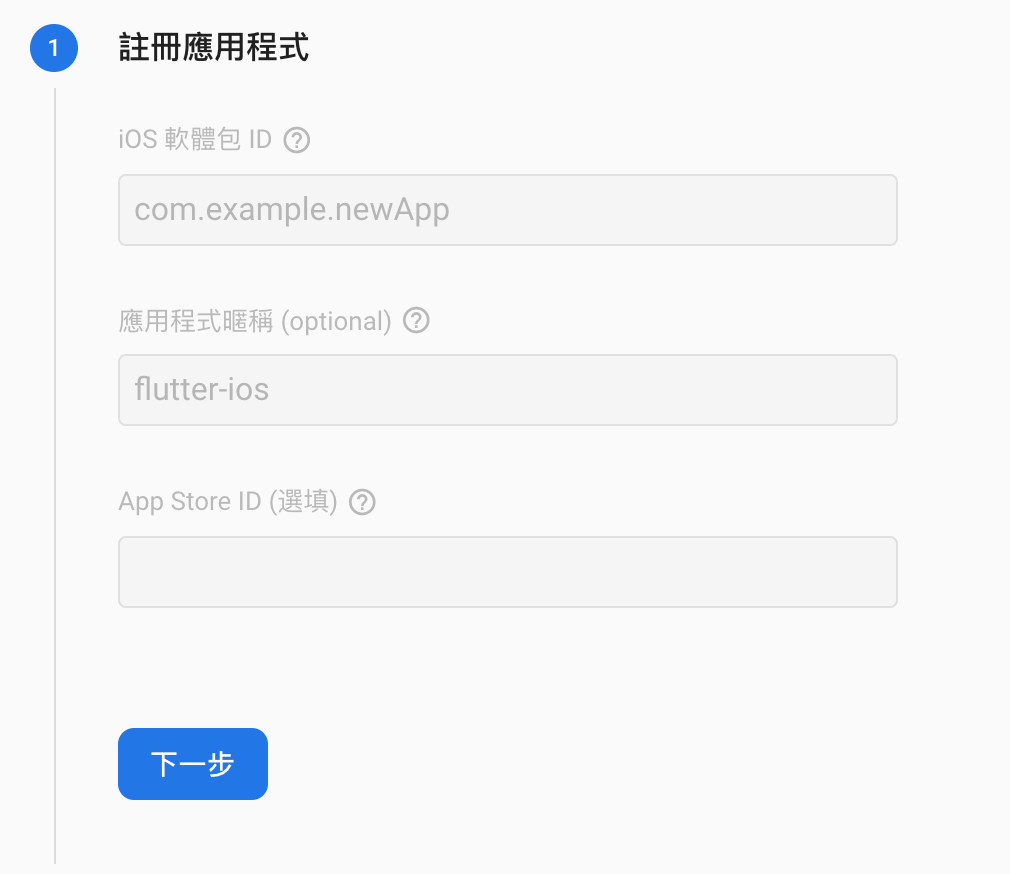
bundle id : xcode 打開 project/ios/Runner.xcworkspace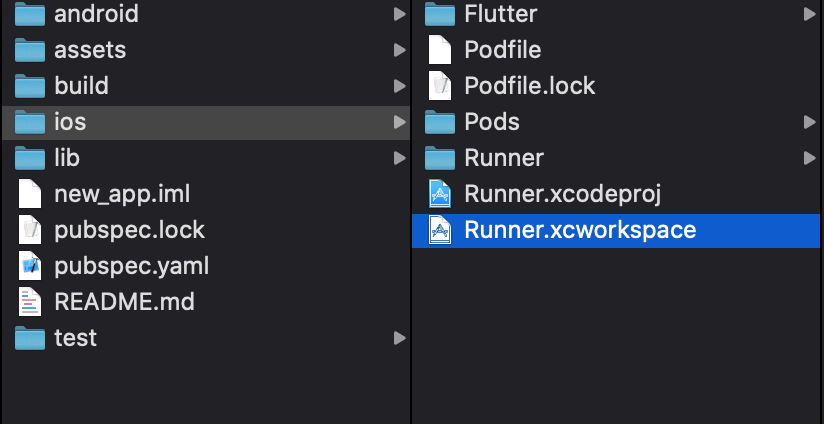
Runner > TARGETS > General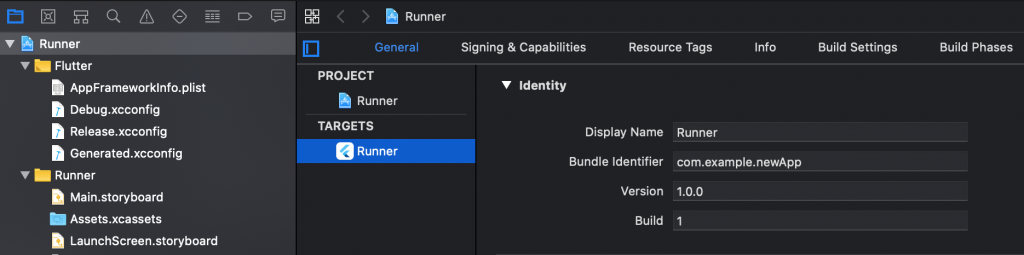
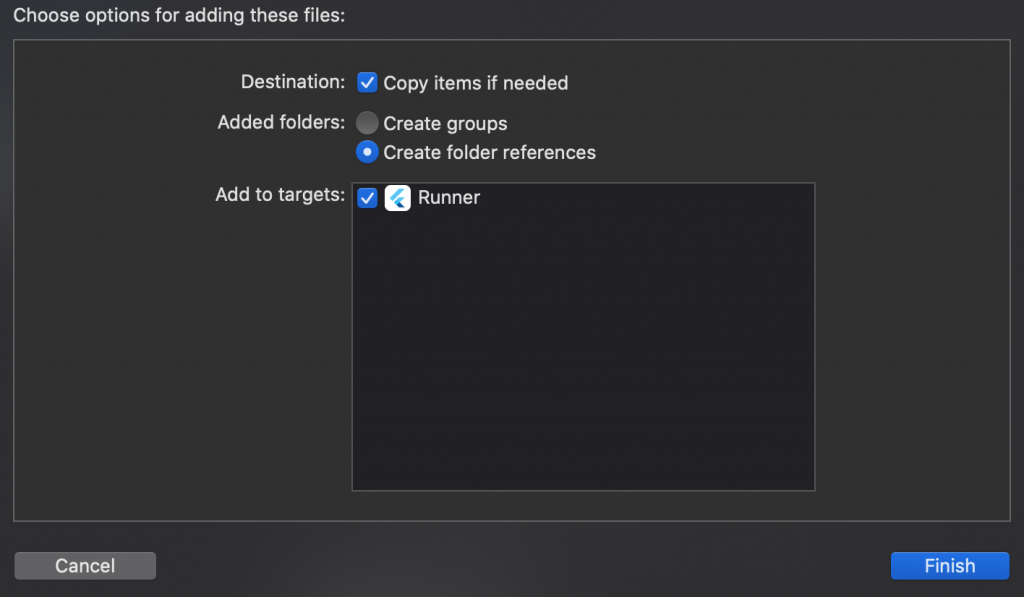
放入 google-info 到 Runner 底下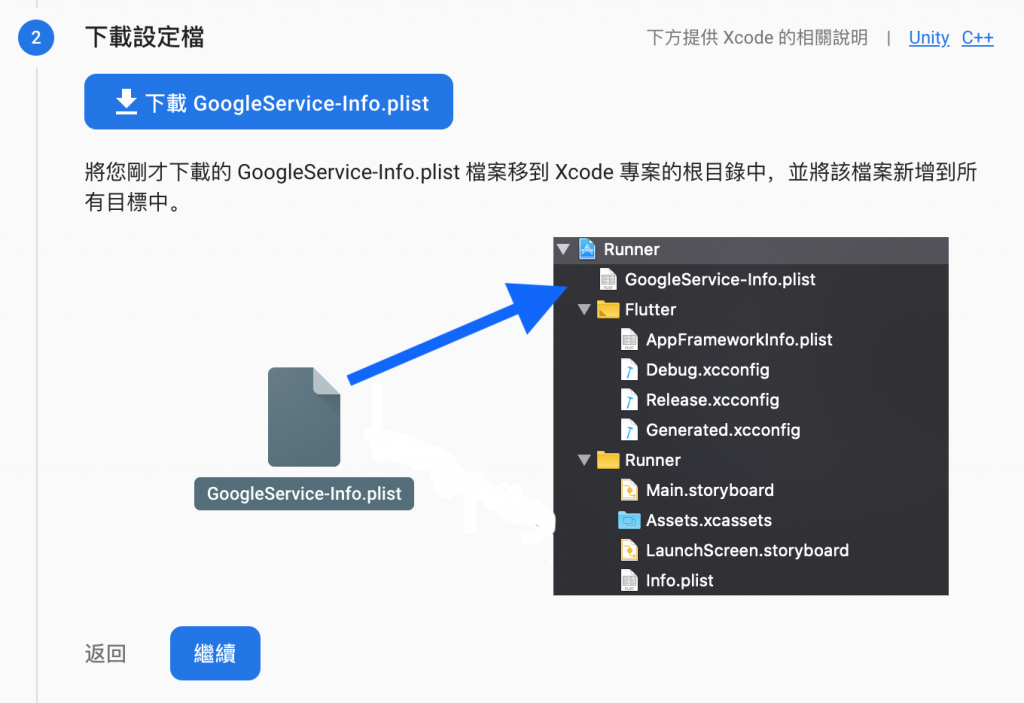
checked copy items if need
增加依賴
// on pubspec.yaml
dependencies:
  firebase_core: ^0.5.0
  firebase_database: ^4.0.0
最好一起增加之前在實作時分開增加就有遇到錯誤,遇到錯誤的話
在需要使用的地方 import
 import 'package:firebase_core/firebase_core.dart';
 import 'package:firebase_database/firebase_database.dart';
init firebase 的兩種方法
在使用 firebase 的功能前都必須先初始化它透過
Firebase.initializeApp() ;
以下的兩種方法可以選擇一種即可
class MyApp extends StatelessWidget {
  // This widget is the root of your application.
  @override
  Widget build(BuildContext context) {
    final Future<FirebaseApp> firebaesFuture = Firebase.initializeApp();
    MaterialApp app =  MaterialApp(
      home: HomePage(),
    );
    return FutureBuilder( //透過 futureBuilder 來執行 firebase init
      future: firebaesFuture ,
      builder: (context ,firebase){return app;},
    );
  }
}
class _LoginPageState extends State<LoginPage>{
  @override
  void initState() { //覆寫 initState
    super.initState();
    Firebase.initializeApp();
  }
  .
  .
  .
程式執行後如果沒有錯誤訊息應該就完成部署囉!!
已經完成部署的可以前往下一篇囉~


 iThome鐵人賽