昨天對模型的連結架構,也就是 urdf.xacro 裡面做了一點簡單的說明,不知道有沒有幫助到各位,今天我們也將帶來他的孿生兄弟 urdf_gazebo.xacro 啦!他們之間的不同點在於,前者著重於機器人之間部件的連結還有座標配合,還沒有對於各項位置的功能有所描寫,而後著正好是補足了其功能描寫,這項敘述是在 gazebo 當中所給予的,所以也就有兩個看起來很相似,內容卻不太相同的 xacro 檔啦!相較於昨天一長串的內容來說,這次的簡單許多,因為內容就是不斷的重複配置。那我們就來看看吧!
今天我們要來看看把 urdf 轉成 xacro 後,接著導入 gazebo 的樣子。整個程式碼還有參數的設定就不會像昨天一樣複雜了,還能夠對物體的顏色去改動,方便在 gazebo 中觀察。
這次一樣用 waffle 機器人的檔案來做介紹!
<?xml version="1.0"?>
<robot name="turtlebot3_waffle_sim" xmlns:xacro="http://ros.org/wiki/xacro">
  <xacro:arg name="laser_visual"  default="false"/>
  <xacro:arg name="camera_visual" default="false"/>
  <xacro:arg name="imu_visual"    default="false"/>

  <gazebo reference="base_link">
    <material>Gazebo/DarkGrey</material>
  </gazebo>

  <gazebo reference="wheel_left_link">
    <mu1>0.1</mu1>
    <mu2>0.1</mu2>
    <kp>500000.0</kp>
    <kd>10.0</kd>
    <minDepth>0.001</minDepth>
    <maxVel>0.1</maxVel>
    <fdir1>1 0 0</fdir1>
    <material>Gazebo/FlatBlack</material>
  </gazebo>

  <gazebo reference="wheel_right_link">
    <mu1>0.1</mu1>
    <mu2>0.1</mu2>
    <kp>500000.0</kp>
    <kd>10.0</kd>
    <minDepth>0.001</minDepth>
    <maxVel>0.1</maxVel>
    <fdir1>1 0 0</fdir1>
    <material>Gazebo/FlatBlack</material>
  </gazebo>

  <gazebo reference="caster_back_right_link">
    <mu1>0.1</mu1>
    <mu2>0.1</mu2>
    <kp>1000000.0</kp>
    <kd>100.0</kd>
    <minDepth>0.001</minDepth>
    <maxVel>1.0</maxVel>
    <material>Gazebo/FlatBlack</material>
  </gazebo>

  <gazebo reference="caster_back_left_link">
    <mu1>0.1</mu1>
    <mu2>0.1</mu2>
    <kp>1000000.0</kp>
    <kd>100.0</kd>
    <minDepth>0.001</minDepth>
    <maxVel>1.0</maxVel>
    <material>Gazebo/FlatBlack</material>
  </gazebo>

  <gazebo reference="imu_link">
    <sensor type="imu" name="imu">
      <always_on>true</always_on>
      <visualize>$(arg imu_visual)</visualize>
    </sensor>
    <material>Gazebo/Grey</material>
  </gazebo>

  <gazebo>
    <plugin name="turtlebot3_waffle_controller" filename="libgazebo_ros_diff_drive.so">
      <commandTopic>cmd_vel</commandTopic>
      <odometryTopic>odom</odometryTopic>
      <odometryFrame>odom</odometryFrame>
      <odometrySource>world</odometrySource>
      <publishOdomTF>true</publishOdomTF>
      <robotBaseFrame>base_footprint</robotBaseFrame>
      <publishWheelTF>false</publishWheelTF>
      <publishTf>true</publishTf>
      <publishWheelJointState>true</publishWheelJointState>
      <legacyMode>false</legacyMode>
      <updateRate>30</updateRate>
      <leftJoint>wheel_left_joint</leftJoint>
      <rightJoint>wheel_right_joint</rightJoint>
      <wheelSeparation>0.287</wheelSeparation>
      <wheelDiameter>0.066</wheelDiameter>
      <wheelAcceleration>1</wheelAcceleration>
      <wheelTorque>10</wheelTorque>
      <rosDebugLevel>na</rosDebugLevel>
    </plugin>
  </gazebo>

  <gazebo>
    <plugin name="imu_plugin" filename="libgazebo_ros_imu.so">
      <alwaysOn>true</alwaysOn>
      <bodyName>imu_link</bodyName>
      <frameName>imu_link</frameName>
      <topicName>imu</topicName>
      <serviceName>imu_service</serviceName>
      <gaussianNoise>0.0</gaussianNoise>
      <updateRate>200</updateRate>
      <imu>
        <noise>
          <type>gaussian</type>
          <rate>
            <mean>0.0</mean>
            <stddev>2e-4</stddev>
            <bias_mean>0.0000075</bias_mean>
            <bias_stddev>0.0000008</bias_stddev>
          </rate>
          <accel>
            <mean>0.0</mean>
            <stddev>1.7e-2</stddev>
            <bias_mean>0.1</bias_mean>
            <bias_stddev>0.001</bias_stddev>
          </accel>
        </noise>
      </imu>
    </plugin>
  </gazebo>

  <gazebo reference="base_scan">
    <material>Gazebo/FlatBlack</material>
    <sensor type="ray" name="lds_lfcd_sensor">
      <pose>0 0 0 0 0 0</pose>
      <visualize>$(arg laser_visual)</visualize>
      <update_rate>5</update_rate>
      <ray>
        <scan>
          <horizontal>
            <samples>360</samples>
            <resolution>1</resolution>
            <min_angle>0.0</min_angle>
            <max_angle>6.28319</max_angle>
          </horizontal>
        </scan>
        <range>
          <min>0.120</min>
          <max>3.5</max>
          <resolution>0.015</resolution>
        </range>
        <noise>
          <type>gaussian</type>
          <mean>0.0</mean>
          <stddev>0.01</stddev>
        </noise>
      </ray>
      <plugin name="gazebo_ros_lds_lfcd_controller" filename="libgazebo_ros_laser.so">
        <topicName>scan</topicName>
        <frameName>base_scan</frameName>
      </plugin>
    </sensor>
  </gazebo>

  <gazebo reference="camera_rgb_frame">
    <sensor type="depth" name="realsense_R200">
      <always_on>true</always_on>
      <visualize>$(arg camera_visual)</visualize>
      <camera>
          <horizontal_fov>1.3439</horizontal_fov>
          <image>
              <width>1920</width>
              <height>1080</height>
              <format>R8G8B8</format>
          </image>
          <depth_camera></depth_camera>
          <clip>
              <near>0.03</near>
              <far>100</far>
          </clip>
      </camera>
      <plugin name="camera_controller" filename="libgazebo_ros_openni_kinect.so">
        <baseline>0.2</baseline>
        <alwaysOn>true</alwaysOn>
        <updateRate>30.0</updateRate>
        <cameraName>camera</cameraName>
        <frameName>camera_rgb_optical_frame</frameName>
        <imageTopicName>rgb/image_raw</imageTopicName>
        <depthImageTopicName>depth/image_raw</depthImageTopicName>
        <pointCloudTopicName>depth/points</pointCloudTopicName>
        <cameraInfoTopicName>rgb/camera_info</cameraInfoTopicName>
        <depthImageCameraInfoTopicName>depth/camera_info</depthImageCameraInfoTopicName>
        <pointCloudCutoff>0.4</pointCloudCutoff>
            <hackBaseline>0.07</hackBaseline>
            <distortionK1>0.0</distortionK1>
            <distortionK2>0.0</distortionK2>
            <distortionK3>0.0</distortionK3>
            <distortionT1>0.0</distortionT1>
            <distortionT2>0.0</distortionT2>
        <CxPrime>0.0</CxPrime>
        <Cx>0.0</Cx>
        <Cy>0.0</Cy>
        <focalLength>0</focalLength>
        <hackBaseline>0</hackBaseline>
      </plugin>
    </sensor>
  </gazebo>

</robot>
那我們一個個介紹他的作用吧!
  <xacro:arg name="laser_visual"  default="false"/>
  <xacro:arg name="camera_visual" default="false"/>
  <xacro:arg name="imu_visual"    default="false"/>
這裡很簡單就是先將雷射相機還有圖片的功能先關閉。
  <gazebo reference="base_link">
    <material>Gazebo/DarkGrey</material>
  </gazebo>
還記得昨天的 link 嗎? 這邊我們就是在 gazebo 的標籤內先指定我們要的組件,這裡就是宣告 base_link ,然後用<material> 去做色彩的配置,這裡指定了 DarkGrey ,我們等等把整個部件都改配色來讓各位看看效果。
將所有部件顏色改紅的成果 <material>Gazebo/Red</material>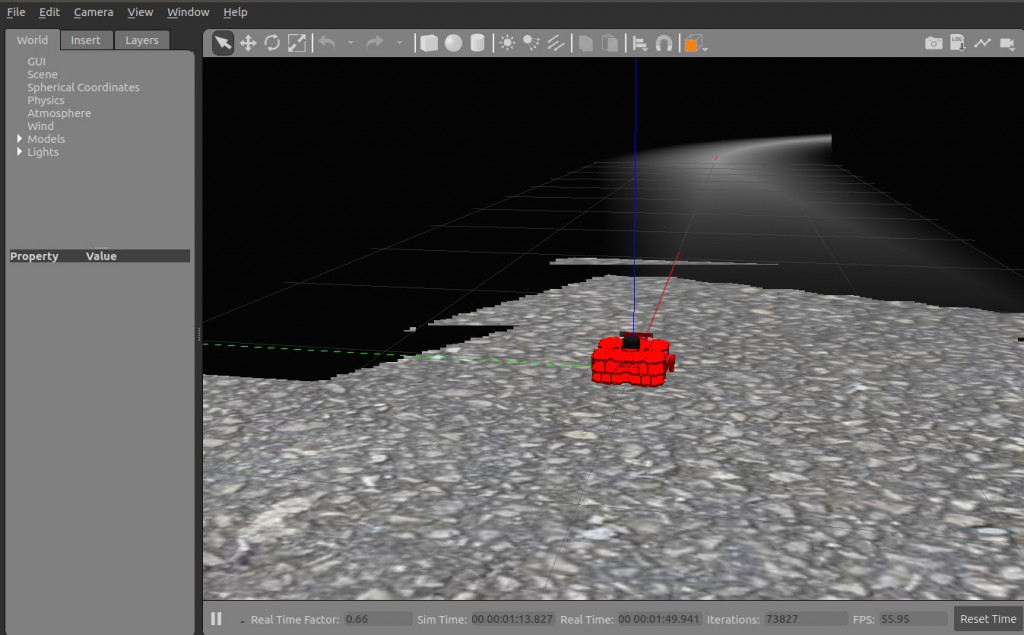
<gazebo reference="wheel_left_link">
    <mu1>0.1</mu1>
    <mu2>0.1</mu2>
    <kp>500000.0</kp>
    <kd>10.0</kd>
    <minDepth>0.001</minDepth>
    <maxVel>0.1</maxVel>
    <fdir1>1 0 0</fdir1>
    <material>Gazebo/FlatBlack</material>
</gazebo>
接著看到針對左輪構造的宣告,
其中的標籤<mu1>、<mu2>:為摩擦係數的參數設定<kp>:對於剛性的參數設置<kd>:對於阻尼的參數設置
這裡有一些筆者沒辦法很好的用中文來表達的,就放上原文來給各位做個參考
<fdir1>:3-tuple specifying direction of mu1 in the collision local reference frame.<minDepth>:minimum allowable depth before contact correction impulse is applied
接著其他構件就是以此類推,有要動作的添加摩擦係數或者剛性等等參數,沒有的就簡單設個顏色區隔,相信很好理解。
在介紹完輪子這些運動物件的配置後,我們來看到插件plugin。他的概念其實很簡單,在我們對於硬體設備,也就是模型本身的連結。架構完成之後現在就是要為他們添加功能,那可能會有人有疑問:那我不就隨便做個圓球狀的模型,然後全部就塞到上面就好了?沒錯,理論上來說是可以這樣,但別忘了 gazebo 是給予我們一個與真實世界相似的模擬空間,所以如果都使用球來模擬,那就失去模擬的意義了。
<robot>
  ... robot description ...
  <link name="sensor_link">
    ... link description ...
  </link>

  <gazebo reference="sensor_link">
    <sensor type="camera" name="camera1">
      ... sensor parameters ...
      <plugin name="camera_controller" filename="libgazebo_ros_camera.so">
        ... plugin parameters ..
      </plugin>
    </sensor>
  </gazebo>

</robot>
在上面不難看出,我們在對於模型來做功能敘述時,要注意的就是你所指定的對象,好比上面在 <plugn> 裡的 "camera_controller",是先在 <gazebo reference="sensor_link"> 這個標籤的包裹下,才插入整個內容的,別一不小心發生指定錯誤的 reference 進而造成模擬的困難,而插件後面的 filename="libgazebo_ros_camera.so",也就是專屬的演算法,就要看各位需求去網上找別人已經寫好的或是自己有能力寫,來自由搭配使用。
這裡也介紹筆者所使用的深度插件,也提幾個裡面的參數來說說
<plugin name="camera_controller" filename="libgazebo_ros_openni_kinect.so">
        <baseline>0.2</baseline>
        <alwaysOn>true</alwaysOn>
        <updateRate>30.0</updateRate>
        <cameraName>camera</cameraName>
        <frameName>camera_rgb_optical_frame</frameName>
        <imageTopicName>rgb/image_raw</imageTopicName>
        <depthImageTopicName>depth/image_raw</depthImageTopicName>
        <pointCloudTopicName>depth/points</pointCloudTopicName>
        <cameraInfoTopicName>rgb/camera_info</cameraInfoTopicName>
        <depthImageCameraInfoTopicName>depth/camera_info</depthImageCameraInfoTopicName>
        <pointCloudCutoff>0.4</pointCloudCutoff>
            <hackBaseline>0.07</hackBaseline>
            <distortionK1>0.0</distortionK1>
            <distortionK2>0.0</distortionK2>
            <distortionK3>0.0</distortionK3>
            <distortionT1>0.0</distortionT1>
            <distortionT2>0.0</distortionT2>
        <CxPrime>0.0</CxPrime>
        <Cx>0.0</Cx>
        <Cy>0.0</Cy>
        <focalLength>0</focalLength>
        <hackBaseline>0</hackBaseline>
      </plugin>
<updateRate>30.0</updateRate> ,既然是相機類的插件,那不可或缺的就是 fps 值啦,這項標籤就是代表我們每秒畫面的更新次數, 所以如果電腦硬體許可的話,想讓畫面更流暢的就可以從這裡動手
<......TopicName>,這裡要注意一下Topic的取名,因為之後使用Rviz顯示圖片,也是藉由選擇TOPIC來呈現
<pointCloudCutoff>0.4</pointCloudCutoff>,因為筆者的這項插件還帶有點雲功能,所以裡面除了圖片名稱,還可以看到點雲參數的配置,但主要的運算還是靠本身的演算法libgazebo_ros_openni_kinect.so來做處理
經過這兩天的文章後,希望各位對一個虛擬機器人的構成有更進一步的了解。雖然描述檔本身很冗長,但是如果要成為一個好的開發者,能利用修改描述檔來客製化機器人是非常重要的。明天開始我們將會介紹一些實際操控 Gazebo 內部機器人的語法,就請大家敬請期待啦。


 iThome鐵人賽