可以先把下面的範例載下來,並執行app.py:
https://github.com/wilsonsujames/flask_tutorial/tree/main/Flask_with_form
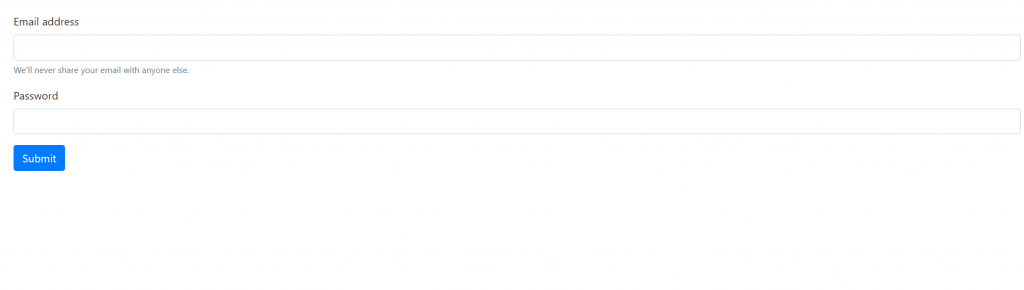
可以在index.html的區塊看見form這個區塊含有兩個input:
<form action="{{ url_for('login_process_fun') }}" method="POST">
  <div class="form-group">
  <label for="exampleInputEmail1">Email address</label>
  <input type="email" class="form-control" id="exampleInputEmail1" name='inputEmail' aria-describedby="emailHelp">
<small id="emailHelp" class="form-text text-muted">We'll never share your email with anyone else.</small>
        </div>
<div class="form-group">
  <label for="exampleInputPassword1">Password</label>
  <input type="password" class="form-control" id="exampleInputPassword1" name='inputpass'>
</div>
<button type="submit" class="btn btn-primary">Submit</button>
  </form>
可以看見有form上面有action是對應了按了型態為submit的按鈕之後,尋找login_process_fun這個function的名稱。
在app.py中,我們也可以看見login_process_fun這個function對應了哪一個路由:
@app.route('/login_process',methods=[ "GET",'POST'])
def login_process_fun():
在使用form時,input我們會加上name的屬性以方便後端的login_process_fun這個function可以獲取input的值:
email=request.form.get('inputEmail')
psword=request.form.get('inputpass')
print(request.form)
我們也可以將字典形式的form印出來,並且分別獲取名子為inputEmail及inputpass以便做後續處理或是呈現在網頁上。
在login_process_fun最後回傳了loginSuccess.html這個頁面,並且帶著email及psword呈現在網頁上。
return render_template('loginSuccess.html',email=email,psword=psword)
一個禮拜了,不知道大家的股票怎麼樣,反正我的聯電是爆開了。
有的時候因為有著執著所以死撐著不放手,但是自己的目標初衷如果是為了跟別人拚槍對決的零和遊戲,應該要玩的靈巧一點,該退就退。如果觀點是著眼未來,我想當別人恐懼的時候,就是我貪婪的時候。
 wilsonsujames

 iThome鐵人賽