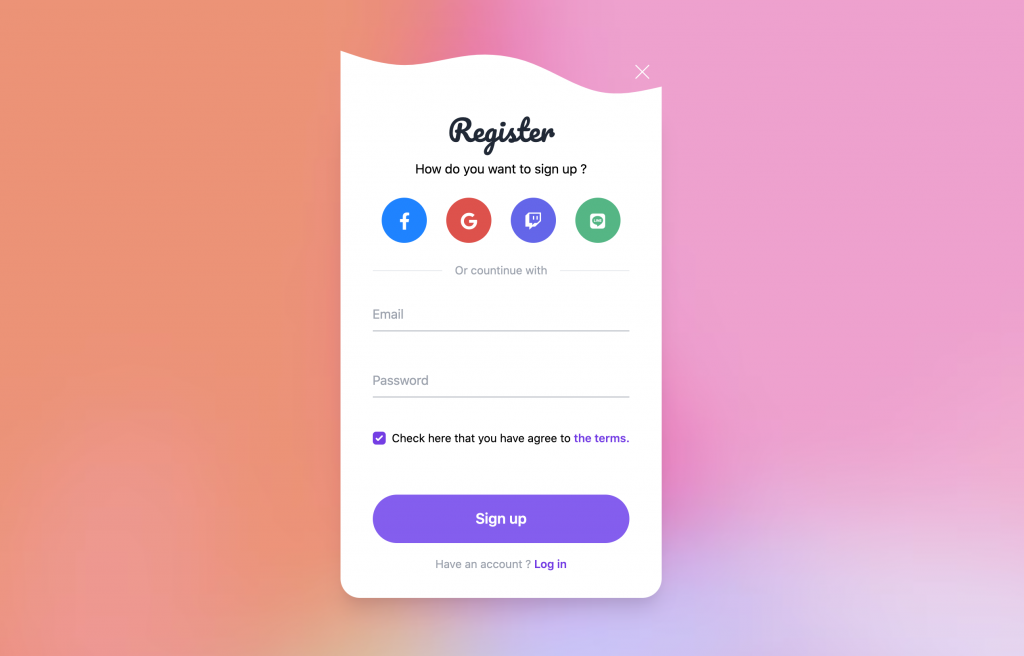
昨天介紹完了 Forms Plugin,今天威爾豬來實作每個專案幾乎都會有的註冊表單,也會使用先前所介紹過的內容。先將 Tailwind 的 Forms Plugin 載入,這邊威爾豬也會 @import Google Font 和 Fontawesome 5 的 CDN,前置作業準備好,我們就可以開始了。
首先我們使用 flex 將表單放入中間的位置,然後先設一個淡紫色的背景,再來設定我們表單的寬度,表單背景為白色,並加上圓角和陰影。範例如下:
<div class="relative min-h-screen bg-purple-100 backdrop-blur flex justify-center items-center">
  <div class="p-8 flex-1 absolute">
    <div class="max-w-[420px] min-w-[320px] bg-white rounded-3xl mx-auto">
      <div class="px-10 pt-4 pb-8 rounded-3xl shadow-xl">
      </div>
    </div>
  </div>
</div>
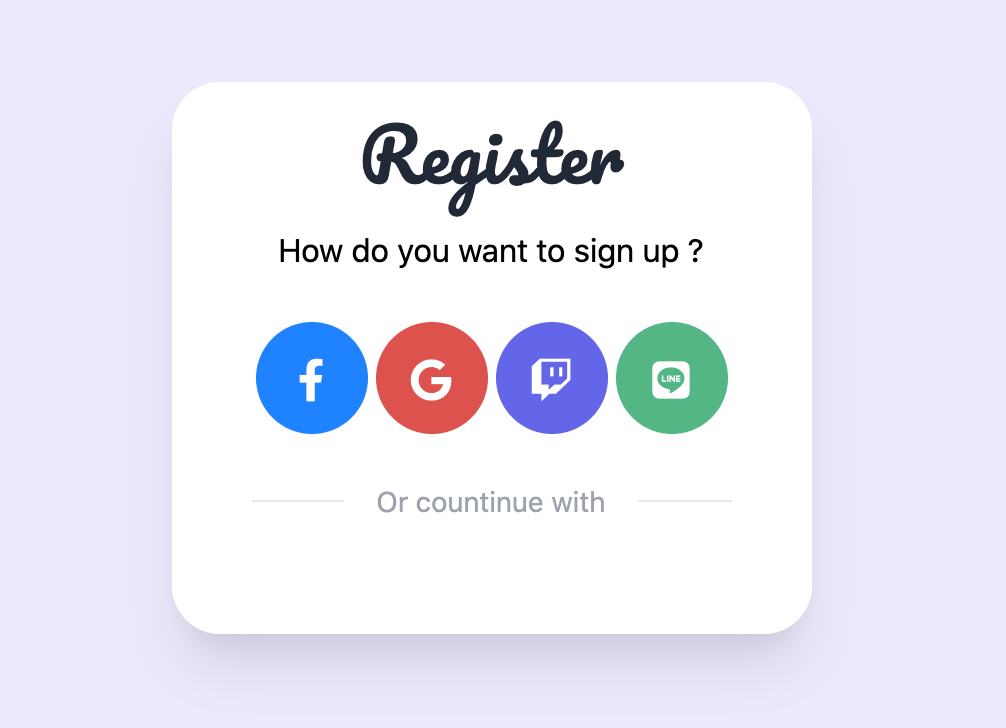
我們將 h1 在 CSS 使用 Google Font 的字型,並添加一小段文字訊息,並讓文字置中。
h1{
    font-family: 'Pacifico', cursive;
}
<div class="px-10 pt-4 pb-8 rounded-3xl shadow-xl">
  <div class="mx-auto text-center">
    <h1 class="text-4xl text-gray-800">Register</h1>
    <p class="mt-4">How do you want to sign up ?</p>
  </div>
</div>

因為威爾豬希望使用者註冊可以善用社群媒體,這樣不用多記一組帳號和密碼,所以註冊表上方會放綁定社群媒體帳號的連結,並給予相對應的企業色。這邊社群 icon 是使用 Fontawesome 建立。
<div class="flex items-center justify-around mt-6">
  <div class="w-14 h-14 text-center rounded-full bg-blue-500 text-white saturate-200 transition-all hover:bg-blue-600">
    <a href="#" class="block leading-[60px]">
      <i class="fab fa-facebook-f fa-lg "></i>
    </a>
  </div>
  <div class="w-14 h-14 text-center rounded-full bg-red-500 text-white saturate-100 transition-all hover:bg-red-600">
    <a href="#" class="block leading-[60px] hover:">
      <i class="fab fa-google fa-lg"></i>
    </a>
  </div>
  <div class="w-14 h-14 text-center rounded-full bg-indigo-500 text-white saturate-100 transition-all hover:bg-indigo-600">
    <a href="#" class="block leading-[60px] hover:">
      <i class="fab fa-twitch fa-lg"></i>
    </a>
  </div>
  <div class="w-14 h-14 text-center rounded-full bg-green-500 text-white saturate-100 transition-all hover:bg-green-600">
    <a href="#" class="block leading-[60px] hover:">
      <i class="fab fa-line fa-lg"></i>
    </a>
  </div>
</div>

因為還是有部分人不想要和社群帳號綁在一起,所以我們必須加入分隔線區隔出來,並設定點樣式。
<div class="flex items-center my-6">
  <hr class="flex-1">
  <span class="px-4 text-sm text-gray-400">Or countinue with</span>
  <hr class="flex-1">
</div>
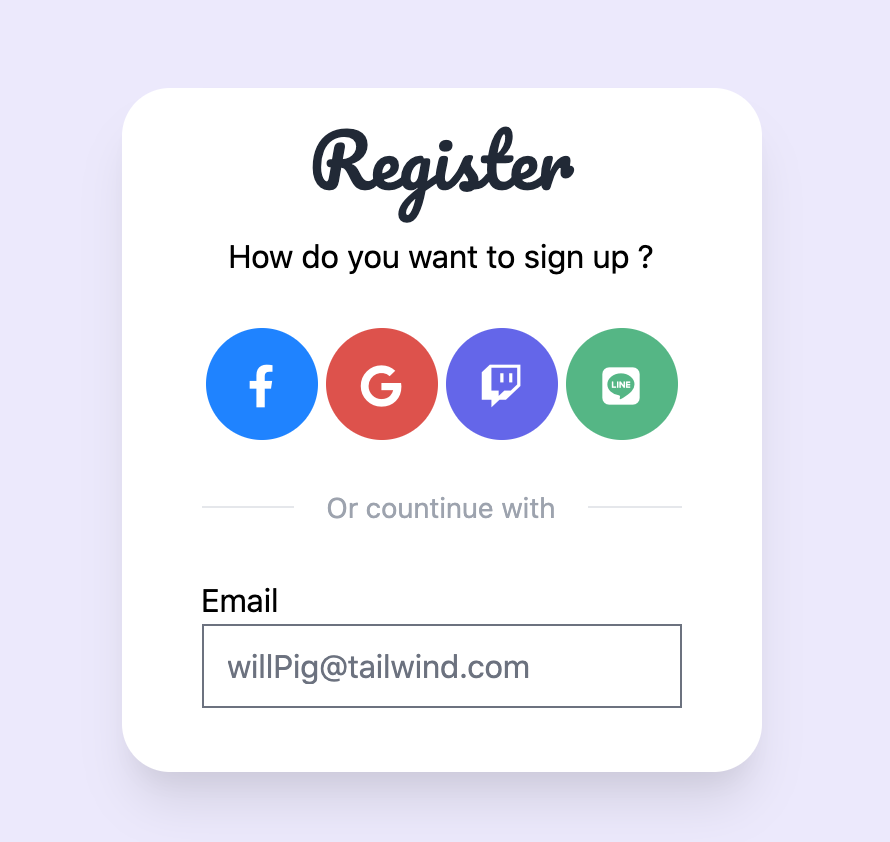
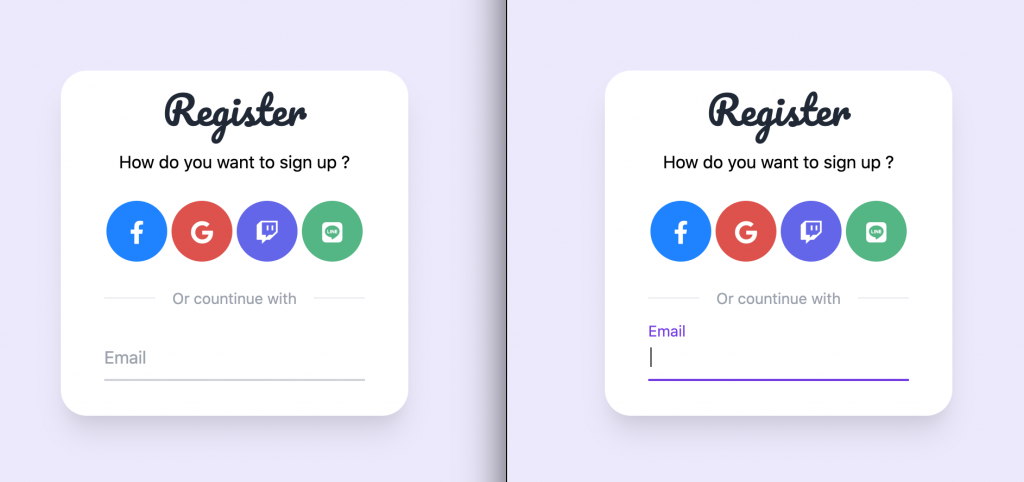
終於進入今天的重頭戲,一般註冊會使用 Email 註冊,威爾豬先使用暴力預設樣式。
<form action="" method="POST">
  <div class="relative">
    <label for="email" class="">Email</label>
    <input id="email" name="email" type="text" class="w-full" placeholder="willPig@tailwind.com">
  </div>
</form>
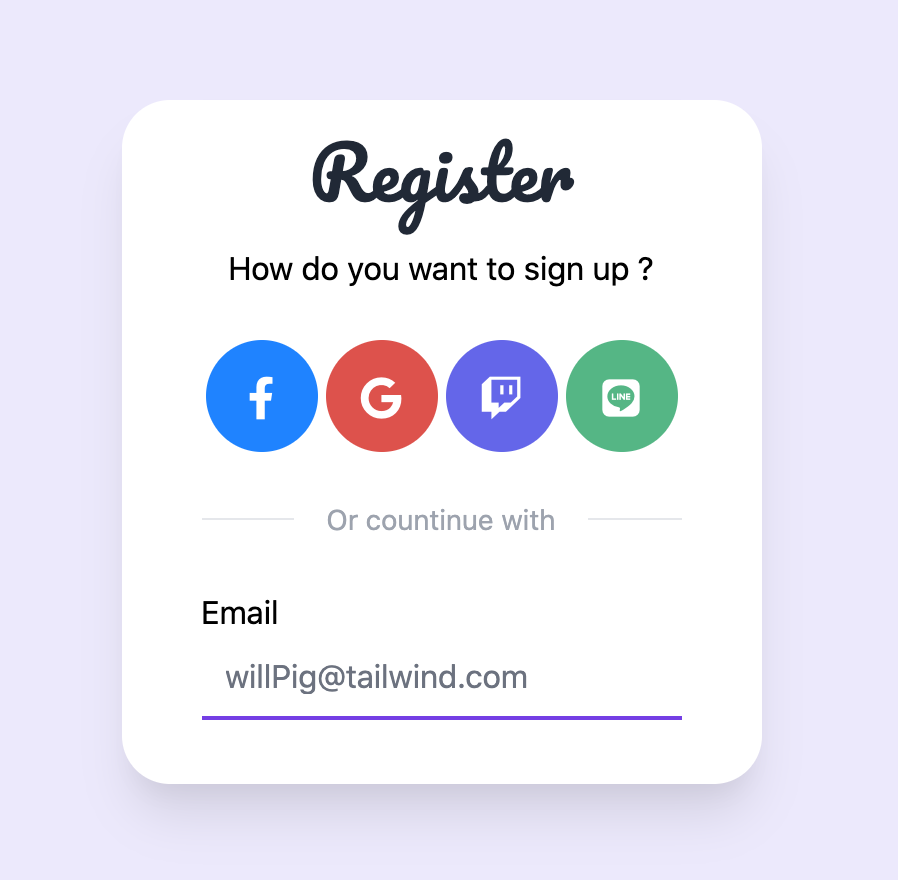
但這不是我們要的,威爾豬想要使用只有一條底線的樣式,而且 Focus 後線段會呈現紫色。所以我們必須清除並重新打造線段樣式。
<form action="" method="POST">
  <div class="relative">
    <label for="email" class="">Email</label>
    <input id="email" name="email" type="text" class="w-full border-0 border-b-2 border-gray-300 focus:ring-0 focus:border-purple-600"" placeholder="willPig@tailwind.com">
  </div>
</form>
我們已經成功一半了,但威爾豬想要使用者 Focus 後,Placeholder 可以往上跑並縮小文字,像登入 Google 登入一樣。
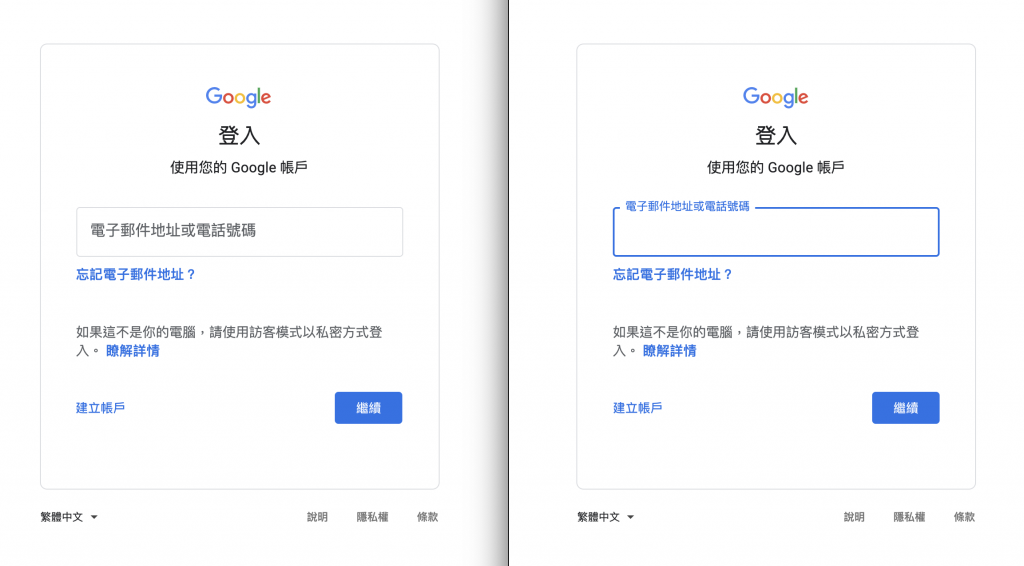
這邊我們要使用一個叫 peer-placeholder-shown,它是 CSS 偽類的一種,這可以用來實現浮動的 Label 文字。一般來說 Label 會放在 Input 上面或是包住 Input,為了實現浮動,我們必須將它放在 Input 元素下面,並將 Input 的 Placeholder 透明化,使用 Position 來定位 Label 元素並將它建置在原本 Placeholder 的位置上,Focus 後就讓 Label 元素往上跑並縮小文字,當輸入框內有文字內容時,Label 元素就一直保持在輸入框的上方。
<form action="" method="POST">
  <div class="relative">
    <input id="email" name="email" type="text" class="peer w-full px-0.5 border-0 border-b-2 border-gray-300 placeholder-transparent focus:ring-0 focus:border-purple-600" placeholder="john@doe.com">
    <label for="email" class="absolute left-0 -top-3.5 text-gray-600 text-sm transition-all peer-placeholder-shown:text-base peer-placeholder-shown:text-gray-400 peer-placeholder-shown:top-2 peer-focus:-top-3.5 peer-focus:text-purple-600 peer-focus:text-sm">Email</label>
  </div>
</form>
噹噹~我們成功實現浮動 Label 了。
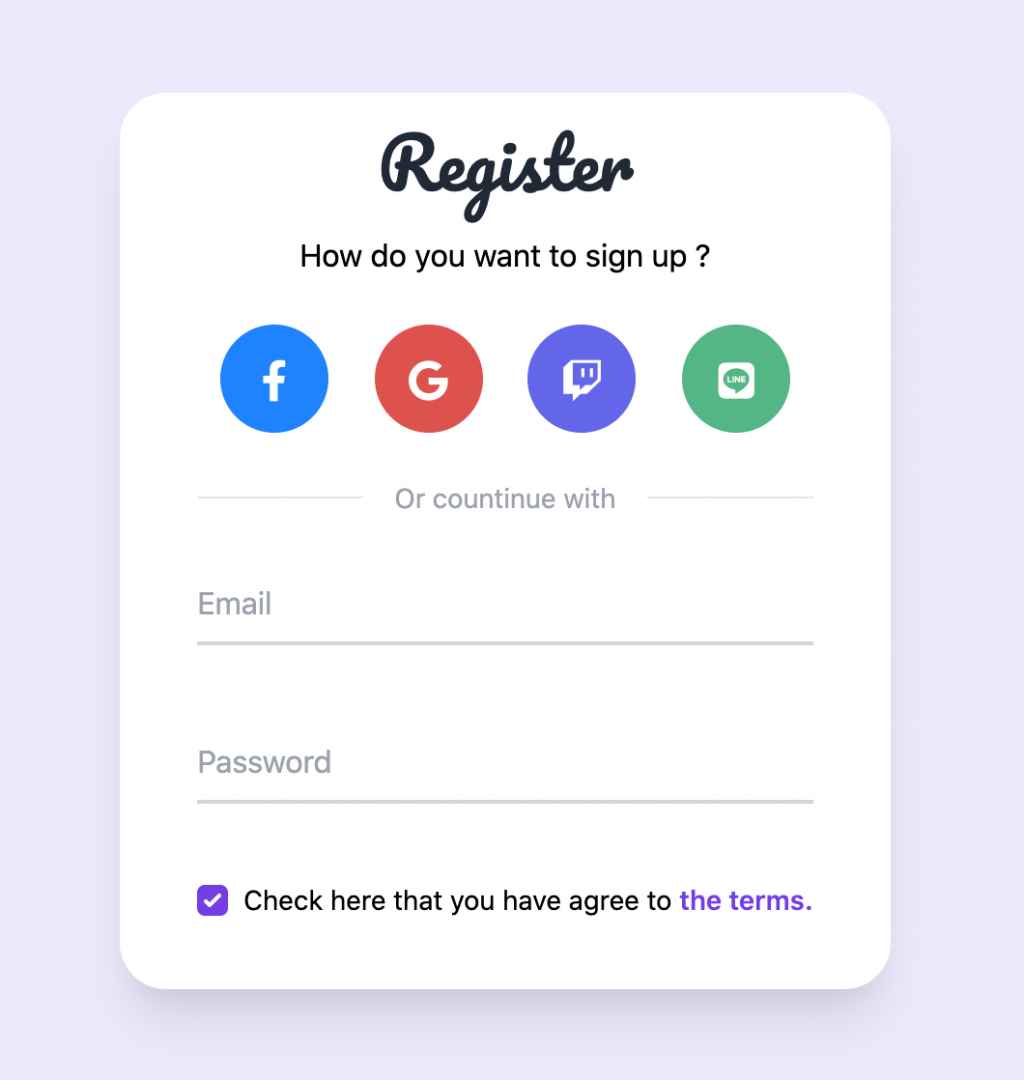
接下來 Password 也是使用一樣的方式,最後加入一個同意隱私項目的 Checkbox,並將預設勾選的藍框樣式改成紫色。
<form action="" method="POST">
  ...
  <div class="mt-10">
    <label class="inline-flex items-center">
      <input type="checkbox" class="rounded border-gray-300 text-purple-600 focus:border-purple-300 focus:ring focus:ring-offset-0 focus:ring-purple-200/50" checked />
      <span class="ml-2 text-sm">Check here that you have agree to <a href="#" class="font-semibold text-purple-600 hover:underline">the terms.</a></span>
    </label>
  </div>
</form>
按鈕威爾豬希望寬度隨著表單大小改變,因為我們並沒有要提交表單,所以使用預設的 type="button" 就可以了,並加上如果已有帳號的使用者可以連結到登入頁面的文字。
<form action="" method="POST">
  ...
  <button type="button" class="w-full mt-14 py-4 text-lg text-white font-semibold text-center rounded-full bg-purple-500 transition-all hover:bg-purple-600">Sign up</button>
  <p class="text-center text-sm text-gray-400 mt-4">Have an account ? <a href="#" class="font-semibold text-purple-600 hover:underline">Log in</a></p>
</form>
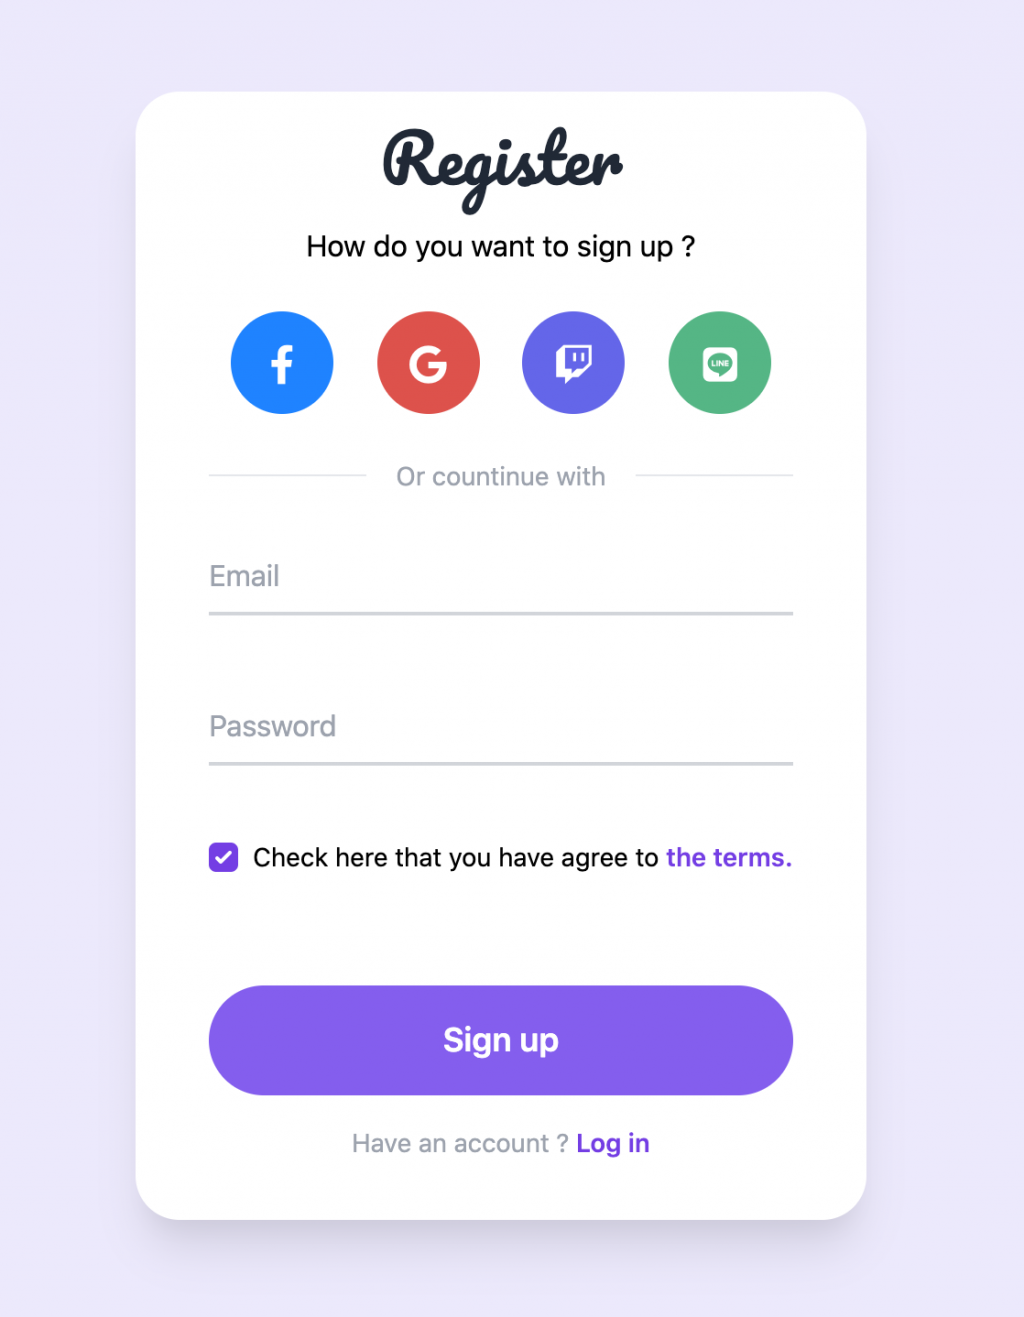
噹噹~終於完成了,這樣我們就有一個漂亮的註冊表單啦。威爾豬這邊再多加一些裝飾,讓我們的表單看起來更不一樣,有興趣的可以到這試玩看看 DEMO。
以上就是今天的實戰內容,我們明天見。


 iThome鐵人賽