Apple 對 Color Picker 的文件
https://developer.apple.com/documentation/swiftui/colorpicker
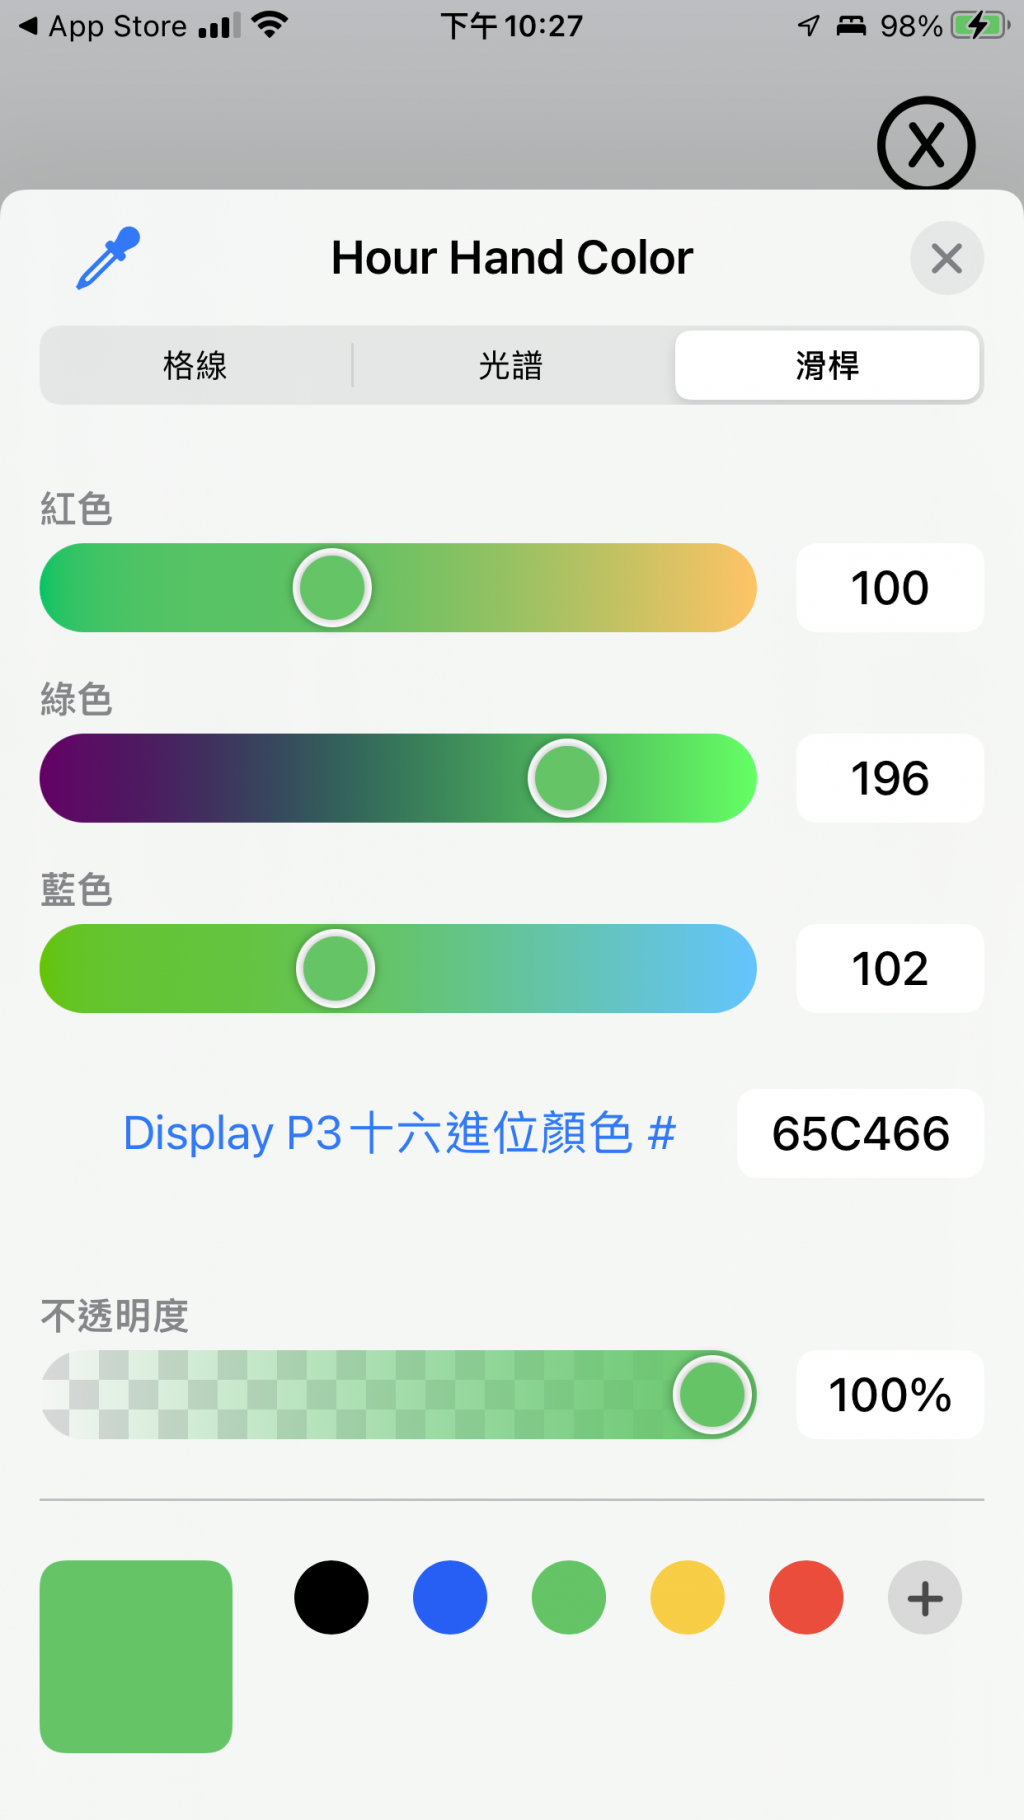
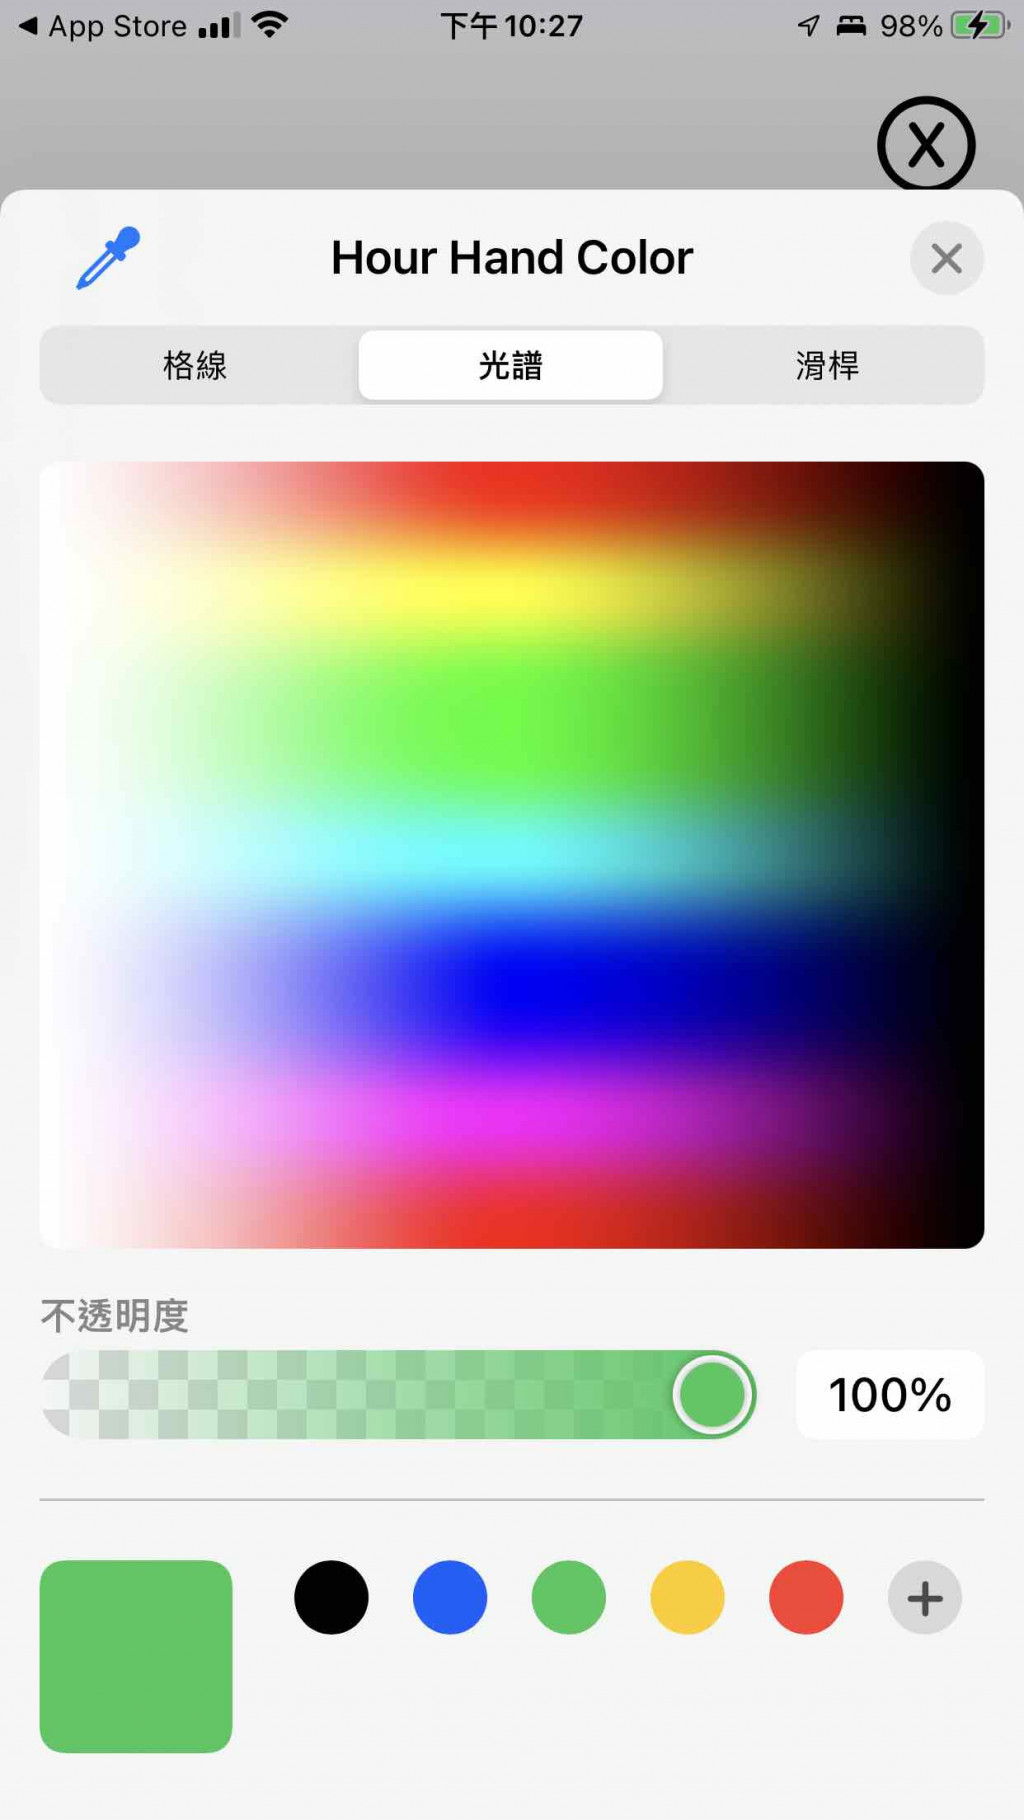
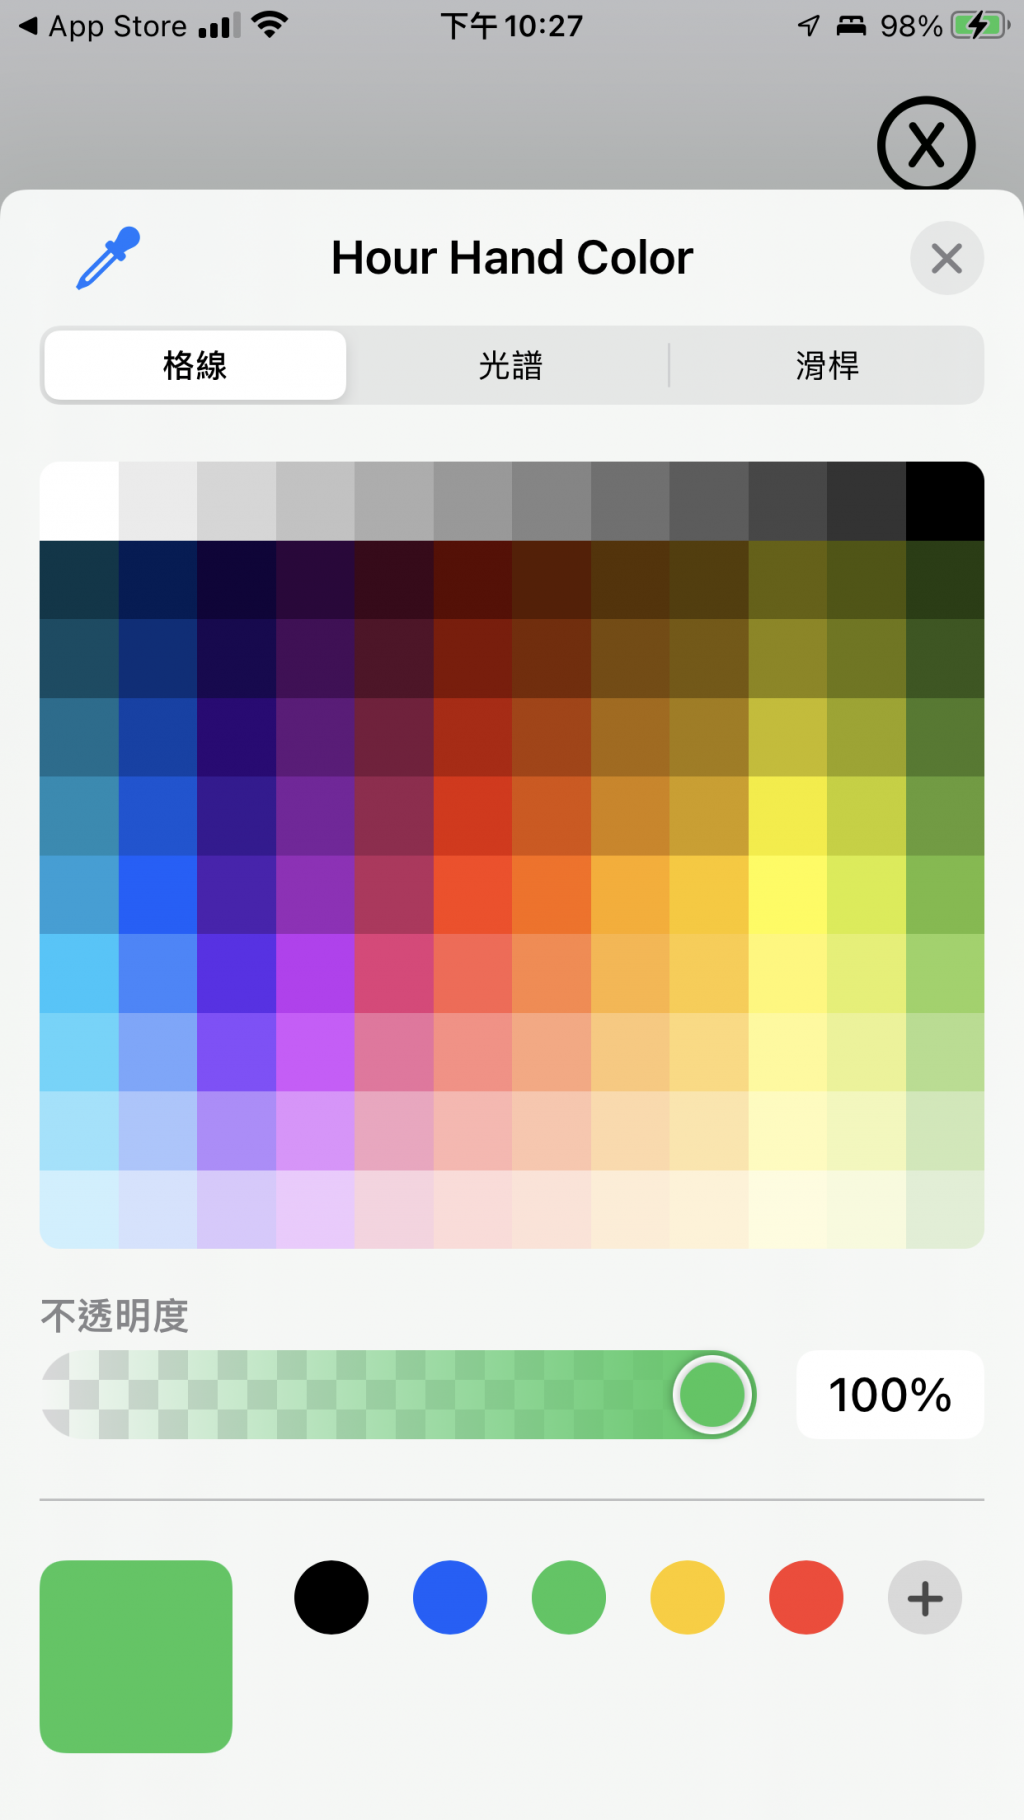
Color Picker 是我很喜歡的一個 SwiftUI 元件,這個元件如果是用 UIKit 手刻,雖然是刻的出來,但非常耗時,如果遇到這樣的需求,以前通常都是找別人寫好的第三方套件。在 SwiftUI,現在直接做好了這個元件,只要 iOS 14+ 的版本,都可以使用。在顏色的選擇上,可以使用 格線/光譜/滑桿 來調,真的是美觀又方便。
我們現在來讓錶盤帶一點顏色
ColorPicker 需要輸入一個 Binding 參數,這邊設計讓外部(也就是錶的那一頁)傳入,然後在裡面更新後,讓外面的錶盤有變化。
struct ColorPickerContainerView: View {

  @Binding var dialColor: Color

  var body: some View {

    ColorPicker("錶盤顏色", selection: $dialColor)
      .padding()
  }
}

struct ColorPickerContainerView_Previews: PreviewProvider {

  @State static var previewDialColor: Color = .white

  static var previews: some View {
    ColorPickerContainerView(dialColor: $previewDialColor)
  }
}
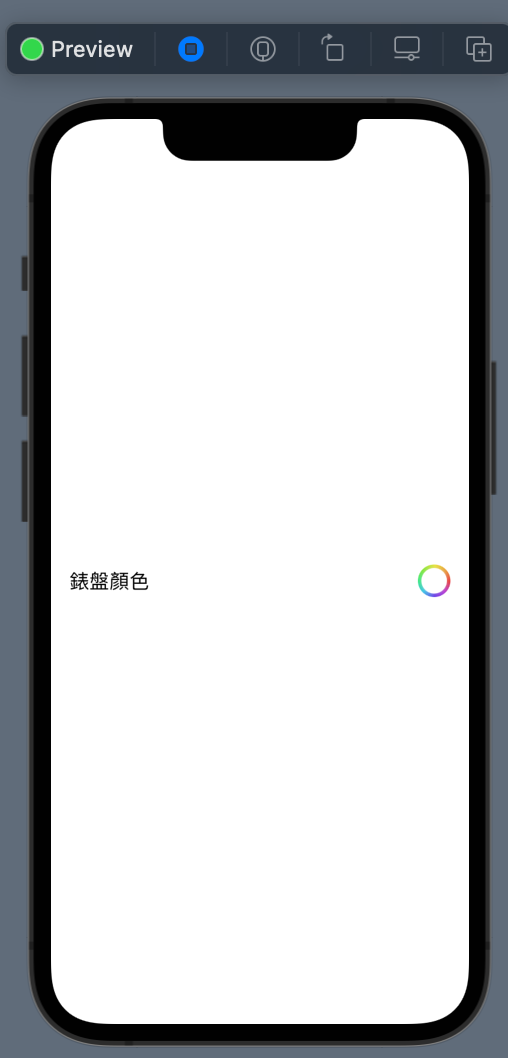
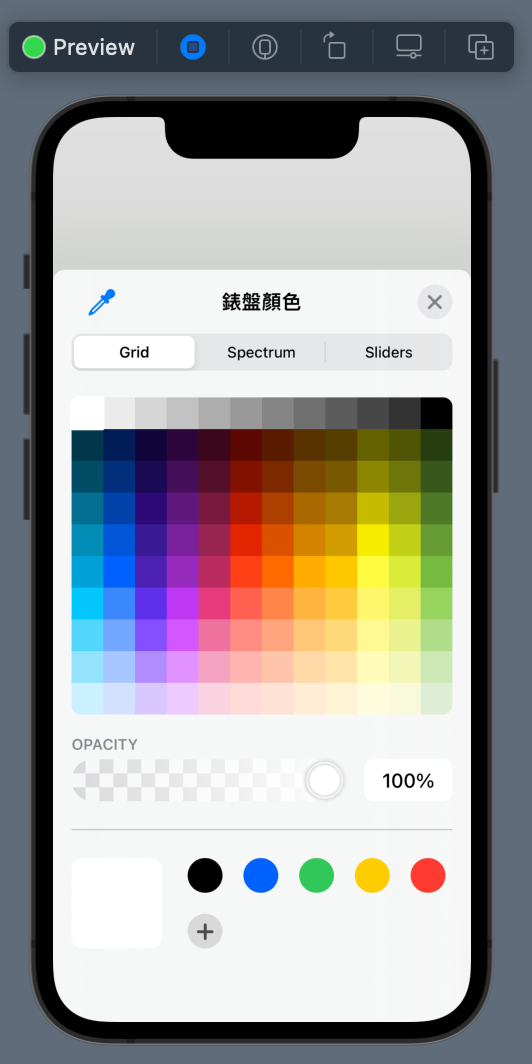
即使是 preview,按下 action 後,也可以把顏色盤叫起來。
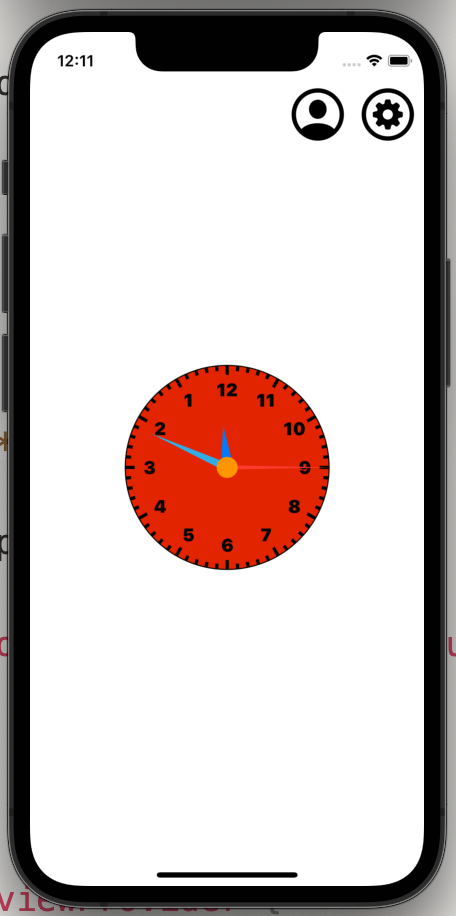
加上一個 dialColor,讓顏色可以被更改。但原來的 Circle().stroke() 下方,要再加一個錶面,這個下方的錶面,是真正變色的地方。
struct ClockDialView: View {

  @Binding var dialColor: Color

  var tickLength: CGFloat = 5

  var body: some View {

    ZStack {
      /// 真的會變色的部分
      Circle()
        .fill(dialColor)
        .padding(3)
      /// 外框
      Circle()
        .stroke()
        .padding(3)

      ticks
        .padding(3)

      HStack {
        Spacer()
        BackwardsClockNumberView()
        Spacer()
      }
    }
  }

  private func isLongTick(_ position: Int) -> Bool {
    return position % 5 == 0
  }

  var ticks: some View {

    ForEach(0..<60) { position in
      let longerTick = tickLength * 1.8

      Tick(tickLength: isLongTick(position) ? longerTick : tickLength )
        .stroke(lineWidth: 3)
        .rotationEffect(.radians(Double.pi * 2 / 60 * Double(position)))
    }
  }
}

struct ClockDialView_Previews: PreviewProvider {

  @State static var dialColor: Color = .green

  static var previews: some View {
    ClockDialView(dialColor: $dialColor, tickLength: 5)
      .frame(width: 200, height: 200, alignment: .center)
  }
}
先新增一個檔案 ColorPickerContainer
在原來的 wiki page button 右邊,再放一個設定 button。
struct ClockContainerView: View {

  var width: CGFloat = 200
  var height: CGFloat = 200

  @StateObject private var clockwork: Clockwork = .init()

  @State private var dialColor: Color = .white

  @State private var isShowingGraceWikiSheet = false

  @State private var isShowingColorPicker = false

  private let graceWikiPageURL = "https://en.wikipedia.org/wiki/Grace_Hopper"

  private let angleUtility: AngleUtility = .init()

  var body: some View {
    ZStack {

      VStack {
        HStack {
          Spacer()
          wikiProfileButton
          settingButton
            .padding(.trailing, 5)
        }
        Spacer()
      }

      Group {
        ClockDialView(dialColor: $dialColor)
        HandShape(handLength: .hour)
          .fill(Color.blue)
          .rotationEffect(Angle(degrees: clockwork.hourAngle))
        HandShape(handLength: .minute)
          .fill(Color.cyan)
          .rotationEffect(Angle(degrees: clockwork.minuteAngle))
        HandShape(handLength: .second)
          .fill(Color.red)
          .rotationEffect(Angle(degrees: clockwork.secondAngle))
        Circle()
          .fill(Color.orange)
          .frame(width: 20, height: 20, alignment: .center)
      }
      .frame(width: width, height: height, alignment: .center)
    }
  }
  /// 將 wiki profile button 抽出
  private var wikiProfileButton: some View {
    Button {

      isShowingGraceWikiSheet.toggle()
    } label: {
      Image(systemName: "person.crop.circle")
        .font(.system(size: 50))
        .foregroundColor(.black)
    }
    .sheet(isPresented: $isShowingGraceWikiSheet) {
      BCWebView(urlString: graceWikiPageURL)
    }
  }
  /// 將設定按鈕抽出
  private var settingButton: some View {

    Button {

      isShowingColorPicker.toggle()
    } label: {
      Image(systemName: "gearshape.circle")
        .font(.system(size: 50))
        .foregroundColor(.black)
    }
    .sheet(isPresented: $isShowingColorPicker) {
      ColorPickerContainerView(dialColor: $dialColor)
    }
  }
}
錶盤變色功能,完成。
如果你想改變針的顏色,也是差不多的事情。
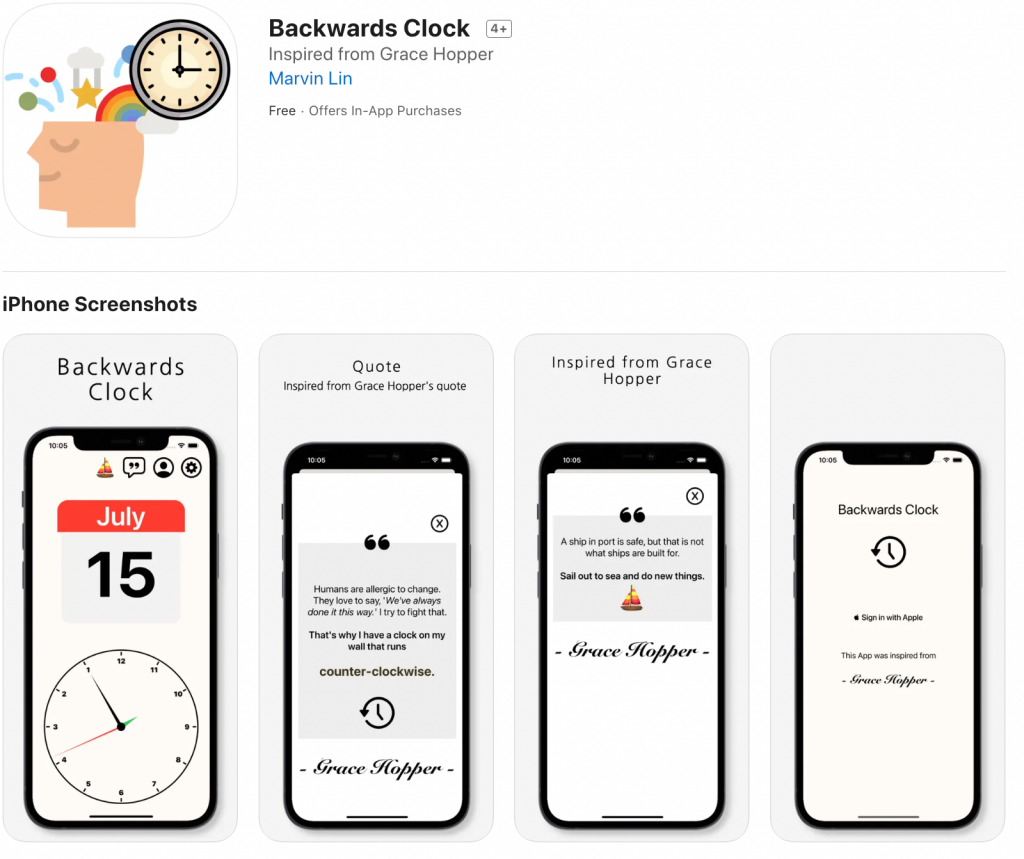
這個時鐘的 app,我後來有寫一個上架的版本,有串接 Firebase 和 RevenueCat。整個大小只有 5.1 MB。 SwiftUI 真的讓我驚豔!
https://apps.apple.com/backwards-clock/id1632935212