前言
Android Studio 提供了許多強大的工具和元件,讓開發者能夠建立出各種豐富多樣的應用程式界面。其中,ViewPager2 與 TabLayout 是一對經典的組合,可以讓你輕鬆實現可滑動分頁介面,提供更好的用戶體驗。
功能
這裡會讓TabLayout和ViewPager2連動起來,當ViewPager滑動或是TabLayout被點選後都可以讓跟著切換想要的畫面
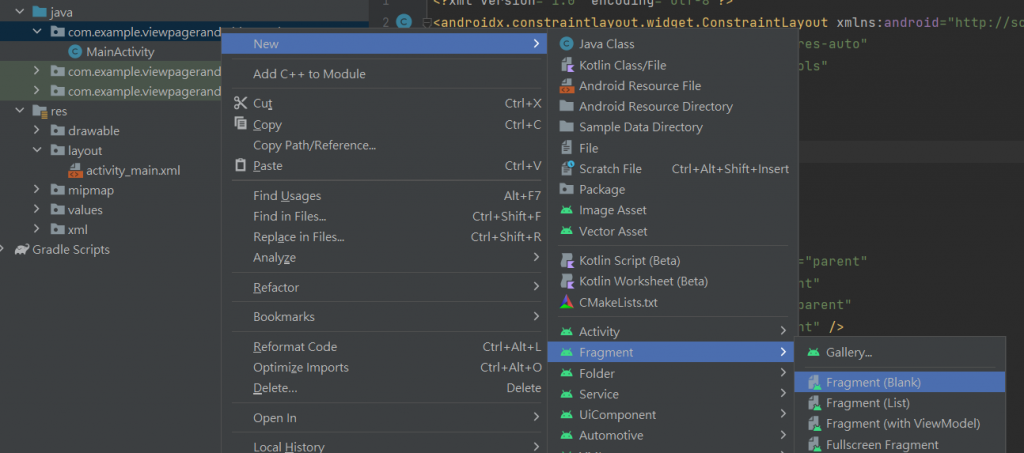
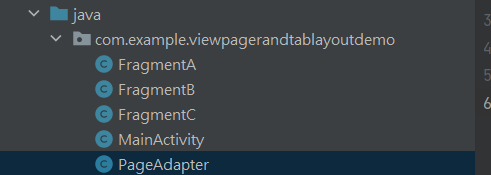
步驟如下


package com.example.viewpagerandtablayoutdemo;

import androidx.annotation.NonNull;
import androidx.fragment.app.Fragment;
import androidx.fragment.app.FragmentManager;
import androidx.lifecycle.Lifecycle;
import androidx.viewpager2.adapter.FragmentStateAdapter;

public class PageAdapter extends FragmentStateAdapter {

    FragmentA fragmentA;
    FragmentB fragmentB;
    FragmentC fragmentC;

    public PageAdapter(@NonNull FragmentManager fragmentManager, @NonNull Lifecycle lifecycle) {
        super(fragmentManager, lifecycle);
    }


    @NonNull
    @Override
    public Fragment createFragment(int position) {
        //position當前ViewPage編號
        switch (position) {
            case 0:
                fragmentA = new FragmentA();
                return fragmentA;
            case 1:
                fragmentB = new FragmentB();
                return fragmentB;
            case 2:
                fragmentC = new FragmentC();
                return fragmentC;
            default:
                return null;
        }
    }

    @Override
    public int getItemCount() {
        return 3;
    }
}
package com.example.viewpagerandtablayoutdemo;

import androidx.annotation.NonNull;
import androidx.appcompat.app.AppCompatActivity;
import androidx.viewpager2.widget.ViewPager2;

import android.os.Bundle;

import com.google.android.material.tabs.TabLayout;
import com.google.android.material.tabs.TabLayoutMediator;

public class MainActivity extends AppCompatActivity {
    private TabLayout tabLayout;
    private ViewPager2 viewPager;
    private String[] tab_title = {"Home","Post","Message"};
    @Override
    protected void onCreate(Bundle savedInstanceState) {
        super.onCreate(savedInstanceState);
        setContentView(R.layout.activity_main);
        ById();//綁定元件
        viewPager.setAdapter(new PageAdapter(getSupportFragmentManager(),getLifecycle()));

        new TabLayoutMediator(tabLayout, viewPager, true, new TabLayoutMediator.TabConfigurationStrategy() {
            @Override
            public void onConfigureTab(@NonNull TabLayout.Tab tab, int position) {
                viewPager.setCurrentItem(tab.getPosition());
                tab.setText(tab_title[position]); //設定Tab標籤文字
            }
        }).attach();
    }
    //綁定元件
    private void ById(){
        tabLayout = findViewById(R.id.tabLayout);
        viewPager = findViewById(R.id.viewpager);
    }
}
PageAdapter介紹
    public PageAdapter(@NonNull FragmentManager fragmentManager, @NonNull Lifecycle lifecycle) {
        super(fragmentManager, lifecycle);
    }
    @NonNull
    @Override
    public Fragment createFragment(int position) {
        //position當前ViewPage編號
        switch (position) {
            case 0:
                fragmentA = new FragmentA();
                return fragmentA;
            case 1:
                fragmentB = new FragmentB();
                return fragmentB;
            case 2:
                fragmentC = new FragmentC();
                return fragmentC;
            default:
                return null;
        }
    }
    @Override
    public int getItemCount() {
        return 3;
    }
MainActivity介紹
    //綁定元件
    private void ById(){
        tabLayout = findViewById(R.id.tabLayout);
        viewPager = findViewById(R.id.viewpager);
    }
        viewPager.setAdapter(new PageAdapter(getSupportFragmentManager(),getLifecycle()));

        new TabLayoutMediator(tabLayout, viewPager, true, new TabLayoutMediator.TabConfigurationStrategy() {
            @Override
            public void onConfigureTab(@NonNull TabLayout.Tab tab, int position) {
                viewPager.setCurrentItem(tab.getPosition());
                tab.setText(tab_title[position]); //設定Tab標籤文字
            }
        }).attach();
    }
viewPager.setAdapter(new PageAdapter(getSupportFragmentManager(), getLifecycle()));
這一行程式碼是設置ViewPager的適配器(Adapter)。ViewPager需要一個適配器來管理其內容頁面。在這裡,你使用了自定義的PageAdapter(假設這是你自己實現的適配器),並傳入getSupportFragmentManager()和getLifecycle()。
new TabLayoutMediator(tabLayout, viewPager, true, new TabLayoutMediator.TabConfigurationStrategy() {...}).attach();
這一行程式碼是設置TabLayout和ViewPager之間的連動。TabLayout用於顯示選項卡,而ViewPager用於顯示不同的內容頁面。這個連動的設置是通過TabLayoutMediator類來實現的。
onConfigureTab(@NonNull TabLayout.Tab tab, int position) {...}
這是一個TabConfigurationStrategy的實現,用於配置每個選項卡的內容。在這個方法中,你可以設定選項卡的標籤文字,並根據position參數設定不同的內容。
tab是當前要配置的選項卡對象。
position是選項卡的位置,你可以根據位置來設定不同的標籤文字。
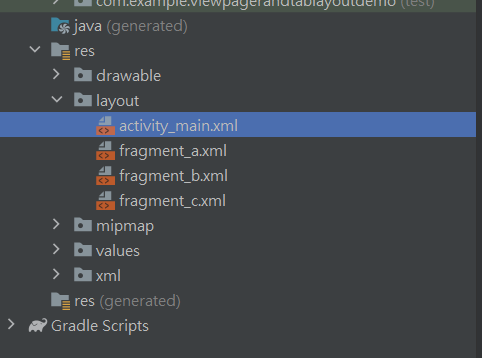
如圖
---main_activity---
<?xml version="1.0" encoding="utf-8"?>
<LinearLayout xmlns:android="http://schemas.android.com/apk/res/android"
    xmlns:app="http://schemas.android.com/apk/res-auto"
    xmlns:tools="http://schemas.android.com/tools"
    android:layout_width="match_parent"
    android:layout_height="match_parent"
    android:orientation="vertical"
    tools:context=".MainActivity">

    <com.google.android.material.tabs.TabLayout
        android:id="@+id/tabLayout"
        android:layout_width="match_parent"
        android:layout_height="0dp"
        android:layout_weight="1"
        tools:layout_editor_absoluteX="1dp"
        tools:layout_editor_absoluteY="128dp">

        <com.google.android.material.tabs.TabItem
            android:layout_width="wrap_content"
            android:layout_height="wrap_content"
            android:text="Monday"
            tools:layout_editor_absoluteX="35dp"
            tools:layout_editor_absoluteY="2dp" />

        <com.google.android.material.tabs.TabItem
            android:layout_width="wrap_content"
            android:layout_height="wrap_content"
            android:text="Tuesday" />

        <com.google.android.material.tabs.TabItem
            android:layout_width="wrap_content"
            android:layout_height="wrap_content"
            android:text="Wednesday" />
    </com.google.android.material.tabs.TabLayout>
https://ithelp.ithome.com.tw/users/20161502/articles
    <androidx.viewpager2.widget.ViewPager2
        android:id="@+id/viewpager"
        android:layout_width="match_parent"
        android:layout_height="0dp"
        android:layout_weight="9" />
</LinearLayout>
Fragment.html的部分
<?xml version="1.0" encoding="utf-8"?>
<FrameLayout xmlns:android="http://schemas.android.com/apk/res/android"
    xmlns:tools="http://schemas.android.com/tools"
    android:layout_width="match_parent"
    android:layout_height="match_parent"
    tools:context=".FragmentA">

    <!-- TODO: Update blank fragment layout -->
    <TextView
        android:layout_width="match_parent"
        android:layout_height="match_parent"
        android:text="@string/hello_blank_fragment" />

</FrameLayout>
