
當初開賽時沒想到賽程會剛好跨到中秋連假,假期中趕稿真的有點難切割時間出來XD
今天要看的 GroundOverlay (區域疊加層),其實就是固定在地圖上的一張圖片。實作的方法也很簡單。
實作的邏輯是:
GroundOverlayOptions() 設定圖片、經緯度等資訊GoogleMap.addGroundOverlay() 將圖片繪製到地圖上,同時取得 GroundOverlay 物件可以做其他操作。要在地圖上建立 GroundOverlay 最重要的兩點是圖片跟位置的經緯度。
圖片讀入的方式跟之前介紹 Marker 的自定義 Icon 一樣,是使用 BitmapDiscriptorFactory 建立 BitmapDiscriptor 物件傳入。所以不論是 Resource 資料夾或是手機本地都可以是圖片的來源位置。
GroundOverlay 的位置設定,有以下三種方法。
GroundOverlayOptions().position(LatLng location, float width, float height)
GroundOverlayOptions().position(LatLng location, float width)
LatLngBounds 設定圖片的東北角與西南角GroundOverlayOptions().positionFromBounds(LatLngBounds bounds)
如果設定的邊界跟原始圖片的比例不同,圖片會被扭曲。
anchor()如果是以單點設定圖片位置,系統預設是以圖片中心作為錨定點。要改變錨定的位置,可以呼叫以下方法更新。
// 圖片錨定在左下角
GroundOverlayOptions().anchor(0f, 1f)
bearing()圖片在地圖上預設為朝北,如果使用者旋轉地圖,圖片會跟著一起旋轉。
如果要將圖片設定不同的朝向,可以使用 bearing() 設定度數,並以順時針方向旋轉。
GroundOverlayOptions().bearing(90f)
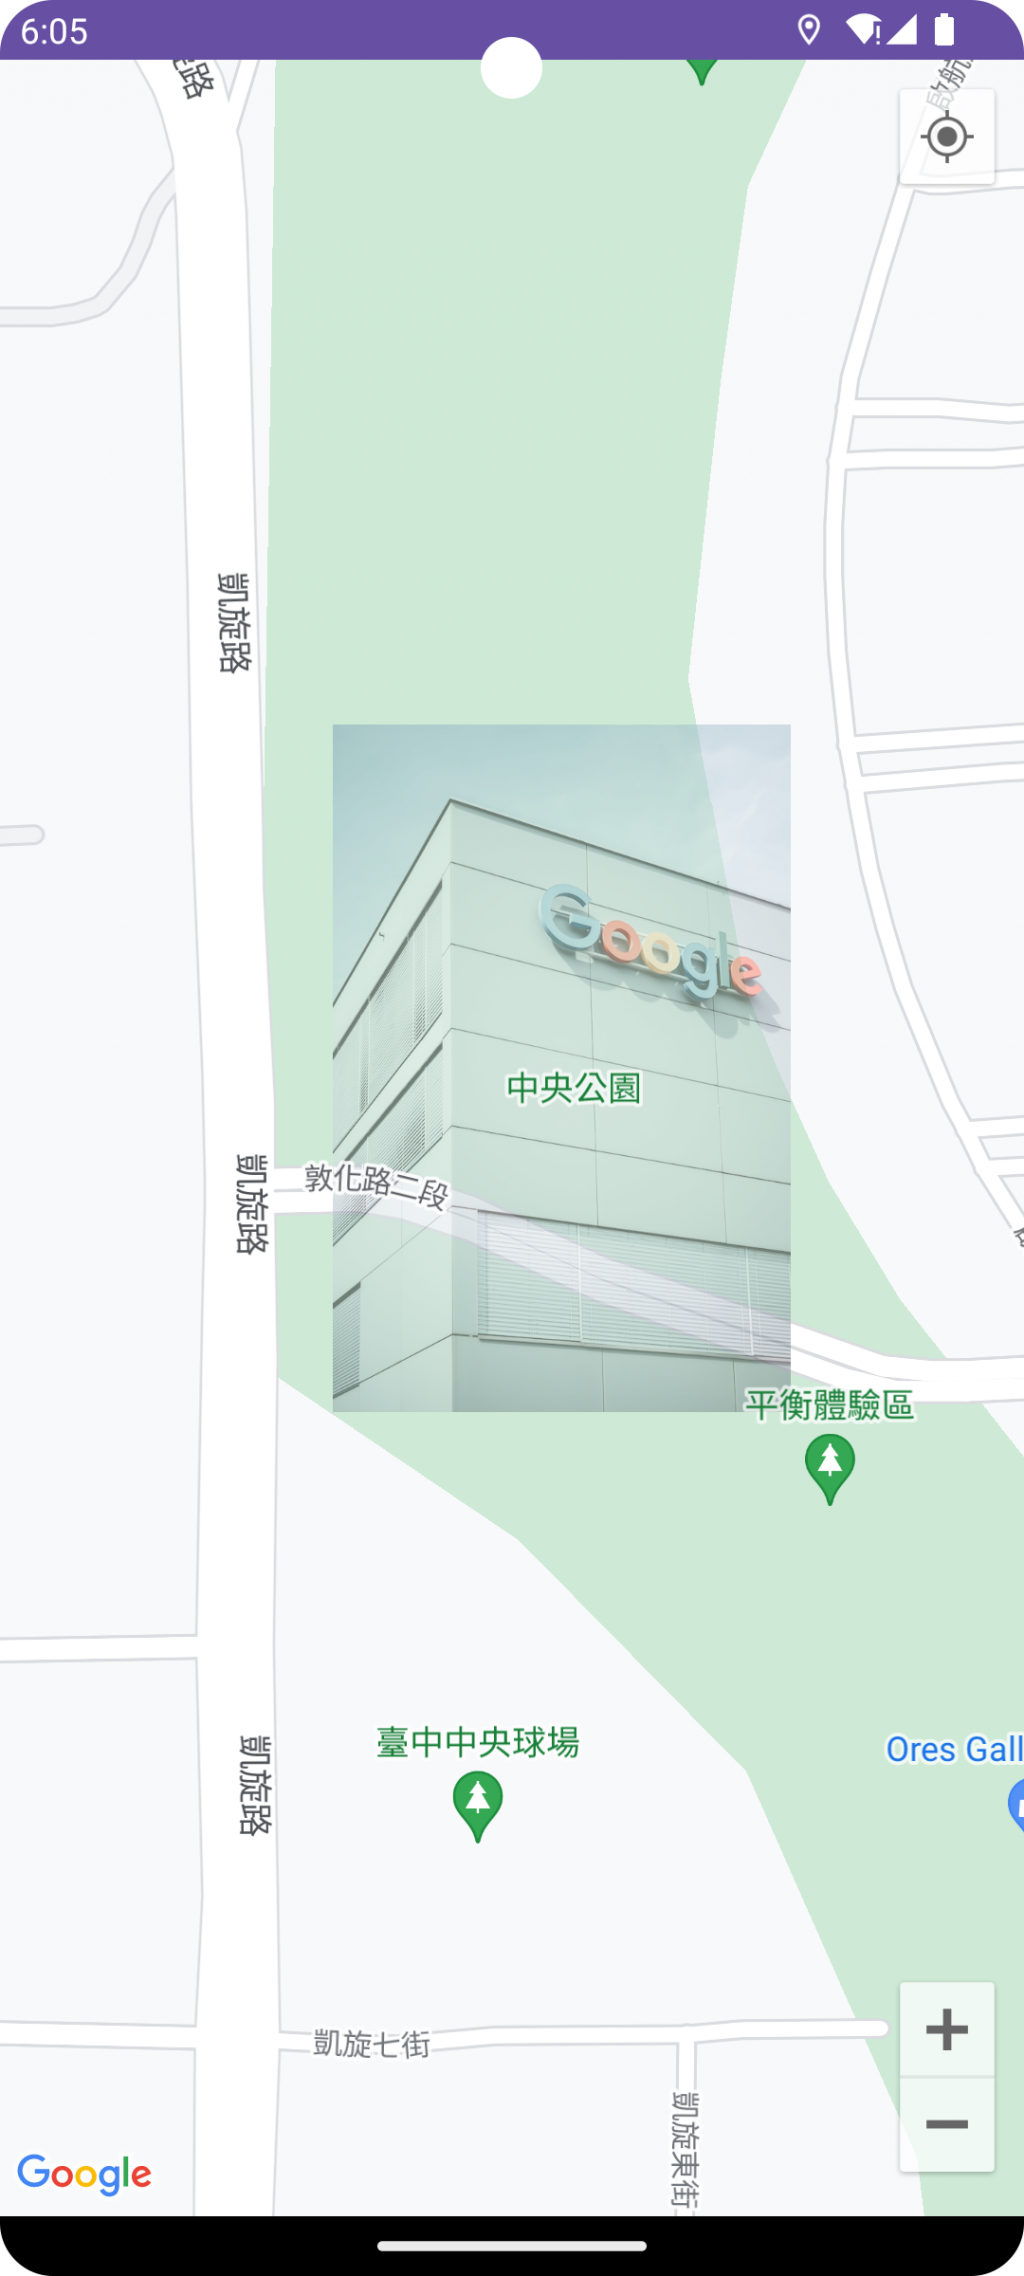
以下是一個簡單的範例
private fun addSimpleGroundOverlay(map: GoogleMap) {
    val centralPark = LatLng(24.1858, 120.6533)
    val groundOverlayOptions = GroundOverlayOptions()
        .image(BitmapDescriptorFactory.fromResource(R.drawable.img_alex_dudar))
        // 設定圖片位置
        .position(centralPark, 200f)
        // 順時針旋轉 90 度
        .bearing(90f)
        // 錨定點設在圖片的左下角
        .anchor(0f, 1f)
    val groundOverlay = map.addGroundOverlay(groundOverlayOptions)
}
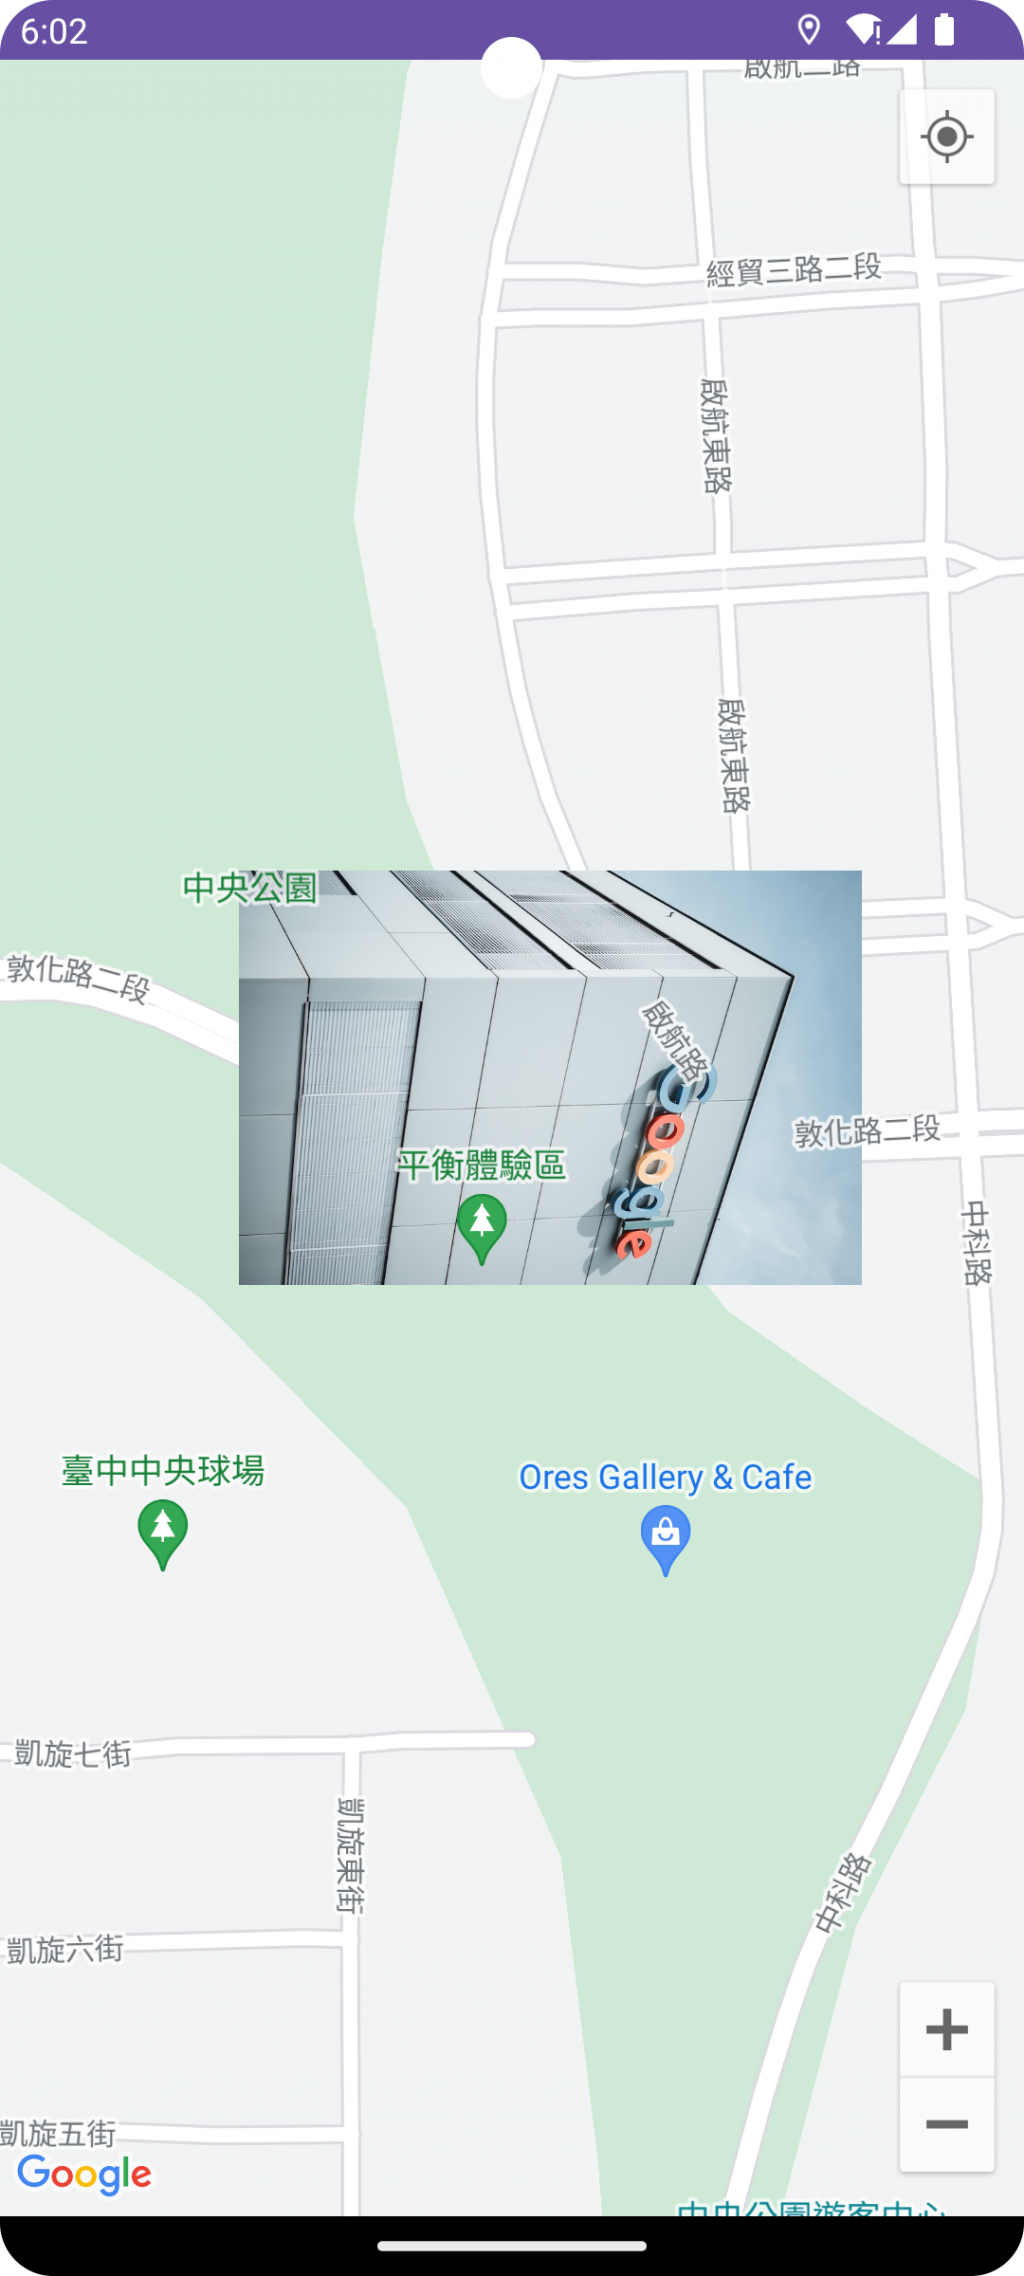
範例使用的照片是 Unsplash 上的圖。
相較於前面線段與多邊形,區域疊加層 (GroundOverlay) 可改變的參數不多。
透明度的設定可透過以下方法,輸入 0 ~ 1 之間的浮點數,1 為全透明 0 為不透明。
// 設定透明度
GroundOverlayOptions().transparency(0.5f)
GroundOverlay如果要更新已經繪製到地圖上的 GroundOverlay,需要在 GoogleMap.addGroundOverlay() 時取得 GroundOverlay 物件。
GroundOverlay.setImage(BitmapDescriptor)
跟設定圖片一樣,傳入 BitmapDescriptor 物件更新圖片。
不過要注意的是,傳入的圖片尺寸大小必須與原圖相同。
除了更換圖片外,圖片的經緯度位置、方向 (Bearing)、點擊行為,都可以做調整。
GroundOverlay.setPosition(LatLng): 設定位置GroundOverlay.setBearing(Float): 方向GroundOverlay.setClickable(Boolean): 可否點擊跟多邊形、線段等繪製物件一樣,使用 remove() 移除地圖上繪製的 GroundOverlay。
GroundOverlay.remove()
點擊事件使用 OnGroundOverlayClickListener 處理監聽回呼,並使用 GoogleMap.setOnGroundOverlayClickListener(OnGroundOverlayClickListener) 設定監聽。
但 GroundOverlay 本身要記得啟用點擊行為,否則是不會有效果的。
以上就是 GroundOverlay 區域疊加層的介紹。不論是繪製還是外觀的調整,跟前幾天介紹的線段或多邊形相比都簡單許多,操作上有問題可以看一下文件或是留言討論~
謝謝您的耐心閱讀,我們就一樣明天見啦~
