今天會透過 ShellScript 來部署 SSH Public Key 到各 Host 上
完成後透過 Ansible 來大量處理 Node-Exporter 的安裝
最後用 Prometheus 來檢視一下 Metric 是否成功
待會 ansible 會透過 SSH 來進行操作
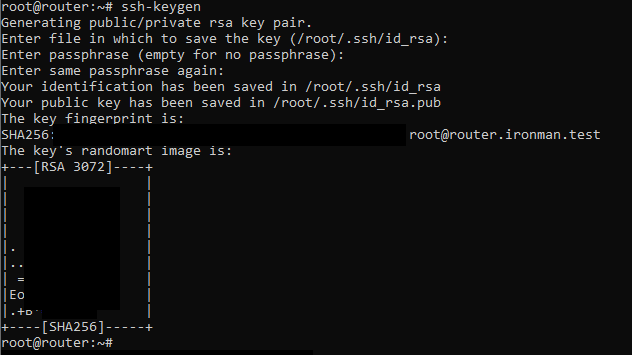
所以這邊來生個 SSH Private/Public KeyPair 來簡化驗證流程
ssh-keygen
ssh-copy-id root@<remote-ip>
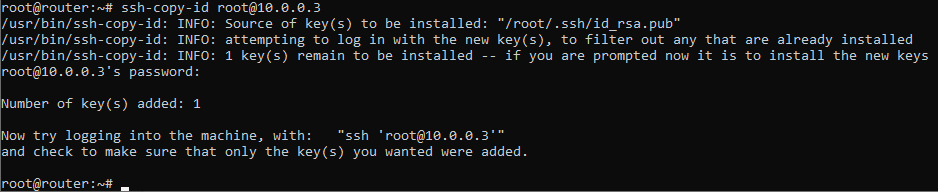
這樣子就成功把 Bastion 公鑰上傳到另一台 Linux 上了
但如果有上百台 Linux 準備被納管 這不是會輸入到累死嗎?
這時就可以用 shell 來幫助我們來進行大量操作(為避免 A:我要先使用 ansible 來匯入 ssh key 驗證ansible
B:那就用 ansible 匯入 的迴圈所以跑去用 shell
這邊要多安裝 expect 來自動跑交互式命令的輸入密碼給 ssh-copy-id 做驗證
apt-get install -y expect
用 APT 安裝好後就來處理 Shell Code 吧
#!/bin/bash

read -s PWD
hosts=("5" "6" "101" "102" "103") # Host IP need to add ssh key.

for i in "${hosts[@]}"; do
        /usr/bin/expect <<EOT
        set timeout 1
        spawn ssh-copy-id root@10.0.0.$i
        expect "Password will auto fill in"
        send "$PWD\n"
        expect EOF
EOT
done
稍微解釋一下
read -s PWD 是將 ssh-copy-id 要用的密碼輸入進入 shell 存為 PWD 這個變數hosts=("5" "6"...) 是將要存放公鑰的 Server IP 存入 hosts 陣列 待會使用 for 來讀取set timeout 1 是為了減少 expect 運行的等待時間大致上是這個樣子 下方是 shell 執行的結果
root@router:~# bash ssh-copy-id.bash
spawn ssh-copy-id root@10.0.0.5
/usr/bin/ssh-copy-id: INFO: Source of key(s) to be installed: "/root/.ssh/id_rsa.pub"
/usr/bin/ssh-copy-id: INFO: attempting to log in with the new key(s), to filter out any that are already installed
/usr/bin/ssh-copy-id: INFO: 1 key(s) remain to be installed -- if you are prompted now it is to install the new keys
root@10.0.0.5's password:

Number of key(s) added: 1

Now try logging into the machine, with:   "ssh 'root@10.0.0.5'"
and check to make sure that only the key(s) you wanted were added.
spawn ssh-copy-id root@10.0.0.6
......
先在 Bastion 上裝 Ansible 吧
apt-get install -y ansible
mkdir /etc/ansible
接著要寫 Ansible 腳本(Playbook) 來執行待會安裝 node-exporter 的流程
這邊先來寫 Ansible 的基本設定 透過 /etc/ansible/ansible.cfg 來指定
這邊設定 Ansible 的 Inventory 路徑和 remote_user 為 root
nano /etc/ansible/ansible.cfg

[defaults]
    inventory = ./inventory
    remote_user = root
    ask_pass = false
這邊透過 Inventory 來指定 Group 的成員
prometheus_node_exporter_inst 是正式安裝的對象tester 是專門開來測試用的群組 (雖然可以 --check 來 dry run :Dnano /etc/ansible/inventory
[prometheus_node_exporter_inst]
lcr.ironman.test
ipam.ironman.test
lke-main.ironman.test
lke-node1.ironman.test
lke-node2.ironman.test
[tester]
10.0.0.6
接著就是 Ansible 的 Playbook 本體
透過 hosts 來指定要被操作的群組 / IP 這邊先用 tester 來做測試
這一個 playbook 有兩個 play 會執行
第一個 play 主要是安裝 prometheus-node-exporter 詳細的操作如下
第二個 play 是用來 local 端測試服務正不正常
---
- name: Install_prometheus_node_exporter_to_servers
  hosts: tester
  tasks:
    - name: update apt package list
      ansible.builtin.apt:
        update_cache: yes
    - name: Install prometheus node-exporter
      ansible.builtin.apt:
        name: prometheus-node-exporter
        state: present
    - name: Install curl
      ansible.builtin.apt:
        name: curl
        state: present
    - name: Make sure a service unit is running and startup when booting
      ansible.builtin.systemd_service:
        name: prometheus-node-exporter
        state: started
        enabled: true

- name: check localhost:9100 from localhost
  hosts: tester
  tasks:
    - name: Check if 'Node Exporter' string exists in localhost:9100/metric
      shell: curl -s http://localhost:9100/metric | grep "Node Exporter"
      register: grep_result
      ignore_errors: yes
    - name: Show result
      debug:
        msg: "node-exporter successful"
      when: grep_result.rc == 0
    - name: Show result if string is not found
      debug:
        msg: "node-exporter failure"
      when: grep_result.rc != 0
測試執行結果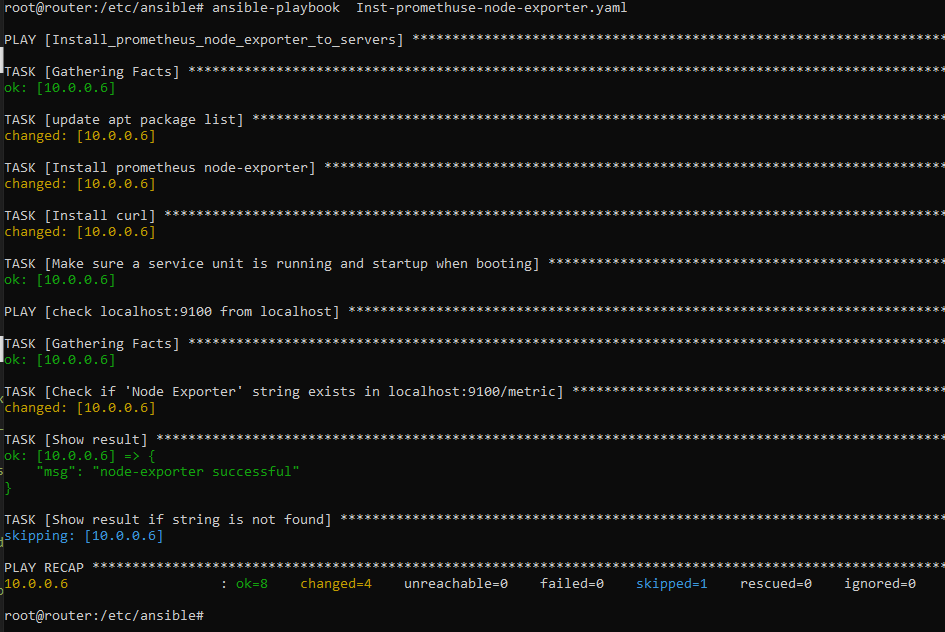
最終執行結果
這邊在第一次執行時遇到 ssh host key 衝突導致執行失敗 ==
最後來 Prometheus 伺服端把設定 Key 上去
再到網頁端確認結果就結束了
打開 prometheus 的設定檔
nano /etc/prometheus/prometheus.yml
job_name 設成可辨識的名字targets 設成對象的 IP- job_name: 'router'
static_configs:
- targets: [ 'router.ironman.test:9100' ]
- job_name: 'lcr'
static_configs:
- targets: [ 'lcr.ironman.test:9100' ]
- job_name: 'ipam'
static_configs:
- targets: [ 'ipam.ironman.test:9100' ]
- job_name: 'lke-main'
static_configs:
- targets: [ 'lke-main.ironman.test:9100' ]
- job_name: 'lke-node1'
static_configs:
- targets: [ 'lke-node1.ironman.test:9100' ]
- job_name: 'lke-node2'
static_configs:
- targets: [ 'lke-node2.ironman.test:9100' ]
接著回到 Prometheus 的網頁上
這次使用 node_memory_MemAvailable_bytes 來看看現在哪台 VM 的 RAM 最閒 欠砍RAM Size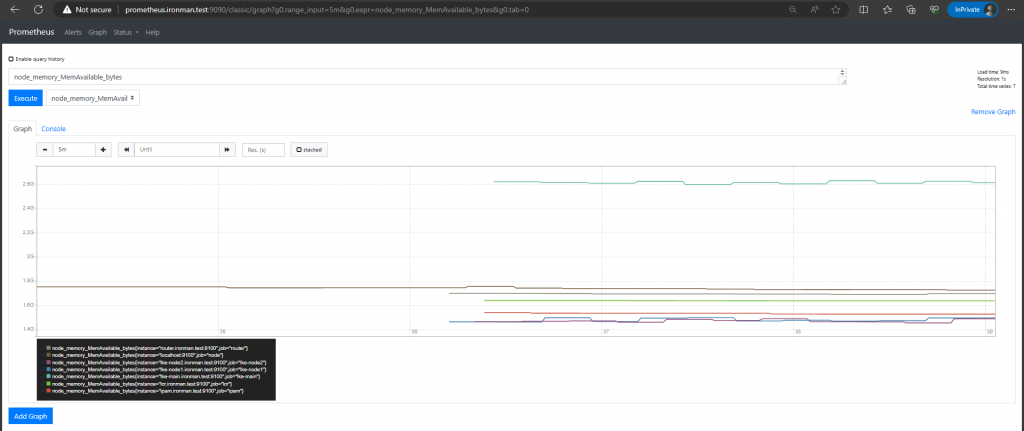
非常成功!
其實官方就有自己的 Ansible Role 可以使用
但秉持著 DIY(Destroy It Youself) 的精神這邊還是用自己寫的了