今天來將 Retrofit2 結合進JetpackCompose中並用LazyColumn來放置抓取到的API資料列。
來到build.gralde(Module:app)加入以下依附元件
dependencies{
    //以上省略

    // Retrofit
    implementation("com.squareup.retrofit2:retrofit:2.9.0")
    // Retrofit with Scalar Converter
    implementation("com.squareup.retrofit2:converter-scalars:2.9.0")
    implementation "com.squareup.retrofit2:converter-gson:2.5.0"
}
來到如圖所示的路徑點開 AndroidManifest.xml 後新增下面的程式碼
<?xml version="1.0" encoding="utf-8"?>
<manifest xmlns:android="http://schemas.android.com/apk/res/android"
    xmlns:tools="http://schemas.android.com/tools">
    <!-- 新增下列這行來開啟網路功能。 -->
    <uses-permission android:name="android.permission.INTERNET" />
    <!--   省略   -->
    <application>
        <!--   省略   -->
    </application>
</manifest>
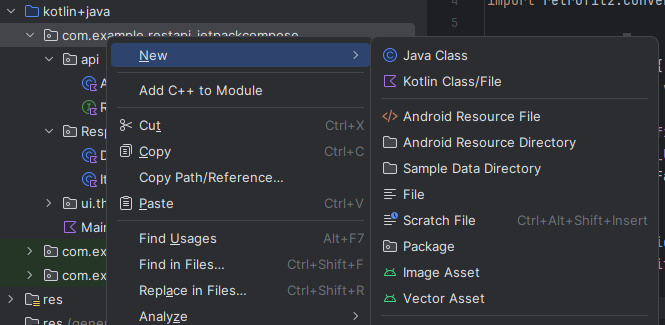
api 資料夾以及 Response 資料夾。Class的ApiService和Interface的RetrofitApi。Response 資料夾新增DataModel和Item。class ApiService {
companion object {
private const val BASE_URL = "https://api.water.gov.taipei"
}
private val retrofit = Retrofit.Builder()
.baseUrl(BASE_URL)
.addConverterFactory(GsonConverterFactory.create())
.build()
fun createApiService(): RetrofitApi {
return retrofit.create(RetrofitApi::class.java)
}
}
這邊是負責後段網址的銜接以及將資料接收以DataModel類別接收下來。
interface RetrofitApi {
    @POST("/prod/WaterQualityData")
    suspend fun postData(): DataModel
}
建立要接收的資料在Api中的資料名稱與類別,名稱與API中的名稱必須大小寫一致,Item中的命名格式也是一樣。
class DataModel{
    @SerializedName("httpCode")
    lateinit var httpCode: String
    @SerializedName("httpMessage")
    lateinit var httpMessage: String
    @SerializedName("count")
    var count: Int = 0
    @SerializedName("item")
    var item: List<Item> = listOf()
}
class Item {
    @SerializedName("update_date")
    lateinit var update_date: String
    @SerializedName("update_time")
    lateinit var update_time: String
    @SerializedName("qua_id")
    lateinit var qua_id: String
    @SerializedName("code_name")
    lateinit var code_name: String
    @SerializedName("longitude")
    lateinit var longitude: String
    @SerializedName("latitude")
    lateinit var latitude: String
    @SerializedName("qua_cntu")
    lateinit var qua_cntu: String
    @SerializedName("qua_cl")
    lateinit var qua_cl: String
    @SerializedName("qua_ph")
    lateinit var qua_ph: String
}
fun MyComposable() {
    var dataModel by remember { mutableStateOf<DataModel?>(null) }

    // Make the API request and update the dataModel
    // You can trigger this request based on user interaction or other events
    LaunchedEffect(Unit) {
        val apiService = ApiService().createApiService()
        val response = apiService.postData()
        Log.e(TAG, "MyComposable: ${response.httpCode}" )
        if (response.httpCode == "200") {
            dataModel = response
        } else {
            // Handle the error here
            Log.e(TAG, "API request failed with code: ${response.item[0].code_name}")
        }
    }
    // 下半部為接收後的畫面布置,後面會附上。
}
LaunchedEffect 是 Jetpack Compose 中的一個組件,它用於執行可能包含暫停函式(Kotlin 協程中的 suspend 函式)的程式碼。當您在 Composable 內部使用 LaunchedEffect,它會啟動一個協程,並將一個程式碼區塊作為參數傳遞給它。這個程式碼區塊中的代碼是在協程內運行的。這邊的程式碼是在上方註解標示的位置,可以直接將此程式碼黏貼上去。
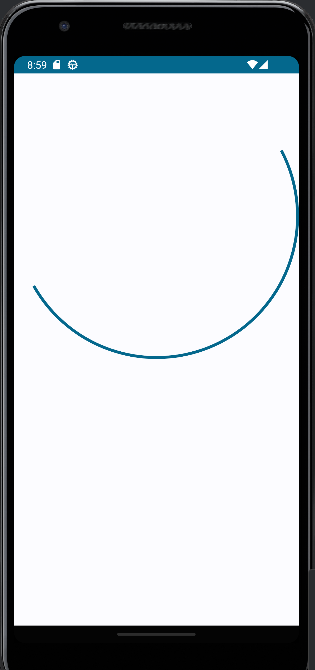
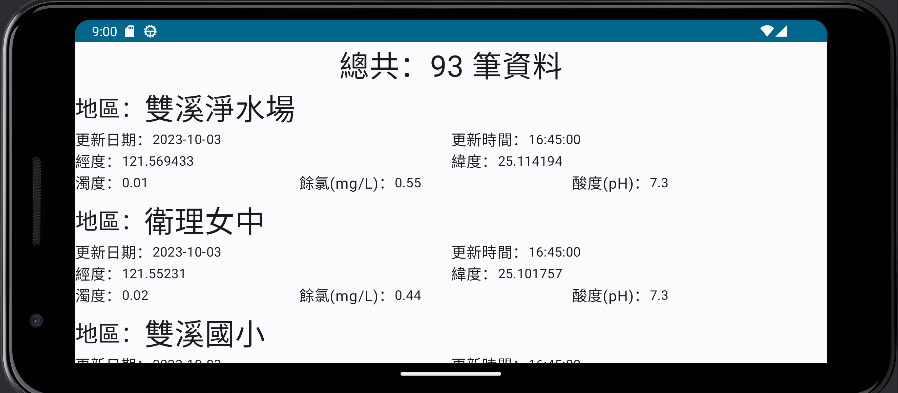
CircularProgressIndicator() 的動作,持續轉圈圈。if (dataModel != null) {
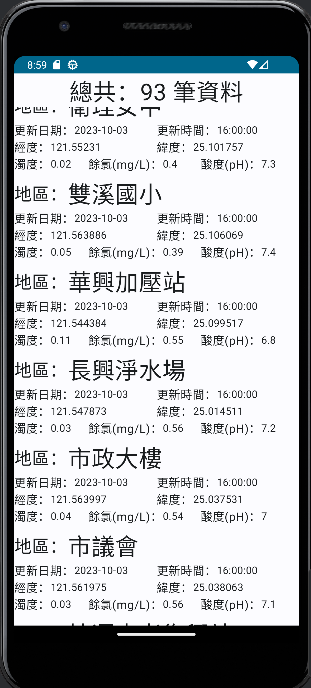
Column {
Text(text = "總共:${dataModel!!.item.size} 筆資料",
Modifier.align(Alignment.CenterHorizontally),
fontSize = MaterialTheme.typography.headlineLarge.fontSize)
LazyColumn(modifier = Modifier.fillMaxSize(),
verticalArrangement = Arrangement.spacedBy(5.dp)) {
items(dataModel!!.item.size) { index ->
Column {
Row {
Text(text = "地區:",
Modifier.align(Alignment.CenterVertically),
fontStyle = MaterialTheme.typography.headlineSmall.fontStyle,
fontSize = MaterialTheme.typography.headlineSmall.fontSize)
Text(text = dataModel!!.item[index].code_name,
Modifier.align(Alignment.CenterVertically),
fontSize = MaterialTheme.typography.headlineLarge.fontSize)
}
Row {
Text(text = "更新日期:",
Modifier.align(Alignment.CenterVertically),
fontSize = MaterialTheme.typography.bodyLarge.fontSize)
Text(text = dataModel!!.item[index].update_date,
fontSize = MaterialTheme.typography.bodyMedium.fontSize,
modifier = Modifier
.weight(2f)
.align(Alignment.CenterVertically))
Text(text = "更新時間:",
fontSize = MaterialTheme.typography.bodyLarge.fontSize,
modifier = Modifier
.align(Alignment.CenterVertically))
Text(text = dataModel!!.item[index].update_time,
fontSize = MaterialTheme.typography.bodyMedium.fontSize,
modifier = Modifier
.weight(2f)
.align(Alignment.CenterVertically))
}
Row {
Text(text = "經度:",
Modifier.align(Alignment.CenterVertically),
fontSize = MaterialTheme.typography.bodyLarge.fontSize)
Text(text = dataModel!!.item[index].longitude,
fontSize = MaterialTheme.typography.bodyMedium.fontSize,
modifier = Modifier
.weight(2f)
.align(Alignment.CenterVertically))
Text(text = "緯度:",
Modifier.align(Alignment.CenterVertically),
fontSize = MaterialTheme.typography.bodyLarge.fontSize)
Text(text = dataModel!!.item[index].latitude,
fontSize = MaterialTheme.typography.bodyMedium.fontSize,
modifier = Modifier
.weight(2f)
.align(Alignment.CenterVertically))
}
Row {
Text(text = "濁度:",
Modifier.align(Alignment.CenterVertically),
fontSize = MaterialTheme.typography.bodyLarge.fontSize)
Text(text = dataModel!!.item[index].qua_cntu,
fontSize = MaterialTheme.typography.bodyMedium.fontSize,
modifier = Modifier
.weight(2f)
.align(Alignment.CenterVertically))
Text(text = "餘氯(mg/L):",
Modifier.align(Alignment.CenterVertically),
fontSize = MaterialTheme.typography.bodyLarge.fontSize)
Text(text = dataModel!!.item[index].qua_cl,
fontSize = MaterialTheme.typography.bodyMedium.fontSize,
modifier = Modifier
.weight(2f)
.align(Alignment.CenterVertically))
Text(text = "酸度(pH):",
Modifier.align(Alignment.CenterVertically),
fontSize = MaterialTheme.typography.bodyLarge.fontSize)
Text(text = dataModel!!.item[index].qua_ph,
fontSize = MaterialTheme.typography.bodyMedium.fontSize,
modifier = Modifier
.weight(2f)
.align(Alignment.CenterVertically))
}
}
}
}
}
} else {
// Handle the case when dataModel is null (e.g., loading or error state)
// You can display a loading indicator or error message
CircularProgressIndicator()
}
以上就完成建立Retrofit以及接收API資料並顯示的動作了。
在JetpackCompose抓取API並顯示在列表中的建立步驟比以往顯示在 RecyclerView 的動作還要少,以往還要再建立Adapter來配置並連結item的元件並將資料寫入item中, LazyColumn 少了撰寫Adapter的步驟。


 iThome鐵人賽