在上一個主題中,我們成功實現了基本的動畫效果和粒子系統,並設計了一個獨立的繪圖管理工具。然而,對於一個相對簡單的粒子系統來說,這樣的設計似乎有些多餘,因為我們可以通過更精簡的架構來實現相同的效果。
因此,本文將探討如何將繪圖邏輯直接整合到粒子系統內部,這不僅可以減少記憶體的使用,還能優化渲染效率。我們將以一個模擬球體碰撞與彈跳的物理引擎為例,展示如何在不借助額外工具的情況下完成繪圖和物理運算。
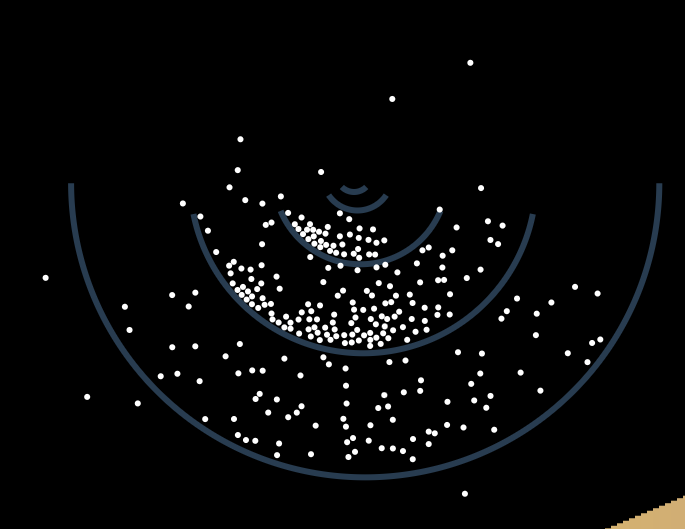
現在,讓我們製作一個模擬多個球體碰撞的物理引擎,這些球體會被牆壁阻擋、相互碰撞並彈跳。接下來的實作將展示如何在粒子系統中整合這些物理行為與繪圖邏輯。

在這裡,和先前相同,提供前端一個控制介面:
useEffect(()=>{
    physic.setCanvas(canvas.current);
    return () => {
        physic.cleanup();
    }
}, []);
透過這個介面,可以呼叫不同的系統:
const createPhysic = function(){
    this.setCanvas = (canvas, pElement) => {
        this.system = new ParticleSystem(canvas.width, canvas.height);
        this.ctx = canvas.getContext("2d");
    }
    this.update = () => {this.system.update();}
    this.render = () => {this.system.render(this.ctx);}
    return this;
}
在粒子系統中,用同名函式來命名 update,用以引入各式各樣的演算法,這裡我們引入排序演算法(後續文章會提到):
class ParticleSystem{
    constructor(width, height){
        this.sort = new SortAlgorithm();
        //......this.walls, this.balls
    }
    update(){
        this.sort.update();
        this.balls.forEach((ball) => {
            // 碰撞檢測
        });
    }
    render(ctx){
        //......this.walls
        this.balls.forEach((ball) => {
            ctx.beginPath();
            ctx.arc(ball.x, ball.y, ball.r, 0, 2 * Math.PI, false);
            ctx.fillStyle = "#FFFFFF";
            ctx.fill();
        });
    }
結合引言,在粒子系統中,存有各式物件的資訊,可以直接進行繪圖和適當的分層渲染,不需要額外的繪圖工具。一個基本的球包含以下資訊:
createBall(x, y, r){
    const vx = Math.random() * 100 - 50;
    const vy = Math.random() * 100 - 50;
    const ax = 0;
    const ay = 9.8 * 10;
    const ball = {x, y, r, vx, vy, ax, ay}
    return ball;
}
彈性碰撞的物理基礎包括兩個重要定律:動量守恆和能量守恆。
動量是物體質量和速度的乘積,定義為:
其中:
動量守恆意味著在沒有外力的情況下,碰撞前後物體的總動量保持不變:
在彈性碰撞中,總動能也保持不變。動能定義為:
這些守恆定律控制了物體碰撞後的運動行為,確保碰撞後物體的總動量和總能量與碰撞前一致。
這個區塊會詳細說明如何進行碰撞檢測與響應,通過 JavaScript 來模擬粒子系統中的彈性碰撞。
在粒子系統中,粒子之間的碰撞是模擬彈性碰撞的核心部分。我們需要計算每一對粒子之間的距離,當距離小於兩者半徑之和時,表示兩個粒子發生碰撞,並需要根據動量和能量守恆原則來更新它們的速度。
在這裡,我們簡化問題,讓粒子之間的質量相同,並用了一個技巧,碰撞時用相對速度來取得能量的傳遞:
handleBallCollision(ball, anotherBall, dist){
    const x = (ball.x + anotherBall.x) / 2;
    const y = (ball.y + anotherBall.y) / 2;

    // 更新球的位置以避免重疊
    ball.x = x + (ball.x - x) / (dist / 2) * ball.r;
    ball.y = y + (ball.y - y) / (dist / 2) * ball.r;
    anotherBall.x = x + (anotherBall.x - x) / (dist / 2) * anotherBall.r;
    anotherBall.y = y + (anotherBall.y - y) / (dist / 2) * anotherBall.r;

    // 相對速度
    const vx = (ball.vx - anotherBall.vx) / 2;
    const vy = (ball.vy - anotherBall.vy) / 2;

    // 計算碰撞後的相對速度
    const angle = Math.atan((ball.y - y) / (ball.x - x));
    const vectorT = -vx * Math.sin(angle) + vy * Math.cos(angle);
    const vectorN = -1 * (vx * Math.cos(angle) + vy * Math.sin(angle));
    const relativeX = -vectorT * Math.sin(angle) + vectorN * Math.cos(angle);
    const relativeY = vectorT * Math.cos(angle) + vectorN * Math.sin(angle);

    // 更新球的速度
    const averageVx = (ball.vx + anotherBall.vx) / 2;
    const averageVy = (ball.vy + anotherBall.vy) / 2;
    ball.vx = (averageVx + relativeX) * this.friction;
    ball.vy = (averageVy + relativeY) * this.friction;
    anotherBall.vx = (averageVx - relativeX) * this.friction;
    anotherBall.vy = (averageVy - relativeY) * this.friction;
}
避免球體重疊:當檢測到兩個球體重疊時,首先根據它們的中心點位置,重新計算球體的位置,避免物理模擬中的穿透現象。
計算速度變化:根據兩個球體的相對速度,我們計算其沿碰撞角度的切線與法線速度變化,從而更新它們的速度。這裡的 Math.atan 用於計算兩個球的相對位置角度,並通過三角運算分解速度。
速度更新:根據切線和法線速度,我們更新兩個球的最終速度,並乘以摩擦係數(friction)來模擬碰撞後能量損失。
牆壁方面,我們將形狀設計為弧形,因此可以視作和圓形的碰撞,主要目標是根據碰撞位置取得法線和切線方向,並根據這些方向更新粒子的速度,使其模擬反彈效果。
    // 計算牆壁圓周上距離球體最近的點
    const x = wall.x + (ball.x - wall.x) / dist * wall.length;
    const y = wall.y + (ball.y - wall.y) / dist * wall.length;

    // 計算碰撞點的角度
    const atan = Math.atan((y - wall.y) / (x - wall.x)); // 第一第四象限
    const theta = atan > 0 ? atan : atan + Math.PI; // 第三第四象限
    const quadrant = y > wall.y ? theta : theta + Math.PI; // 一二三四象限

    // 判斷碰撞點是否在牆壁的弧形範圍內
    if (quadrant > wall.endAngle || quadrant < wall.startAngle) return;

    // 確定球體是否在牆壁內部或外部
    const isInside = dist <= wall.length ? 1 : -1;

    // 更新球體的位置,確保球體不會穿過牆壁
    ball.x = x + (ball.x - x) / (wall.length - dist) * (ball.r + wall.thick) * isInside;
    ball.y = y + (ball.y - y) / (wall.length - dist) * (ball.r + wall.thick) * isInside;

    // 計算反彈角度
    const angle = Math.atan((ball.y - y) / (ball.x - x));
    const vectorT = -ball.vx * Math.sin(angle) + ball.vy * Math.cos(angle);
    const vectorN = -1 * (ball.vx * Math.cos(angle) + ball.vy * Math.sin(angle));

    // 更新球體的速度,使其在碰撞後反彈
    ball.vx = (-vectorT * Math.sin(angle) + vectorN * Math.cos(angle)) * this.friction;
    ball.vy = (vectorT * Math.cos(angle) + vectorN * Math.sin(angle)) * this.friction;
}
在每一幀中,必須依次更新所有粒子的速度和位置,並進行碰撞檢測。
this.balls.forEach((ball) => {
    // 更新速度和位置
    ball.x = (ball.x + ball.vx / 60);
    ball.y = (ball.y + ball.vy / 60);
    ball.vx = (ball.vx + ball.ax / 60) * this.slow;
    ball.vy = (ball.vy + ball.ay / 60) * this.slow;
    // 檢測與其他球體的碰撞
    this.balls.forEach((anotherBall) => {
        if (ball == anotherBall) return;
        const dist = this.getDist(ball, anotherBall);
        if (dist < ball.r + anotherBall.r) {
            this.handleBallCollision(ball, anotherBall, dist);
        }
    });

    // 檢測與牆壁的碰撞
    this.walls.forEach((wall) => {
        const dist = this.getCollide(ball, wall);
        if (dist > 0) {
            this.handleWallCollision(ball, wall, dist);
        }
    });
});
以及用來取得距離、檢測碰撞的函式:
getDist(a, b){
    const x = a.x - b.x;
    const y = a.y - b.y;
    const dist = Math.sqrt(x*x + y*y);
    return dist;
}
getCollide(ball, wall){
    if(wall.type == "arc"){
        const x = ball.x - wall.x;
        const y = ball.y - wall.y;
        const dist = Math.sqrt(x*x + y*y);
        return (dist + ball.r >= wall.length - wall.thick && dist < wall.length + wall.thick) ? dist : 0;
    }
    return 0;
}
在這篇文章中,我們探討了如何在粒子系統中模擬彈性碰撞,包括粒子之間的碰撞檢測與處理,以及粒子與牆壁的碰撞處理。透過每一幀更新位置和速度,並在必要時進行碰撞處理,我們能夠創建一個具有物理真實感的粒子系統。
在優化和擴展方面,我們可以進一步加入更真實的物理參數,如質量、彈性系數,甚至考慮流體力學和引力效應。最終,我們所建立的系統不僅僅是一個動畫展示,更是一個結合數學、物理與程式設計的實踐項目,展現了粒子系統在動畫與模擬中的廣泛應用。
