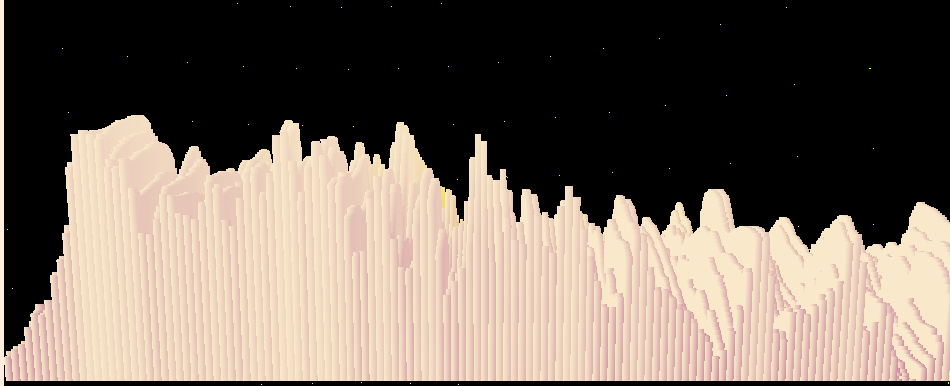
在上一個主題中,我們用原生 JS 完成了基本的粒子系統和排序演算法的視覺化,然而,造輪子還是有一定的局限性,尤其是更複雜的圖形如 3D 的投影和座標轉換,因此,本文將展示如何使用 Three.js 強大的渲染器,來幫助我們簡化三維場景中的圖形渲染。
起初做這個主題,是我了解到音頻資料的傅立葉轉換,可以用 3D 的形式看出時域和頻域的關係,不過這需要一定的理論基礎,因此取而代之地,我們會將眼光專注在如何將音頻資料結合 3D 長條圖來實現視覺化。

在這裡,和先前相同,提供前端一個控制介面:
import musicAnalyser from '../js/musicAnalyser';
useEffect(()=>{
    musicAnalyser.setCanvas(canvas.current);
    window.addEventListener('resize', musicAnalyser.resize, false);
    return () => {
        musicAnalyser.cleanup();
        window.removeEventListener("resize", musicAnalyser.resize);
    }
}, []);
因為 Three 會協助我們做底層運算,將物體投影到攝影機的視角,因此我們只需要利用它的核心工具——場景、鏡頭、渲染器,它就能幫我們把長條圖精準繪製在畫布中了!
import * as THREE from 'three';
const createMusicAnalyser = function(){
    this.setCanvas = (canvas) => {
        this.scene = new THREE.Scene();
        this.renderer = new THREE.WebGLRenderer({"alpha": true, "canvas": canvas});
        this.camera = new THREE.PerspectiveCamera( 75, canvas.width / canvas.height, 0.1, 1000 );
    };
    this.cleanup = () => {};
    this.resize = () => {};
    this.getAnalyser = () => {};
    this.update = () => {};
    this.render = () => {
        this.renderer.render( this.scene, this.camera );
    }
    return this;
}
const musicAnalyser = new createMusicAnalyser();
export default musicAnalyser;
在使用 Web Audio API 取得音訊資料的時候,必須得到使用者的同意或主動播放音樂,因此透過播放事件來建立分析器:
this.getAnalyser = (audio) => {
    if(!this.analyser) this.analyser = createAnalyser(audio);
}
// jsx
<audio onPlay={(e) => musicAnalyser.getAnalyser(e.target)}></audio>
我們需要 AudioContext 作為接口來處理音頻資料,利用它可以調整音量、進行混音等。在這裡只示範如何取得傅立葉轉換後的資料,並且將音量設置為 1 倍大小,完整的流程如下:
function createAnalyser(audio){
    // 設定音訊
    const AudioContext = window.AudioContext || window.webkitAudioContext; //相容性
    const audioCtx = new AudioContext();
    // 創建節點
    const source = audioCtx.createMediaElementSource(audio);
    const gainNode = audioCtx.createGain();
    const analyser = audioCtx.createAnalyser();
    // 連接節點
    source.connect(gainNode);
    gainNode.connect(analyser);
    analyser.connect(audioCtx.destination);
    // 對每個節點進行設定
    gainNode.gain.value = 1;
    analyser.fftSize = 4096; // frequencyBinCount = 2048
    return analyser;
}
Three 場景可以容納各種物體,方便渲染,這裡我們將長條圖演算法封裝在 BufferFactory 內部,從音訊接口取得資料後,在交由 buff 去轉換成對應的圖形。
this.setCanvas = (canvas) => {
    //......
    this.buff = new BufferFactory();
    this.scene.add(this.buff.mesh)
}
this.update = () => {
    if(this.analyser){
        const bufferLength = this.analyser.frequencyBinCount;
        const dataArray = new Uint8Array(bufferLength);
        this.analyser.getByteFrequencyData(dataArray);

        const data = new Uint8Array(bufferLength / 8)
        for (let i = 0; i < bufferLength / 8; i++) {
            data[i] = dataArray[i];
        }
        this.buff.transformData(data);
    }
    this.buff.update();
}
要注意的一個小細節是,為求效能我們會避免用到 ES6 的陣列操作,比如把陣列切割成一半,你可能會優先想到 slice,然後試著用一行去完成它:
const data = [...dataArray].slice(0, bufferLength / 8);
簡潔是簡潔,但是光是轉換型別為普通陣列,就增加了不必要的開銷,對動畫的效能負擔,我只能說是"肉眼可見"。
我們首先設置鏡頭的位置和朝向(就像安裝監視器的概念)。不過,Three 也允許我們用滑鼠來拖曳鏡頭,提供另一種更直覺的方式,設置目標為鏡頭的方向。最後,為避免迷失方向,可以添加輔助用坐標軸。
import { OrbitControls } from 'three/examples/jsm/controls/OrbitControls';
this.setCanvas = (canvas) => {
    //......
    const radius = 512;
    this.camera.position.set(radius/4, radius/3, radius/3);
    this.controls = new OrbitControls(this.camera, this.renderer.domElement);
    this.controls.target.set(radius/4, 0, -radius/3);
    this.controls.update();
    this.axis = new THREE.AxesHelper(300);
    this.scene.add(this.axis);
}
對於畫布的渲染,渲染器決定了視窗大小,相當於分辨率;鏡頭則決定了比例
this.resize = () => {
    const [w, h] = [this.canvas.width, this.canvas.height];
    this.renderer.setSize(w, h);
    this.camera.aspect = w/h;
    this.camera.updateProjectionMatrix();
}
Three 本身有提供 dispose() 方法用來釋放資料,從渲染器、場景、幾何體、乃至材質都可以調用這個方法,所以基本邏輯就是遍歷所有場景中的對象,一一將其釋放。
this.cleanup = () => {
    // 移除場景中的對象
    if (this.scene) {
        this.scene.traverse((object) => {
            if (object instanceof THREE.Mesh) {
                object.geometry.dispose();
                object.material.dispose();
            }
        });

        while (this.scene.children.length > 0) {
            const child = this.scene.children[0];
            this.scene.remove(child);
        }
    }

    // 釋放渲染器
    if (this.renderer) {
        this.renderer.dispose();
    }

    this.buff = null;
    this.canvas = null;
    this.scene = null;
    this.camera = null;
    this.renderer = null;
    this.analyser = null;
}
在這篇文章中,我們介紹了如何捕捉實時的音頻資料,並且構建了 3D 視覺化的基礎架構,結合了 Three.js 的鏡頭設置、場景管理、記憶體清理,這為後續文章打下了堅實的骨架。
我們接下來將深入探討 3D 實體的製作,特別是如何使用音頻分析結果來動態生成幾何體、材質與長條圖,將聲音視覺化。在這過程中,效能優化和資源管理也是不容忽視的挑戰。特別是在面對大量的數據處理和動態渲染時,所以我也會一併分享我遇到的坑。
