在 Day 3,我們認識了 Notion API,知道它能夠存取 Pages、Databases 與 Blocks。今天,我們要進入實作 - 完成專案的基礎建置:準備好 Python / VS Code 環境、設定 GitHub 版控、建立 Notion Integration,最後用一個小測試確認 API 能正常運作。
在開始寫程式前,我們需要先把環境準備好,方便安裝後續需要的套件。
以下將用Macbook示範
# macOS 通常自帶 Python,但建議確認版本是否 ≥ 3.9:
python3 --version

# 同時確認 pip 是否可用:
pip3 --version
mkdir notion-llm-assistant
cd notion-llm-assistant
mkdir src
touch README.md
python3 -m venv venv
source venv/bin/activate   # 啟用虛擬環境
pip install requests python-dotenv
pip freeze > requirements.txt
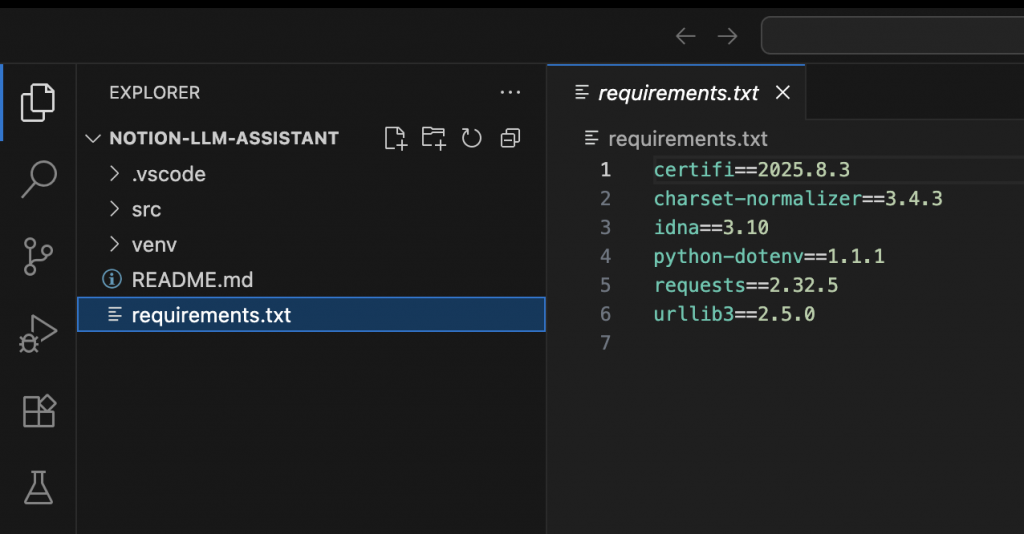
notion-llm-assistant/
├── src/
├── .env
├── requirements.txt
└── README.md
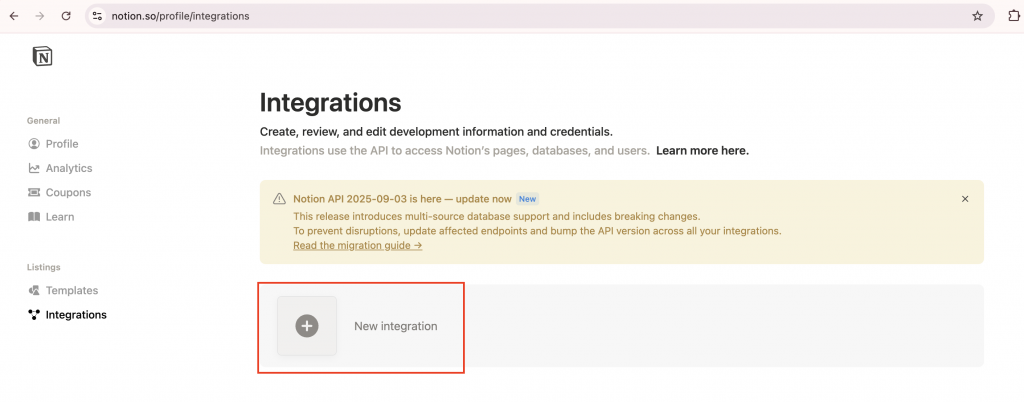
在我們開始串接 API 之前,需要先拿到一組 Integration Token(也就是 API Key)。這組 Token 相當於是「Bot 身份證」,能代表你去存取 Notion 資料。
Save:
Name:給這個 Integration 取的名稱,可隨意命名,但需注意不可包含 “Notion“ 字串Associated Workspace:選擇你要使用的 Notion 工作區Type:選擇 Internal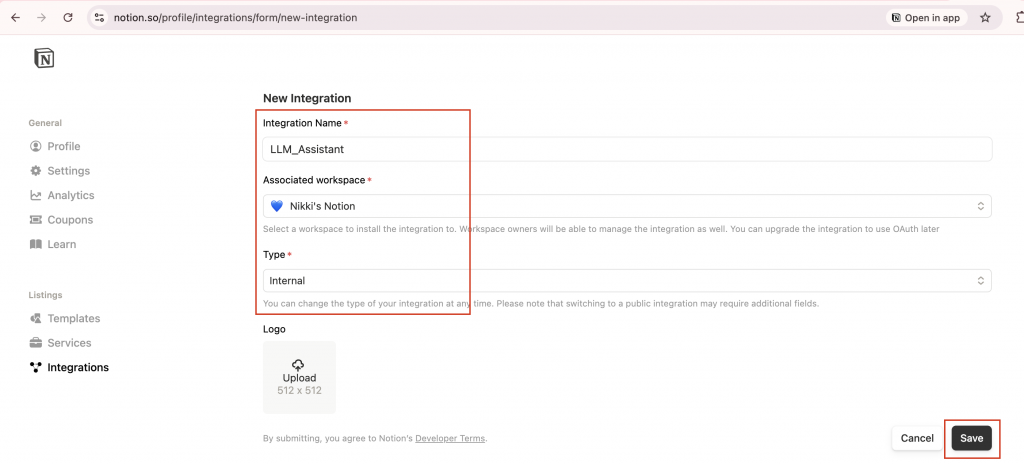
Integration Name:上一步的設定名稱。Internal Integration Secret:這是一組 API Token,相當於「金鑰」,讓外部應用程式(例如你 Python 寫的程式)能用這個身分去存取 Notion。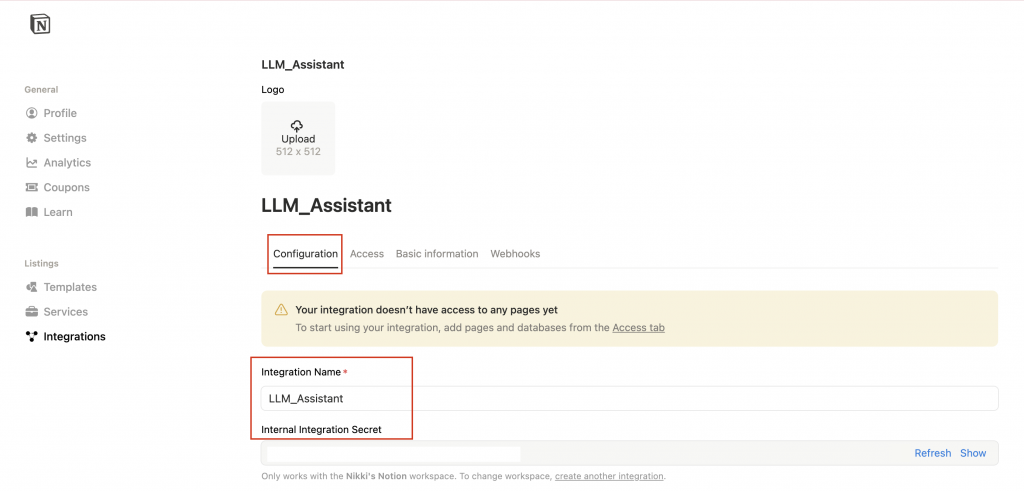
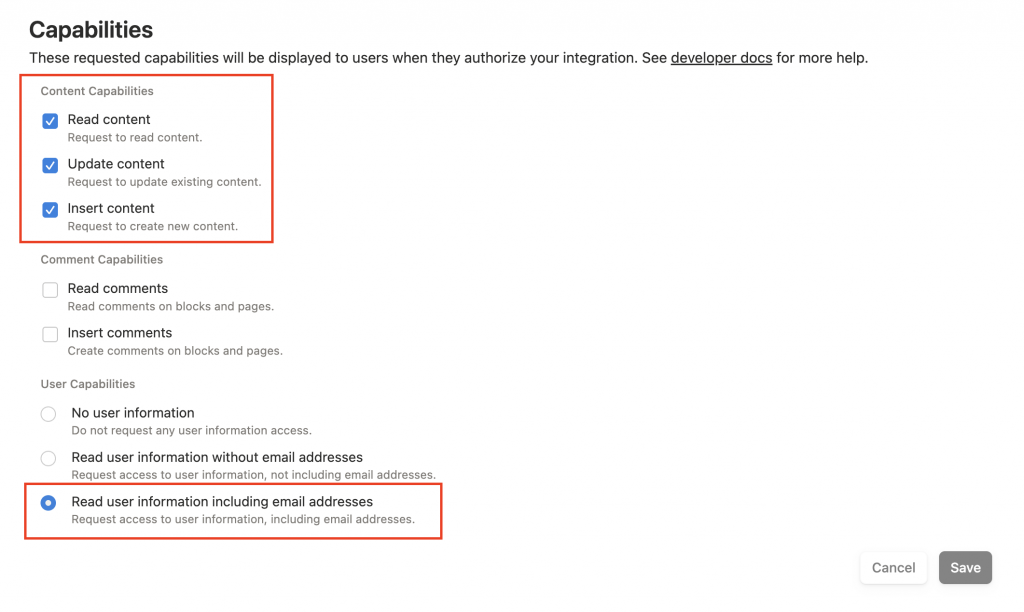
| 類別 | 權限項目 | 功能說明 |
|---|---|---|
| 🔑 Content Capabilities(內容權限) | Read content | 讀取頁面和資料庫的內容 |
| Update content | 修改現有的頁面 | |
| Insert content | 新增新的頁面或 Block | |
| 💬 Comment Capabilities(評論權限) | Read comments | 讀取頁面下的留言 |
| Insert comments | 新增頁面留言 | |
| 👤 User Capabilities(使用者資訊) | No user information | 完全不讀取使用者資訊 |
| Read user information without email | 只讀取使用者名稱 | |
| Read user information including email | 可讀取名稱與 email |
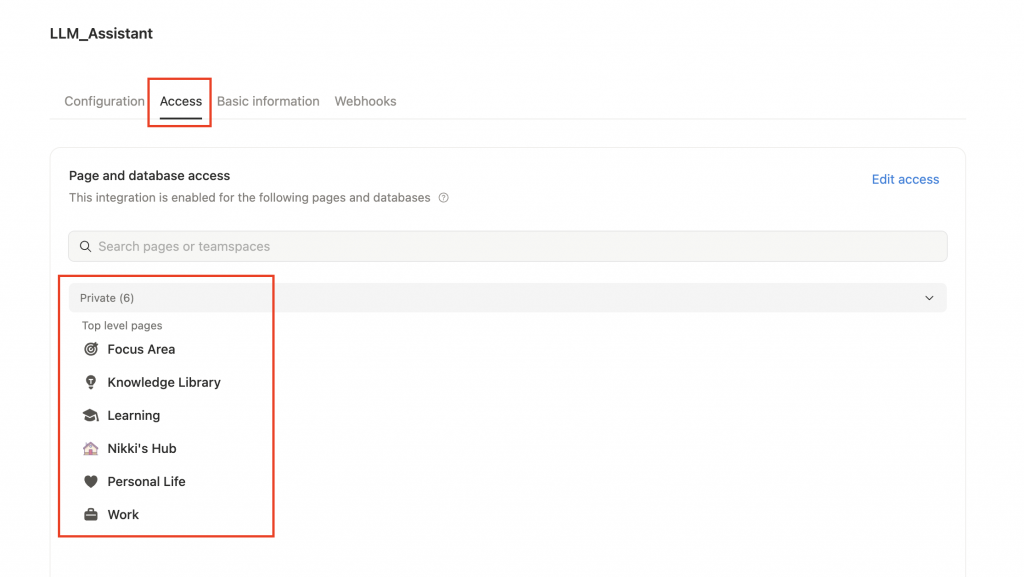
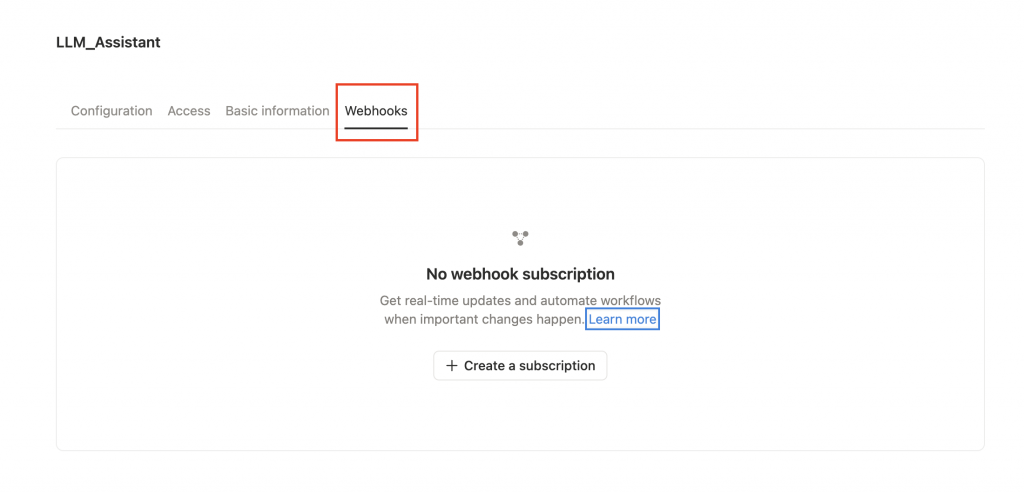
設定 Integration 的存取範圍
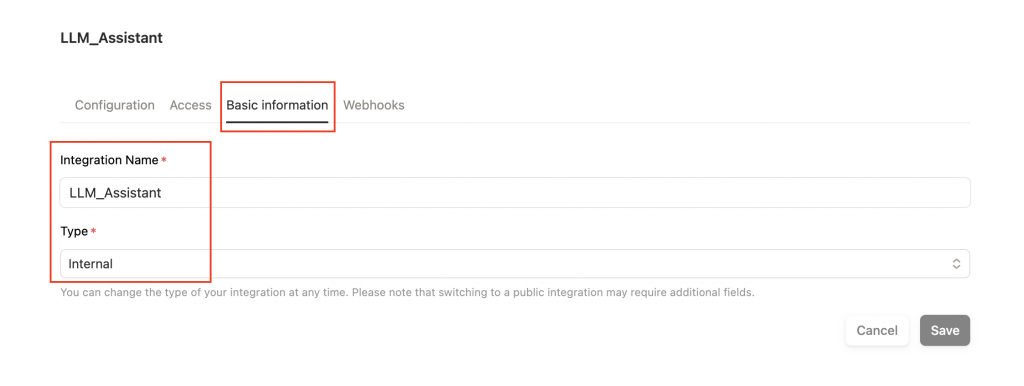
Integration Name:同樣是 LLM_Assistant。Type:
NOTION_TOKEN=secret_xxxxxxx
from dotenv import load_dotenv
import os

load_dotenv()
notion_token = os.getenv("NOTION_TOKEN")
一個好的專案除了程式碼要能執行,也需要良好的版控,方便追蹤變更、團隊協作,以及公開參賽用的程式碼展示。以下會示範如何把你 MacBook 上的專案資料夾推到 GitHub。
1. 初始化 Git 專案
git init
git config user.name "Nikki Chen"
git config user.email "your_github_email@example.com"
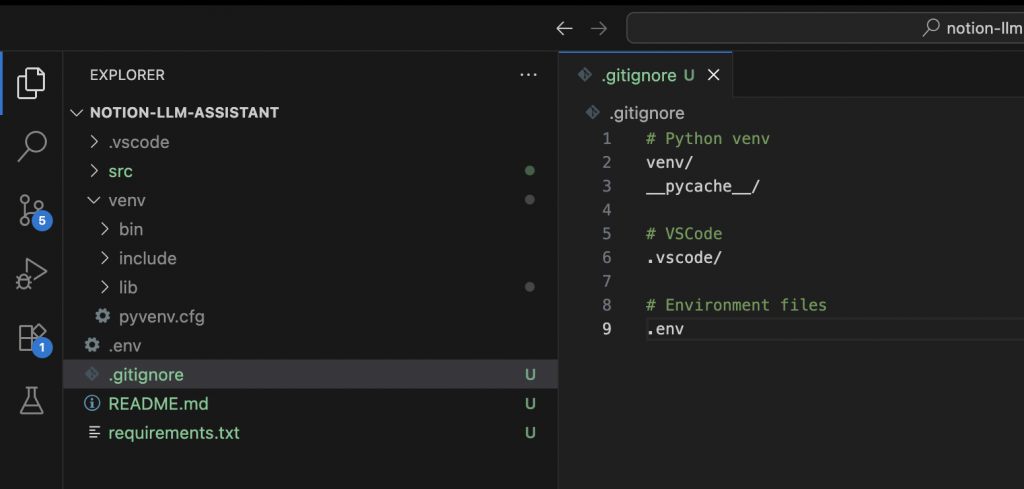
2. 建立 .gitignore
.gitignore 檔:#Python venv
venv/
__pycache__/
#VSCode
.vscode/
#Environment files
.env
3. 連線到 GitHub
git remote add origin https://github.com/your-username/notion-llm-assistant.git
git remote -v
會看到類似:
origin  https://github.com/your-username/notion-llm-assistant.git (fetch)
origin  https://github.com/your-username/notion-llm-assistant.git (push)
4. 加入並提交檔案
git add .
git commit -m "Initial commit: setup project structure"
5. 推送到 GitHub
git branch -M main
git push -u origin main
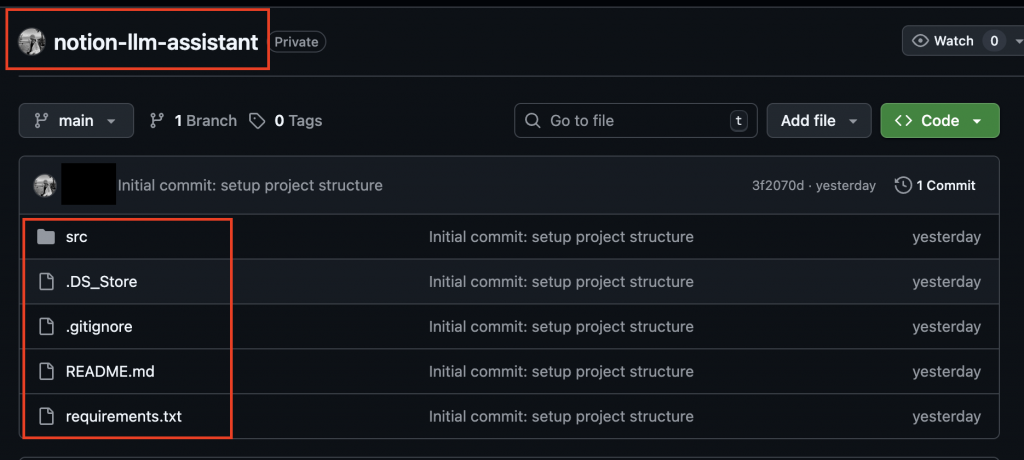
6. 驗證
到你的 GitHub repo 頁面,就可以看到剛剛推送的專案程式碼 🎉
import requests, os
from dotenv import load_dotenv

load_dotenv()
token = os.getenv("NOTION_TOKEN")

url = "https://api.notion.com/v1/users/me"
headers = {
    "Authorization": f"Bearer {token}",
    "Notion-Version": "2022-06-28"
}

res = requests.get(url, headers=headers)
print(res.json())
程式碼說明
requests:Python 的 HTTP 請求套件,用來呼叫 Notion API。os:存取系統環境變數,例如 .env 裡的 Token。dotenv:讓 Python 可以讀取 .env 檔,把環境變數載入進程中。load_dotenv():讀取 .env 檔,裡面存放 NOTION_TOKEN=xxxxxx。os.getenv("NOTION_TOKEN"):把 NOTION_TOKEN 這個值取出來,存在變數 token 裡。這樣可以避免把 Token 寫死在程式碼裡,提高安全性。url:設定 API endpoint,/v1/users/me 是官方推薦的「測試 API」,用來檢查 Token 是否能正常存取 Notion。headers:HTTP 請求標頭。Authorization:帶上 Bearer <token>,告訴 Notion 這是合法的 Bot 身份。Notion-Version:指定 API 版本,確保行為一致。requests.get(...):發送 GET 請求到 Notion API。res.json():把 API 回傳的 JSON 轉成 Python 字典,印出來。如果一切正常,你會看到類似以下輸出:
{
  "object": "user",
  "id": "xxxxxxxx-xxxx-xxxx-xxxx-xxxxxxxxxxxx",
  "type": "bot",
  "bot": {
    "owner": {
      "type": "workspace",
      "workspace": true
    }
  },
  "name": "My Integration"
}
這段程式碼的目的就是測試 Token 是否有效。
如果成功,代表:
.env 檔讀取成功今天,我們完成了專案的第一個「落地步驟」:
這些準備,確保我們的專案有 乾淨的環境、穩定的版控、安全的金鑰管理,能讓接下來的開發更順利。
在 Day 5,我們會進一步進行:
👉 實作抓取 Notion Page / Database 資料,把真實的筆記拉出來,並開始設計資料清洗策略,讓後續的 LLM 能更好地理解與檢索。

