如果說,我今天要訓練輸入是圖片,而且我想做資料擴增(data augmentation),那有沒有一個比較好的讀取方式呢?今天就要來跟大家介紹 TFRecordDataset 這個好用的東西啦。
你可以把 tf.data.TFRecordDataset()想像成一個資料集的前處理器,你可以為這個處理器設置經過什麼樣的 parse_function,也可以叫這個處理器打亂資料集(shuffle),甚至是指定每次拿出來的 batch size。
data_set = tf.data.TFRecordDataset(TFRECORD_PATH)
data_set = data_set.map(parse_function)
data_set = data_set.shuffle(buffer_size=9)
data_set = data_set.batch(3)
那麼,parse_function 又是什麼意思呢?他就有點像自動洗車場,當你把資料餵進去時,可以在裡面客製化定義資料會經過什麼樣的清洗流程,而這個方法的輸入是以一個 example 作為單位,所以啦,我可以定義該如何拿名稱、年紀、照片等資料後並將其 return 出來。
def parse_function(example_proto):
   features = {'member/name': tf.io.FixedLenFeature([], tf.string),
               'member/encoded': tf.io.FixedLenFeature([], tf.string),
               'member/age': tf.io.FixedLenFeature([], tf.int64),
               'member/height': tf.io.VarLenFeature(tf.float32),
               'member/prefer_prods': tf.io.VarLenFeature(tf.int64)}
   features = tf.io.parse_single_example(example_proto, features)
   images = tf.image.decode_png(features['member/encoded'])

   return features, images
而文章最上頭有提到資料擴增,這個擴增的定義也可以在 parse_function 來實作,所以我們多加了這幾行。
def parse_function(example_proto):
   features = {'member/name': tf.io.FixedLenFeature([], tf.string),
               'member/encoded': tf.io.FixedLenFeature([], tf.string),
               'member/age': tf.io.FixedLenFeature([], tf.int64),
               'member/height': tf.io.VarLenFeature(tf.float32),
               'member/prefer_prods': tf.io.VarLenFeature(tf.int64)}
   features = tf.io.parse_single_example(example_proto, features)
   images = tf.image.decode_png(features['member/encoded'], channels=3)
   # 注意png原本有4個channel,但執行到下面的處理會出錯,所以前一行先降成3個channel。
   images = tf.image.random_brightness(images, 0.1)  # 隨機亮度
   images = tf.image.random_saturation(images, 0.7, 1.3)  # 隨機飽和度
   images = tf.image.random_contrast(images, 0.6, 1.5)  # 隨機對比度
   images = tf.image.random_flip_left_right(images)  # 隨機翻左翻右

   return features, images
一個小地方要注意的是 tensorflow 的資料擴增(data augmentation)限定圖片 channel 為3,png 預設 channel 為4,因此必須要去除透明度。
完成 parse_function 後,我們就必須把處理器實體化出來啦,然後用 get_next() 拿到吐資料的 tensor。
iterator = data_set.make_initializable_iterator()
next_element = iterator.get_next()
最後實際 demo,我們把前幾天的資料集讀出來,印出 features,並將資料擴增的結果顯示出來。
with tf.Session() as sess:
   sess.run(iterator.initializer)

   results, imgs = sess.run(next_element)

   print('names: {}'.format(results['member/name']))
   print('ages: {}'.format(results['member/age']))
   print('heights: {}'.format(results['member/height']))
   print('prefer_prods: {}'.format(results['member/prefer_prods']))

   for img in imgs:
       img = cv2.cvtColor(img, cv2.COLOR_RGB2BGR)
       cv2.imshow('img', img)
       cv2.waitKey(-1)
印出的訊息: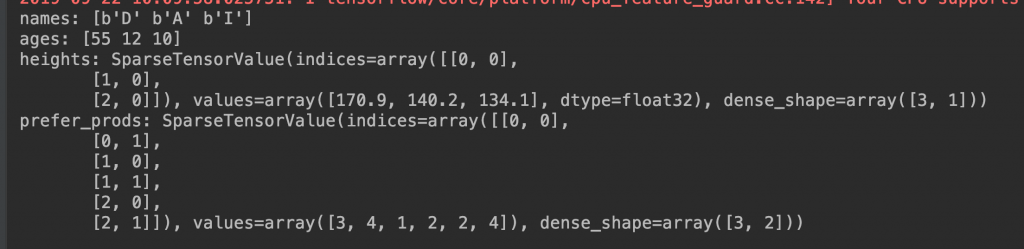
圖片部分,可以看到資料擴增後的效果: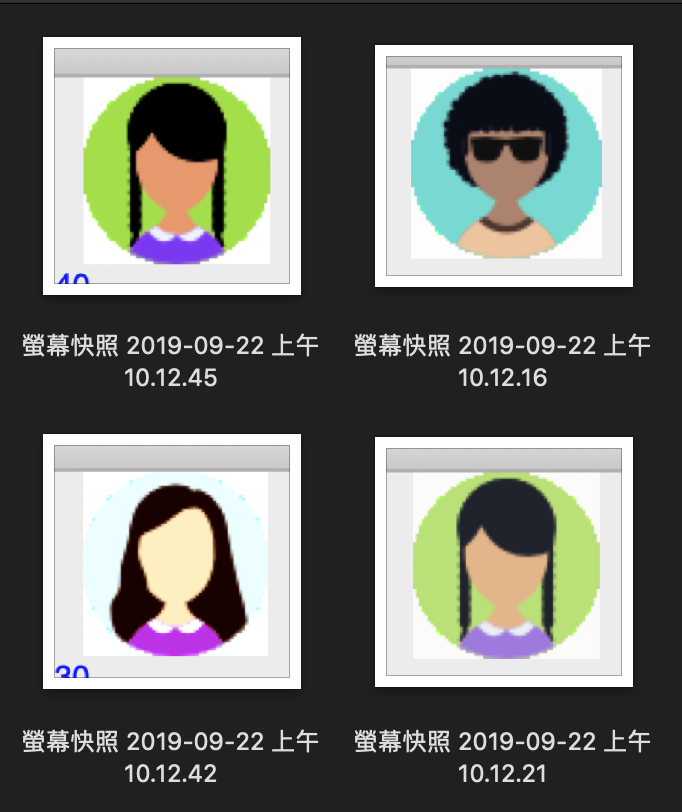
這就是 data augmentation 和 TFRecordDataset 使用的方法,以上有關資料集的處理就介紹到這邊囉!

 iThome鐵人賽