這次來練習一個側邊選單切版,參考影片是 Amos 老師的鐵人賽
https://www.youtube.com/watch?v=yB3_LtwBiaE
首先先把 HTML 架構寫好,這一部分非常重要,因為如果確認 HTML 的架構無誤,那就只要單純檢查 CSS 就可以了,
HTML 架構如下,圖示的部分是用 fontawesome ,可以上網去找 CDN 放進 head 內,找到喜歡的圖案,直接把連結複製貼上就可以用了!!是相當方便的功能,就不用一直畫 icon...
想呈現的畫面如下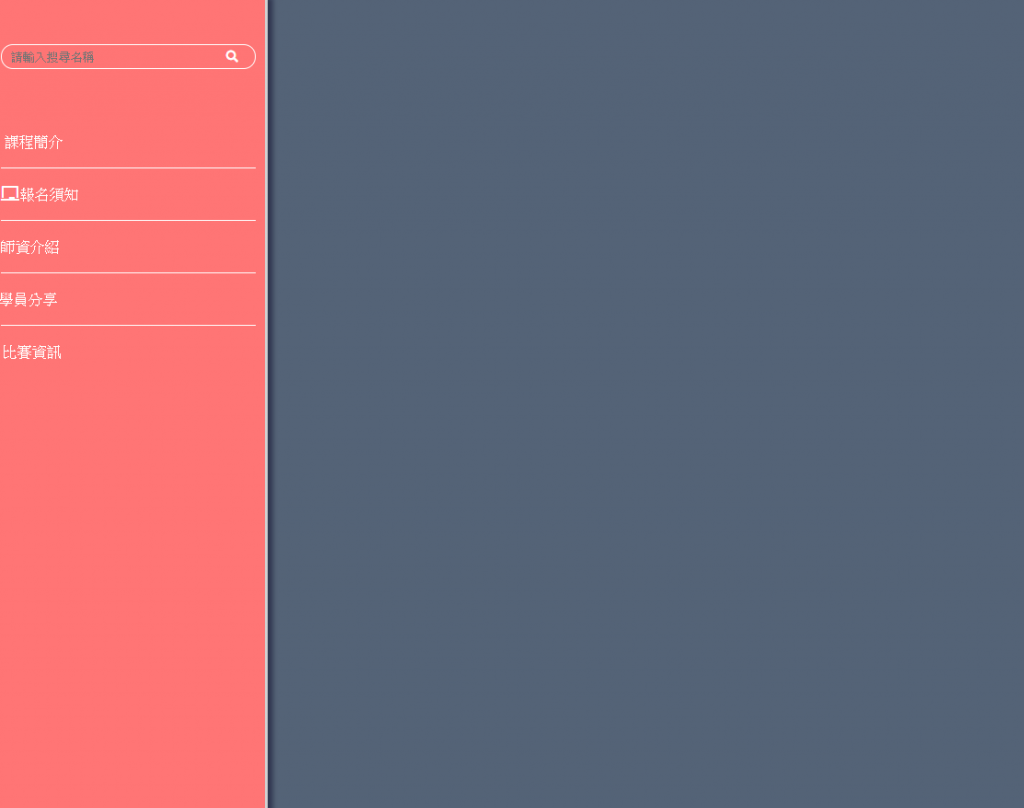
HTML 如下
<!DOCTYPE html>
<html lang="en">

<head>
    <meta charset="UTF-8">
    <meta name="viewport" content="width=device-width, initial-scale=1.0">
    <meta http-equiv="X-UA-Compatible" content="ie=edge">
    <link rel="stylesheet" href="css/all.css">
    <link rel="stylesheet" href="https://cdnjs.cloudflare.com/ajax/libs/font-awesome/5.11.2/css/all.css">
    <title>asideMenu</title>
</head>

<body>
    <div class="sideMenu">
        <form>
            <input type="search">
            <button><i class="fas fa-search"></i></button>
        </form>
        <nav>
            <a href="#"><i class="fas fa-sitemap"></i>課程簡介</a>
            <a href="#"><i class="fas fa-chalkboard"></i></i>報名須知</a>
            <a href="#"><i class="fas fa-book-reader"></i>師資介紹</a>
            <a href="#"><i class="fas fa-user-graduate"></i>學員分享</a>
            <a href="#"><i class="fas fa-trophy"></i>比賽資訊</a>
        </nav>
    </div>
</body>

</html>
寫完檢查畫面會變下圖。嗯...架構差不多
再來優化一下畫面,先做幾個全域設定值
* {
    font-family: 'noto Sans TC', 'sans-serif';
}

html,
body {
    height: 100%;
}

body {
    background-color: #546377;
}

a {
    text-decoration: none;
}
其實前面還有 CSS reset ,但因為很冗長,就不貼上來了,以上是這次 aside 會用到的全域設定。
再來要優化內容
.sideMenu {
    width: 300px;
    height: 100%;
    background-color: #ff7575;
    border-right: 3px solid #d1d1d1;
    display: flex;
    //讓 sideMenu 裡面的元素變成橫排
    flex-direction: column;
    //讓 flex 的方向變成直排
    padding: 50px 0;
    //因為有 boxsizing 的關係,所以不會有 Y 軸 bar
    box-shadow: 5px 0 5px hsla(240, 40%, 15%, .6);
    //H 為 hue(色相)、S 為 saturation(飽合度)、L 為 lightness(亮度),a透明度

    hsla 可以看一下這篇裡面寫得滿清楚,這邊就不再贅述
    https://abgne.tw/css/css3-lab/css3-hsl-hsla-color.html

    也可以在W3School 玩一下
    https://www.w3schools.com/cssref/tryit.asp?filename=trycss_func_hsla


    form {
        display: flex;
        //讓 form 裡面的元素橫向排列
        margin: 0 10px 50px;
        border-radius: 100px;
        border: 1px solid #fff;

        input {
            width: 230px;
        }

        button {
            width: 50px;
        }

        input,
        button {
            border: none;
            padding: 5px 10px;
            background-color: transparent;
            color: #fff;

        }
        //把共同的屬性拉出來寫一次就好,CSS會比較漂亮且清楚

        input:focus,
        button:focus{
            outline: none;
            //讓表單不要有 focus 效果
        }
    }

}

nav {
    a {
        display: block;
        color: #fff;
        padding: 20px 10px;
        position: relative;
        .fas{
            margin-right: -1.1em;
            //用 margin 的特性往右拉負值,讓文字靠左對齊
            transform: scale(0);
            //使圖示消失
            transition: 0.3s;

         transform:scale 的特性可以看這篇
        }
        &:hover .fas{
            margin-right: 0em;
            //使文字回到原來的位置
            transform: scale(1)
            //使圖示出現
        }

        &+a::before {
            content: '';
            //要寫分隔線在選項中間,這邊使用偽元素呈現,使用偽元素一定要使用 content:'',不然不會有效果
            position: absolute;
            border-top: 1px solid #ffffff;
            left: 10px;
            right: 10px;
            top: 0px;
            //使用絕對定位方式編寫,因為 padding已設定左右 10px,所以左右邊要推擠 10px
            //然後使分隔線定位在 top:0px,固定在中間

        }
    }

}


    form {
        display: flex;
        //讓 form 裡面的元素橫向排列
        margin: 0 10px 50px;

        input {
            border: none;
            padding: 5px 10px;
            width: 230px;

        }

        button {
            border: none;
            padding: 5px 10px;
            width: 50px;
        }
    }

}

nav {
    a {
        display: block;
        color: #fff;
        padding: 20px 10px;
        position: relative;

        &+a::before {
            content: '';
            //要寫分隔線在選項中間,這邊使用偽元素呈現,使用偽元素一定要使用 content:'',不然不會有效果
            position: absolute;
            border-top: 1px solid #ffffff;
            left: 10px;
            right: 10px;
            top: 0px;
            //使用絕對定位方式編寫,因為 padding已設定左右 10px,所以左右邊要推擠 10px
            //然後使分隔線定位在 top:0px,固定在中間

        }
    }

}
滿有趣的一個練習
codepen https://codepen.io/hnzxewqw/pen/dybBqdx


 iThome鐵人賽