延續Day14 實作 ASP.NET Core 建立 Web API 教學,我們來看網頁發送API請求到後端,後端回傳資料,並呈現在網頁上面。
參考教學課程:使用 JavaScript 呼叫 ASP.NET Core web API
在本教學課程中,您會了解如何:
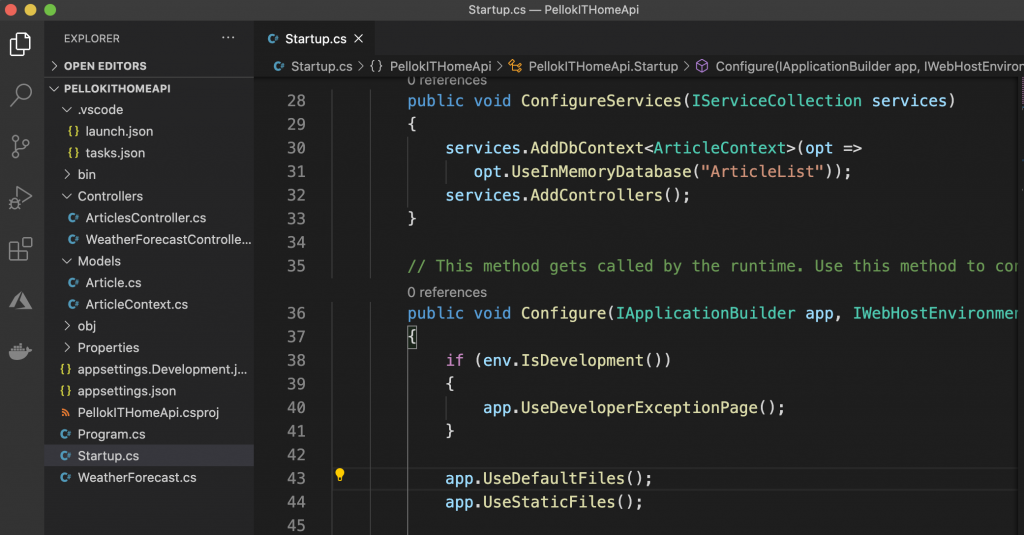
在Startup.cs檔案裡面的Configure Function 增加以下兩行
使用預設檔案,我們希望網站預設開啟index.html檔案
app.UseDefaultFiles();
使用靜態檔案,
app.UseStaticFiles();
public void Configure(IApplicationBuilder app, IWebHostEnvironment env)
{
    if (env.IsDevelopment())
    {
        app.UseDeveloperExceptionPage();
    }

    app.UseDefaultFiles();
    app.UseStaticFiles();

    app.UseHttpsRedirection();

    app.UseRouting();

    app.UseAuthorization();

    app.UseEndpoints(endpoints =>
    {
        endpoints.MapControllers();
    });
}
專案根目錄中建立 wwwroot 資料夾
在wwwroot資料夾內建立js資料夾和css資料夾,用來存放js和css等檔案
mkdir wwwroot
mkdir wwwroot/js
mkdir wwwroot/css
在wwwroot目錄下創建 index.html檔案
touch wwwroot/index.html
以下列標記取代 index.html 的內容(一個標準的HTML檔案):
<!DOCTYPE html>
<html>
<head>
    <meta charset="UTF-8">
    <title>To-do CRUD</title>
    <link rel="stylesheet" href="css/site.css" />
</head>
<body>
    <h1>To-do CRUD</h1>
    <h3>Add</h3>
    <form action="javascript:void(0);" method="POST" onsubmit="addItem()">
        <input type="text" id="add-name" placeholder="New to-do">
        <input type="submit" value="Add">
    </form>

    <div id="editForm">
        <h3>Edit</h3>
        <form action="javascript:void(0);" onsubmit="updateItem()">
            <input type="hidden" id="edit-id">
            <input type="checkbox" id="edit-isComplete">
            <input type="text" id="edit-name">
            <input type="submit" value="Save">
            <a onclick="closeInput()" aria-label="Close">✖</a>
        </form>
    </div>

    <p id="counter"></p>

    <table>
        <tr>
            <th>Is Complete?</th>
            <th>Name</th>
            <th></th>
            <th></th>
        </tr>
        <tbody id="todos"></tbody>
    </table>

    <script src="js/site.js" asp-append-version="true"></script>
    <script type="text/javascript">
        getItems();
    </script>
</body>
</html>
在 wwwroot/js 資料夾創建 site.js檔案
touch wwwroot/js/site.js
以下列程式碼取代 site.js 的內容
const uri = 'api/Articles';
let todos = [];

function getItems() {
  fetch(uri)
    .then(response => response.json())
    .then(data => _displayItems(data))
    .catch(error => console.error('Unable to get items.', error));
}

function addItem() {
  const addNameTextbox = document.getElementById('add-name');

  const item = {
    isComplete: false,
    name: addNameTextbox.value.trim()
  };

  fetch(uri, {
    method: 'POST',
    headers: {
      'Accept': 'application/json',
      'Content-Type': 'application/json'
    },
    body: JSON.stringify(item)
  })
    .then(response => response.json())
    .then(() => {
      getItems();
      addNameTextbox.value = '';
    })
    .catch(error => console.error('Unable to add item.', error));
}

function deleteItem(id) {
  fetch(`${uri}/${id}`, {
    method: 'DELETE'
  })
  .then(() => getItems())
  .catch(error => console.error('Unable to delete item.', error));
}

function displayEditForm(id) {
  const item = todos.find(item => item.id === id);

  document.getElementById('edit-name').value = item.name;
  document.getElementById('edit-id').value = item.id;
  document.getElementById('edit-isComplete').checked = item.isComplete;
  document.getElementById('editForm').style.display = 'block';
}

function updateItem() {
  const itemId = document.getElementById('edit-id').value;
  const item = {
    id: parseInt(itemId, 10),
    isComplete: document.getElementById('edit-isComplete').checked,
    name: document.getElementById('edit-name').value.trim()
  };

  fetch(`${uri}/${itemId}`, {
    method: 'PUT',
    headers: {
      'Accept': 'application/json',
      'Content-Type': 'application/json'
    },
    body: JSON.stringify(item)
  })
  .then(() => getItems())
  .catch(error => console.error('Unable to update item.', error));

  closeInput();

  return false;
}

function closeInput() {
  document.getElementById('editForm').style.display = 'none';
}

function _displayCount(itemCount) {
  const name = (itemCount === 1) ? 'to-do' : 'to-dos';

  document.getElementById('counter').innerText = `${itemCount} ${name}`;
}

function _displayItems(data) {
  const tBody = document.getElementById('todos');
  tBody.innerHTML = '';

  _displayCount(data.length);

  const button = document.createElement('button');

  data.forEach(item => {
    let isCompleteCheckbox = document.createElement('input');
    isCompleteCheckbox.type = 'checkbox';
    isCompleteCheckbox.disabled = true;
    isCompleteCheckbox.checked = item.isComplete;

    let editButton = button.cloneNode(false);
    editButton.innerText = 'Edit';
    editButton.setAttribute('onclick', `displayEditForm(${item.id})`);

    let deleteButton = button.cloneNode(false);
    deleteButton.innerText = 'Delete';
    deleteButton.setAttribute('onclick', `deleteItem(${item.id})`);

    let tr = tBody.insertRow();

    let td1 = tr.insertCell(0);
    td1.appendChild(isCompleteCheckbox);

    let td2 = tr.insertCell(1);
    let textNode = document.createTextNode(item.name);
    td2.appendChild(textNode);

    let td3 = tr.insertCell(2);
    td3.appendChild(editButton);

    let td4 = tr.insertCell(3);
    td4.appendChild(deleteButton);
  });

  todos = data;
}
若要在本機測試 HTML 網頁,可能需要變更 ASP.NET Core 專案的啟動設定:
開啟 Properties\launchSettings.json。
移除 launchUrl 屬性,以強制在專案的預設檔案index.html開啟應用程式。
fetch(uri)
  .then(response => response.json())
  .then(data => _displayItems(data))
  .catch(error => console.error('Unable to get items.', error));
function addItem() {
  const addNameTextbox = document.getElementById('add-name');

  const item = {
    isComplete: false,
    name: addNameTextbox.value.trim()
  };

  fetch(uri, {
    method: 'POST',
    headers: {
      'Accept': 'application/json',
      'Content-Type': 'application/json'
    },
    body: JSON.stringify(item)
  })
    .then(response => response.json())
    .then(() => {
      getItems();
      addNameTextbox.value = '';
    })
    .catch(error => console.error('Unable to add item.', error));
}
fetch(`${uri}/${itemId}`, {
  method: 'PUT',
  headers: {
    'Accept': 'application/json',
    'Content-Type': 'application/json'
  },
  body: JSON.stringify(item)
})
.then(() => getItems())
.catch(error => console.error('Unable to update item.', error));
fetch(`${uri}/${id}`, {
  method: 'DELETE'
})
.then(() => getItems())
.catch(error => console.error('Unable to delete item.', error));
創建4筆資料: a, b, c, d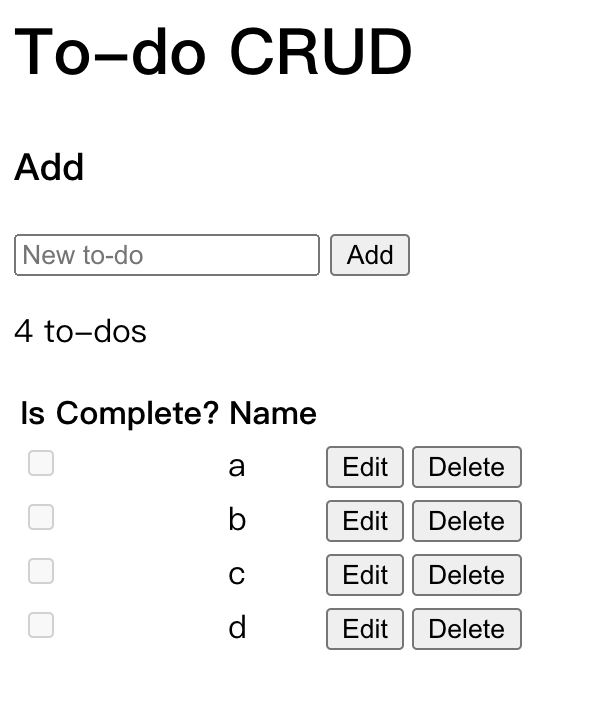
編輯: a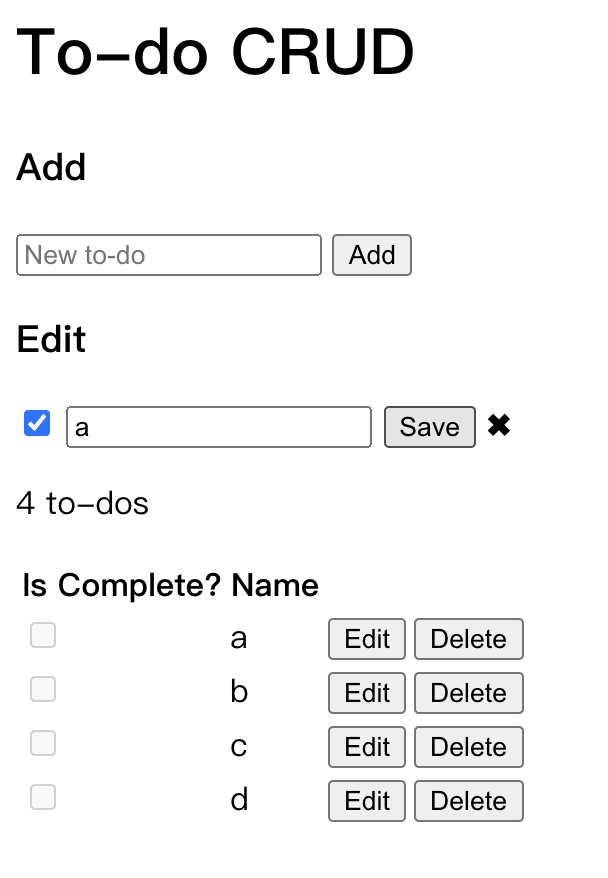
設定為完成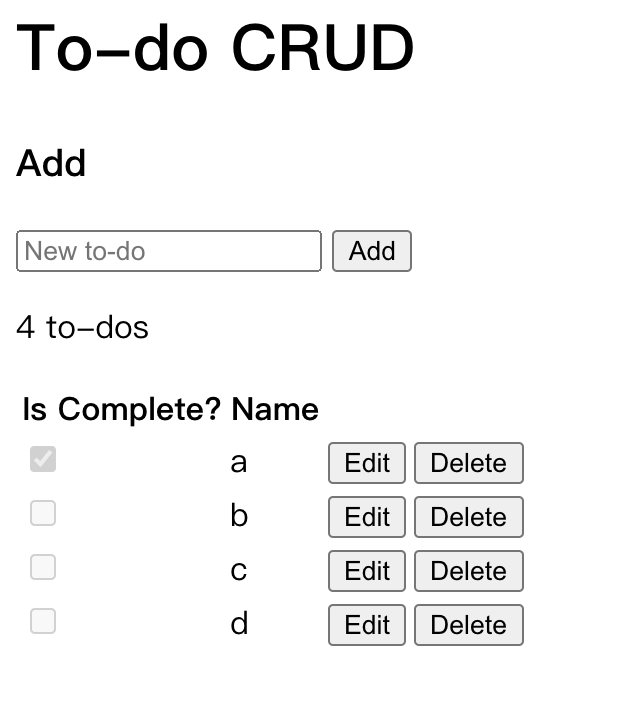
增加 .gitignore 檔案
.vscode/*
bin/*
obj/*
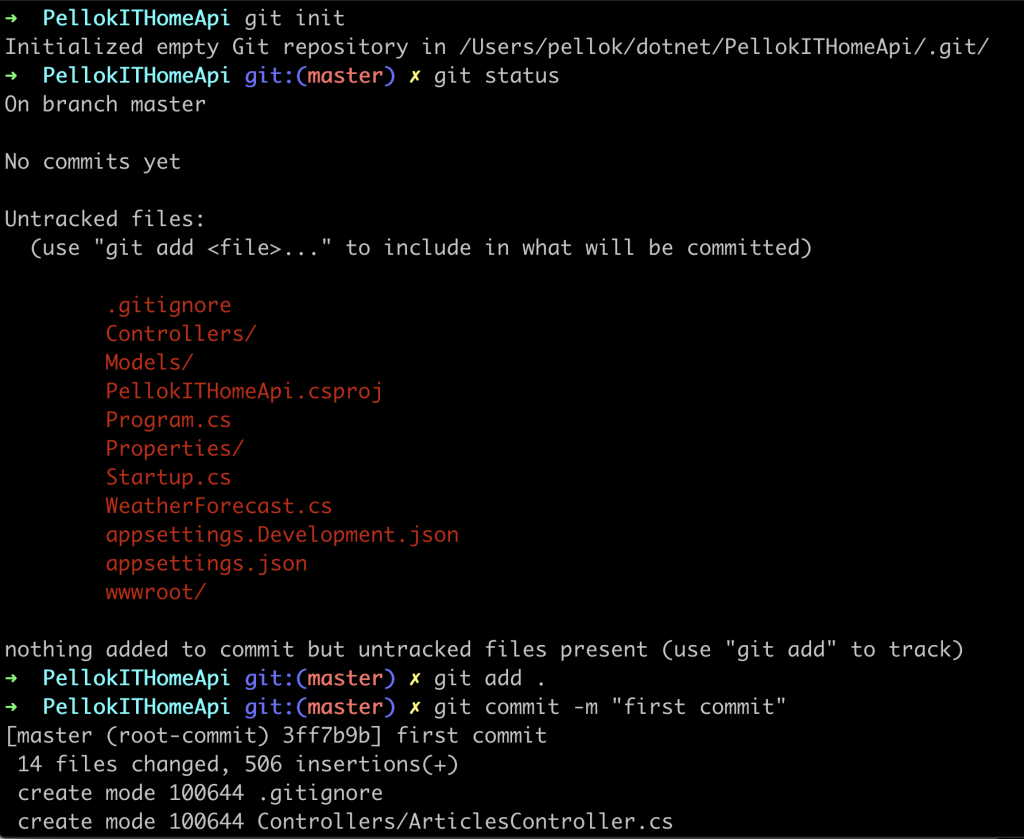
使用 Git
#初始化
git init
# 查看狀態
git status
# 加入索引
git add .
# 提交版本
git commit -m "first commit"
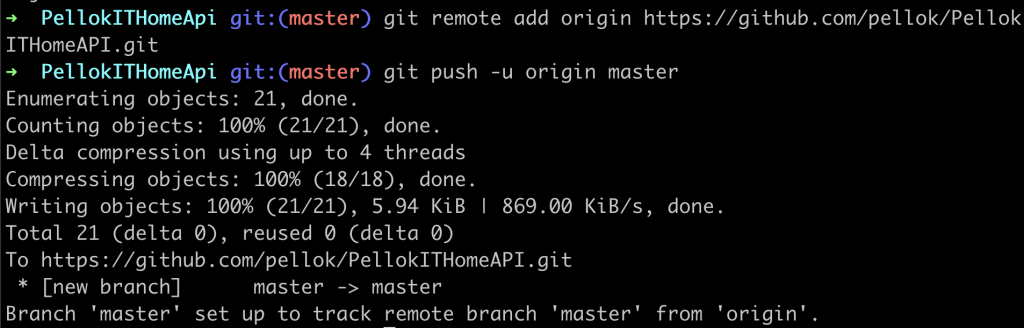
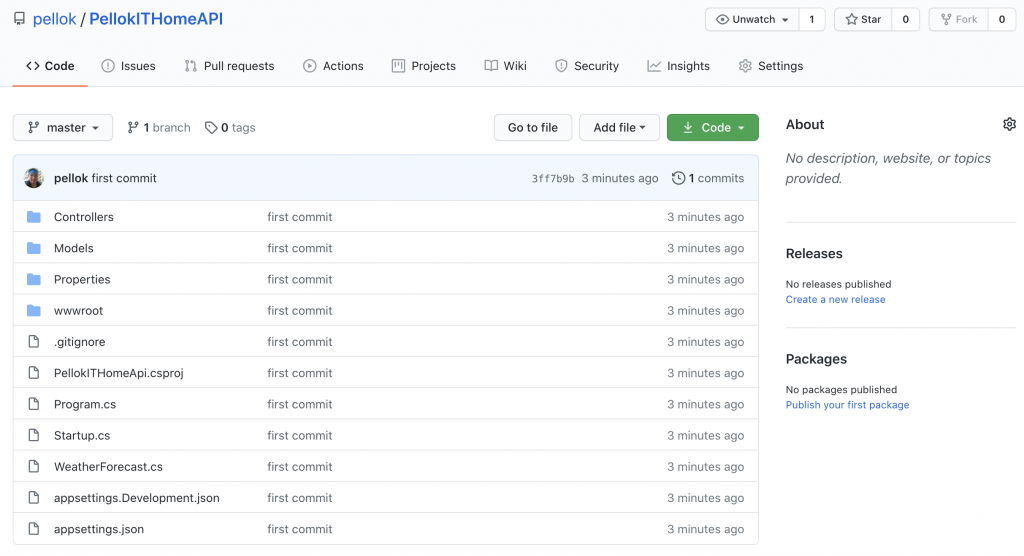
上傳到遠端倉庫GitHub
# 加入 GitHub 遠端連結
git remote add origin https://github.com/pellok/PellokITHomeAPI.git
# 上傳到遠端
git push -u origin master
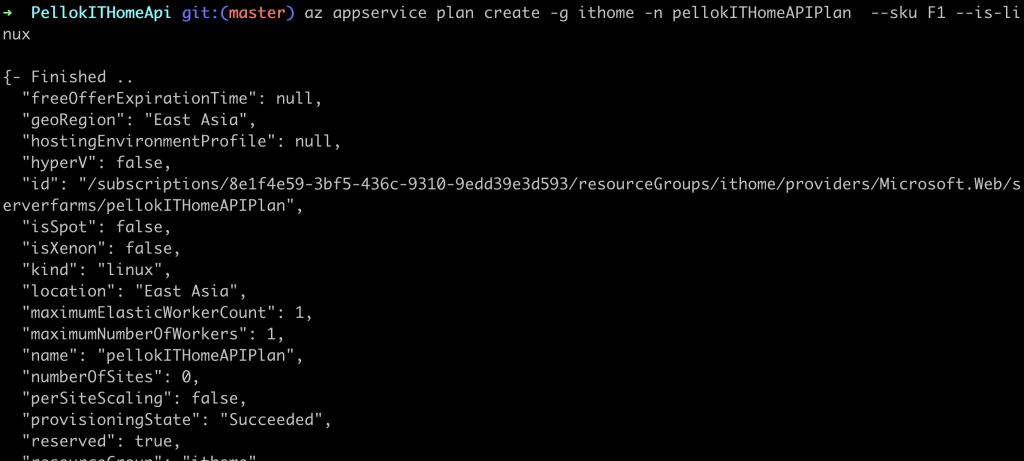
詳細可以看 Day13 部署 Webapp 使用 SQL服務的設定本機 git 部署
# 創建 pellokITHomeAPIPlan 方案
az appservice plan create -g ithome -n pellokITHomeAPIPlan --sku F1 --is-linux
# 創建 pellokITHomeAPI webapp服務
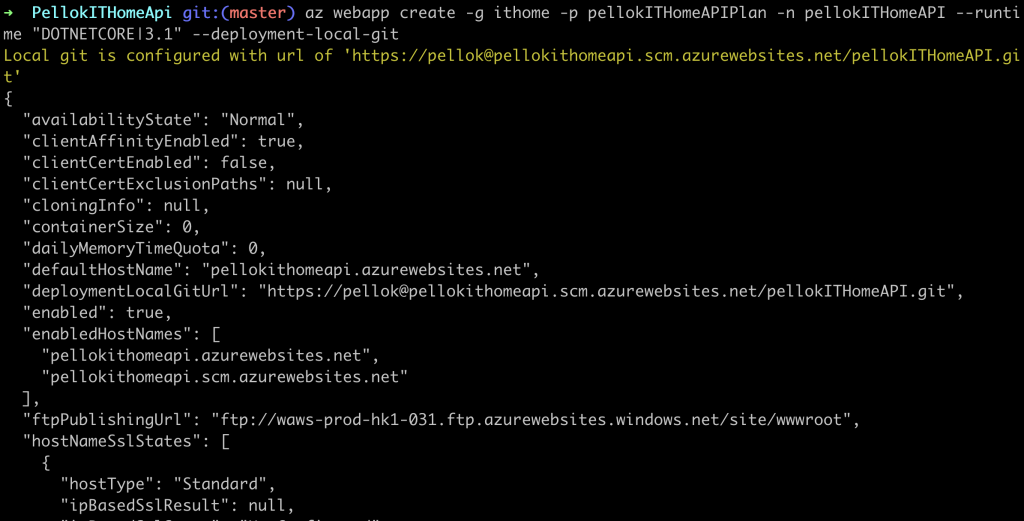
az webapp create -g ithome -p pellokITHomeAPIPlan -n pellokITHomeAPI --runtime "DOTNETCORE|3.1" --deployment-local-git
# 增加遠端位置
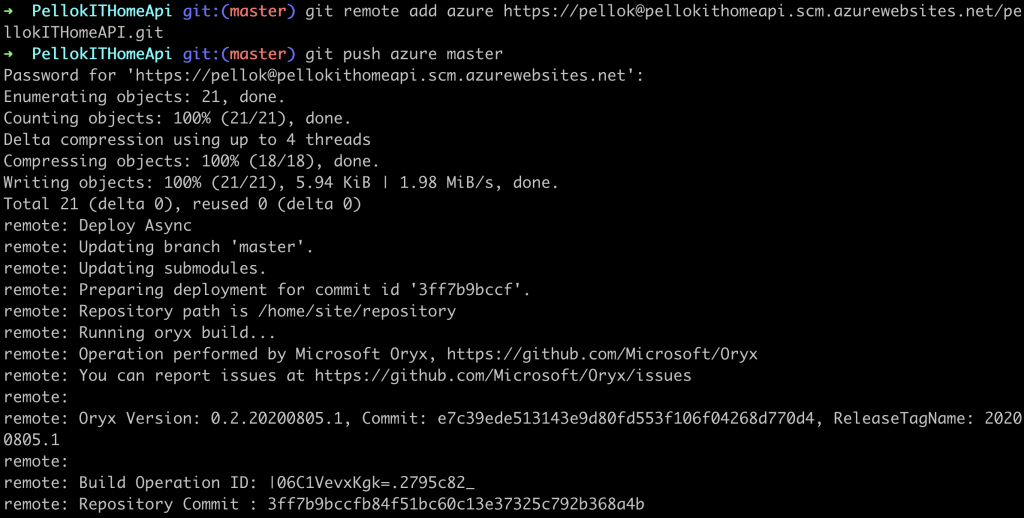
git remote add azure https://pellok@pellokithomeapi.scm.azurewebsites.net/pellokITHomeAPI.git
# 上傳到遠端,會詢問密碼,在上面的設定本機 git 部署有設定
git push azure master
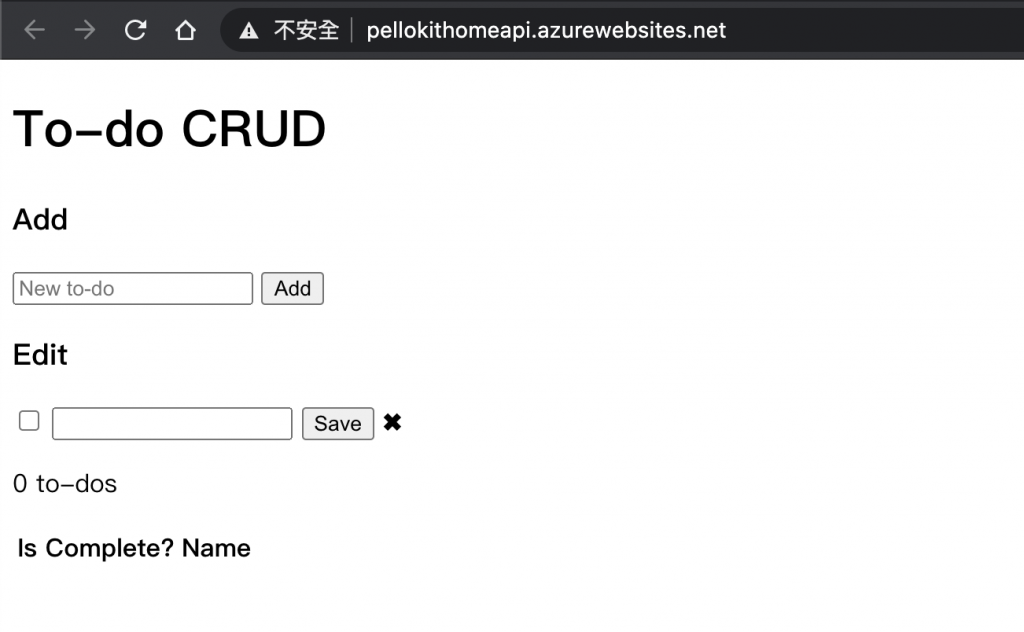
az webapp browse -g ithome -n pellokITHomeAPI
上一篇 Day15 網頁基礎知識
下一篇 Day17 實作 Identity ASP.NET Core


 iThome鐵人賽