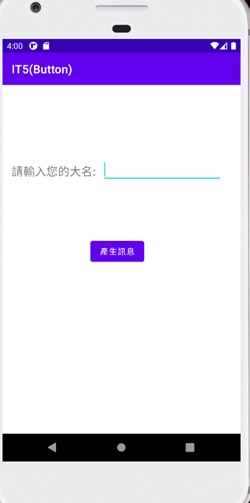
今天要介紹的是Button這個常在程式中能看到的元件,在Button的屬性設定上許多都與之前介紹的元件大致相同,但一個按鈕最重要的就是要有一個功能,所以今天就來講一下如何設定按鈕的功能。首先透過前兩天介紹的元件來簡單設計一個介面。
<androidx.constraintlayout.widget.ConstraintLayout
    xmlns:android="http://schemas.android.com/apk/res/android"
    xmlns:app="http://schemas.android.com/apk/res-auto"
    xmlns:tools="http://schemas.android.com/tools"
    android:layout_width="match_parent"
    android:layout_height="match_parent"
    tools:context=".MainActivity">
    <TextView
        android:id="@+id/tx2"
        android:layout_width="wrap_content"
        android:layout_height="wrap_content"
        android:layout_marginStart="16dp"
        android:layout_marginLeft="16dp"
        android:layout_marginTop="136dp"
        android:text="請輸入您的大名:"
        android:textSize="20dp"
        app:layout_constraintStart_toStartOf="parent"
        app:layout_constraintTop_toTopOf="parent" />

    <EditText
        android:id="@+id/et1"
        android:layout_width="wrap_content"
        android:layout_height="wrap_content"
        android:layout_marginStart="172dp"
        android:layout_marginLeft="172dp"
        android:layout_marginTop="124dp"
        android:ems="10"
        android:inputType="textPersonName"
        app:layout_constraintStart_toStartOf="parent"
        app:layout_constraintTop_toTopOf="parent" />

    <Button
        android:id="@+id/button"
        android:layout_width="wrap_content"
        android:layout_height="wrap_content"
        android:layout_marginStart="152dp"
        android:layout_marginLeft="152dp"
        android:layout_marginTop="264dp"
        android:onClick="show"
        android:text="產生訊息"
        app:backgroundTint="@null"
        android:background="@drawable/buttonframe"
        app:layout_constraintStart_toStartOf="parent"
        app:layout_constraintTop_toTopOf="parent" />

</androidx.constraintlayout.widget.ConstraintLayout>
在button中,比較重要的是按紐事件,而android:onClick=”” 這裡設定的就是按鈕事件的函數名稱,透過這行取得按鈕的事件功能。
接者來MainActivity.java中設定功能的函數:
public class MainActivity extends AppCompatActivity {
    EditText et1;                       //變數宣告
    @Override
    protected void onCreate(Bundle savedInstanceState) {
        super.onCreate(savedInstanceState);
        setContentView(R.layout.activity_main);
        et1=(EditText)findViewById(R.id.et1);       //取的物件
    }

    public void show(View v){
        Toast tos = Toast.makeText(this,et1.getEditableText()+"您好",Toast.LENGTH_SHORT);
        tos.show();
    }
}
這裡我用Toast產生一個簡單的提醒訊息。
Toast tos = Toast.makeText(this,et1.getEditableText()+"您好",Toast.LENGTH_SHORT);
首先宣告變數tos(型態為Toast)並透過Toast.makeText()並設定內容,括號內分別需要寫入Context(MainActivity.this)、要顯示的Text(et1.getEditableText())、最後則是顯示的持續時間(Toast.LENGTH_SHORT),此設定大約兩秒。這樣就完成Button的功能設定了。以下是效果展示: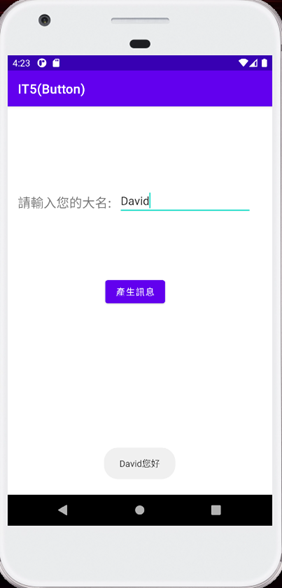
Button就簡單介紹到這裡,謝謝大家