iT邦幫忙

2021 iThome 鐵人賽

DAY 28
0

https://ithelp.ithome.com.tw/upload/images/20210929/20100951afkBYYXe9Z.jpg

今天我們要來介紹 IAM Role 的實作示範,那我們開始吧!

首先使用 Admin 登入,進入 Conole 頁面搜尋 IAM 並點擊,如下圖:
https://ithelp.ithome.com.tw/upload/images/20210913/20100951CHFNw2Y1PG.png

創建 IAM Role

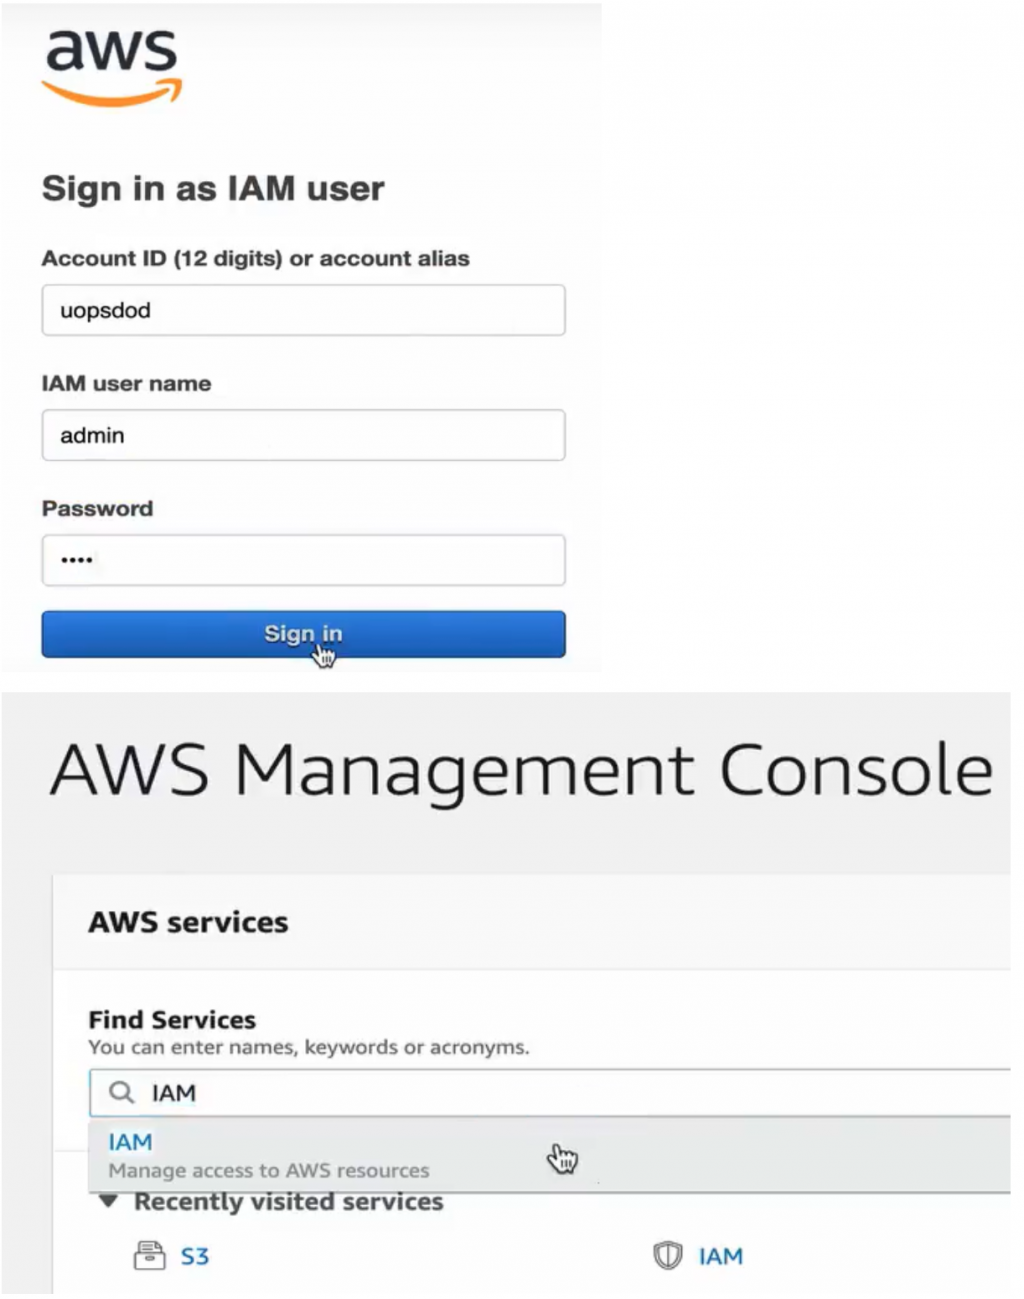
進入之後,點左側表 Rules,並按下 Create role 來建立一個新的 Role,如下圖:
https://ithelp.ithome.com.tw/upload/images/20210913/20100951zUQ10D0wx4.png

Step1: Select type of trusted entity

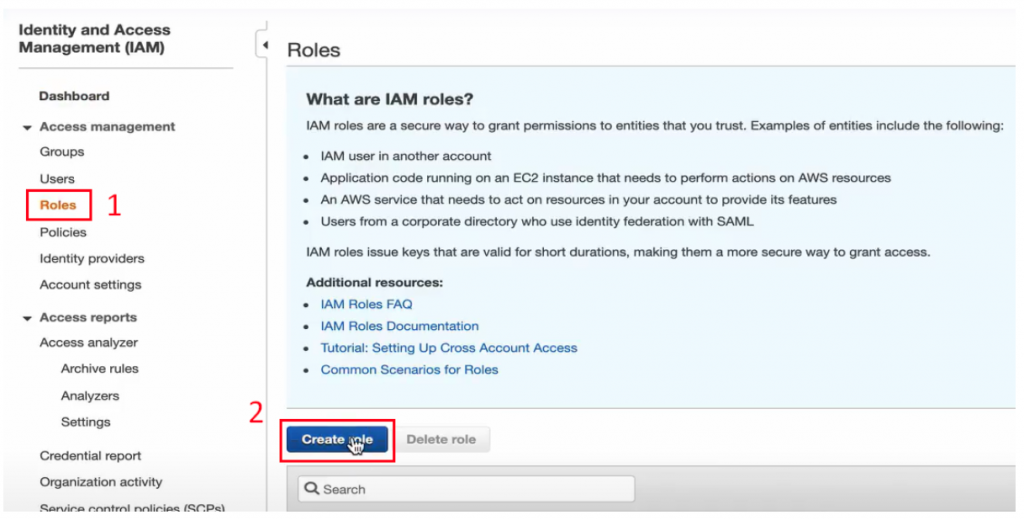
第一步,選擇 Type,上方會有四個選項,除了 AWS service 以外的三個選項都是比較高階的主題,我這邊選擇基礎的 AWS service。

由於這次要創造 Role 的 AWS Service 是 EC2,因此 Choose a use case這邊就選擇 EC2,如下圖:
https://ithelp.ithome.com.tw/upload/images/20210913/20100951ebr0lnuZKV.png

Step2: Attach permissions policies

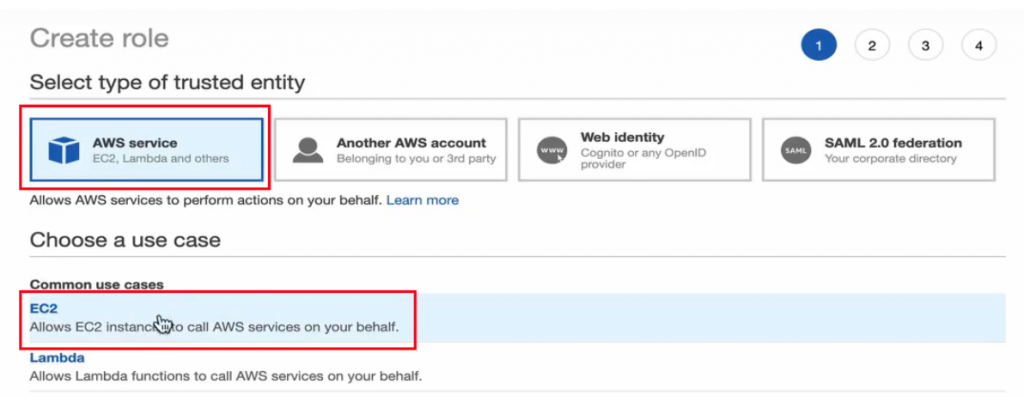
第二步則是要決定這個給 EC2 用的 Role,要有什麼權限,在這邊我要給他 S3 的權限,所以搜尋 S3 並選 AmazonS3FullAccess,如下圖:
https://ithelp.ithome.com.tw/upload/images/20210913/20100951HMolrEOlpn.png

Step3: Add tags

此步驟預設即可,下一步。

Step4: Review

第四步可以給他 Role name,我叫他 ec2role-s3fullacces,在這邊也可以看到在 Step2 加上去的 Policy (AmazonS3FullAccess),如下圖:
https://ithelp.ithome.com.tw/upload/images/20210913/20100951m6aEVG0BtW.png

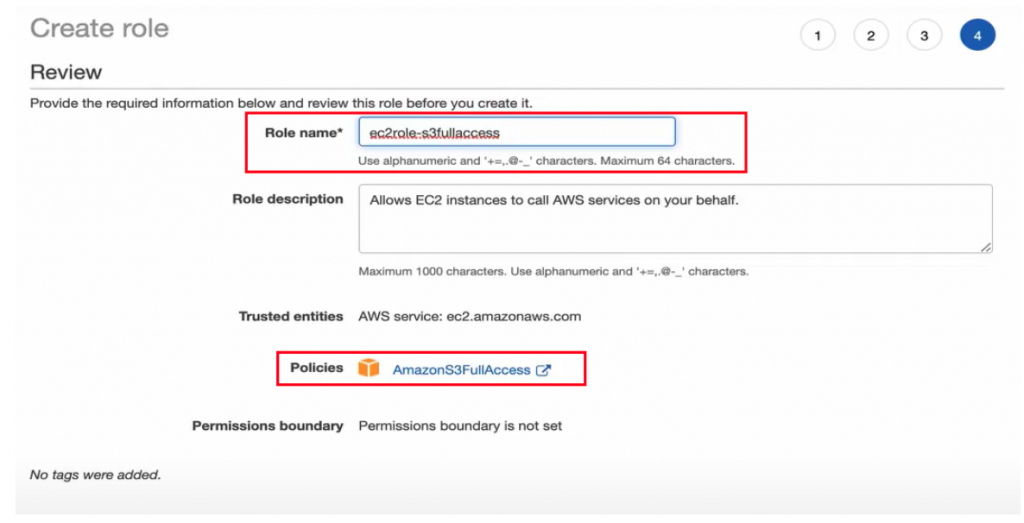
回到主頁面後直接搜尋 ec2role,就會看到剛剛所創立的 ec2role-s3fullacces,如下圖:
https://ithelp.ithome.com.tw/upload/images/20210913/20100951doaQ6939go.png

點擊 Role name 可以看到細部資訊,如下圖:
https://ithelp.ithome.com.tw/upload/images/20210913/20100951f8krO0tsi2.png

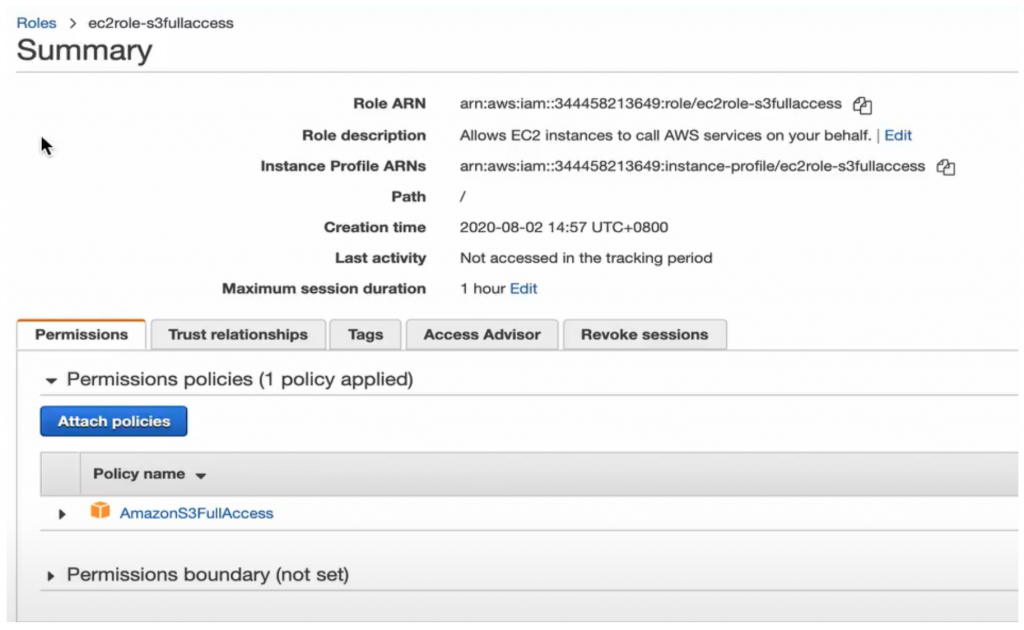
到這邊,就成功建立了一個給 EC2 使用的 Role。

建立 VPC 環境

首先點左上角 Service,搜尋 VPC 並在新分頁開啟,如下圖:
https://ithelp.ithome.com.tw/upload/images/20210913/20100951KNuNtPycsL.png

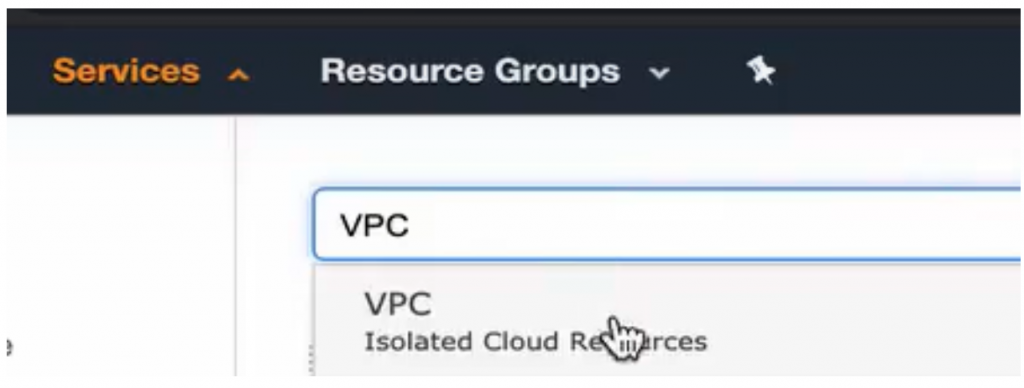
我們首先到 AWS Console 為 EC2 創造 VPC 環境,到 VPC 頁面之後按下 Launch VPC Wizard,如下圖。
https://ithelp.ithome.com.tw/upload/images/20210913/20100951Dbv7JkZjQu.png

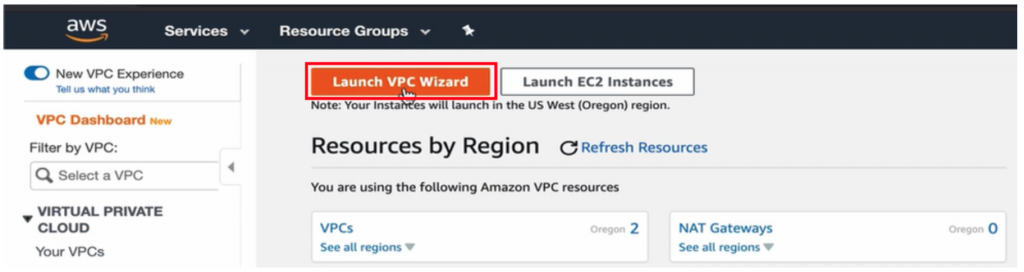
進去之後能幫我們快速建立一個環境,選擇下圖紅圈框起的 VPC with a Single Public Subnet,我們要將 EC2 放在一個 Public Subnet 裡面,然後點擊 Select。
https://ithelp.ithome.com.tw/upload/images/20210913/20100951vQA9Li01vx.png

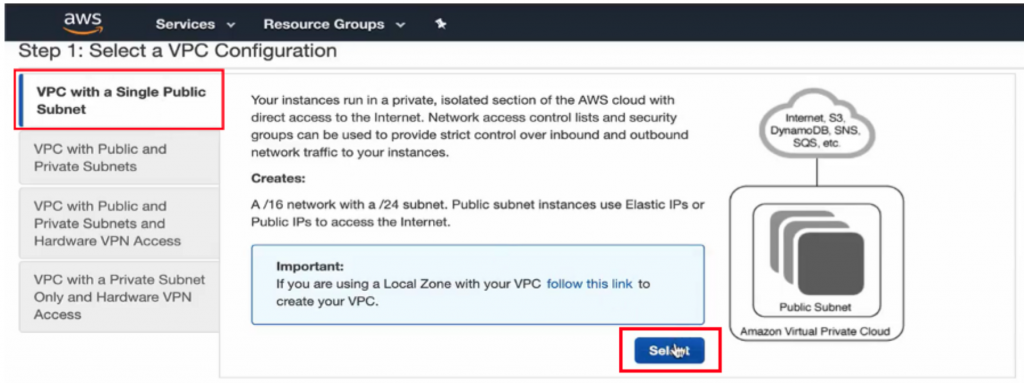
接著,給他一個 VPC name,這邊我叫他 vpc-iam-demo,好的就可以按下 Create VPC,如下圖:
https://ithelp.ithome.com.tw/upload/images/20210913/20100951q150JsCAhA.png

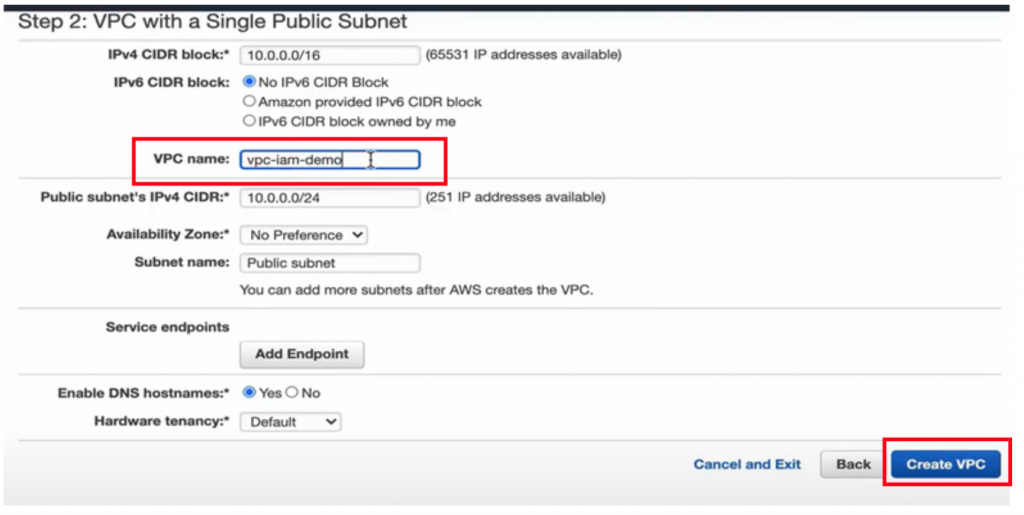
若創建完後看到 State 呈現 availiable,就代表成功創立了,如下圖:
https://ithelp.ithome.com.tw/upload/images/20210913/20100951eiVJ5mTPNt.png

建立 EC2 Instance 並套用 IAM Role

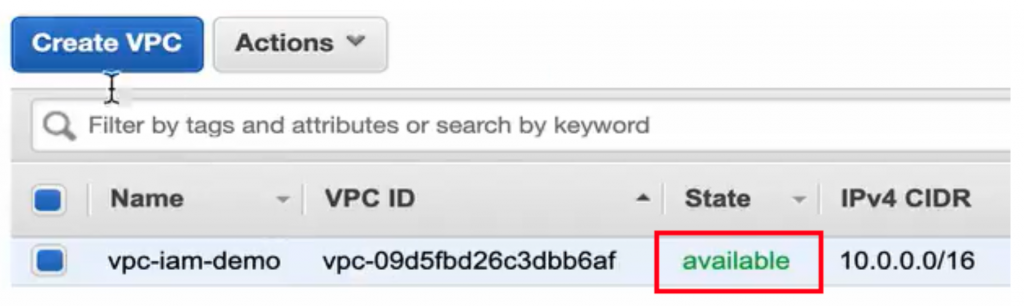
接下來按 Service,搜尋 EC2 並點擊,如下圖:
https://ithelp.ithome.com.tw/upload/images/20210913/20100951dU3RYuvS23.png

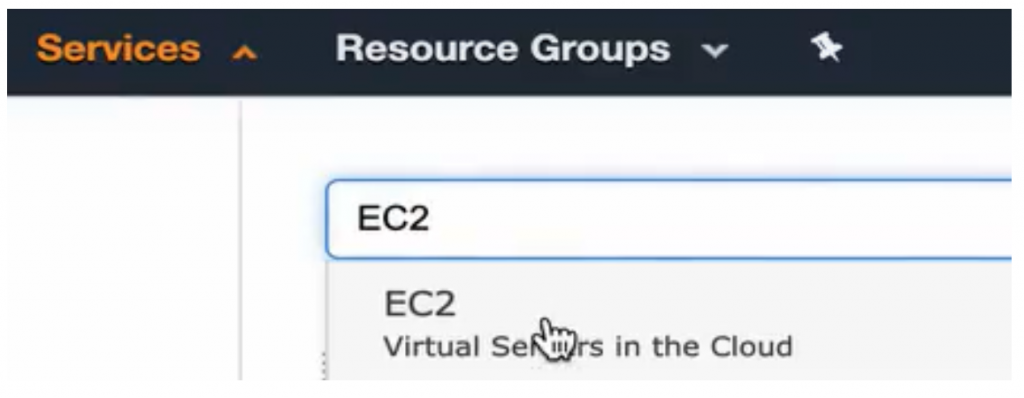
進到 EC2 頁面後點左側列表 Instances,並按下 Launch Instance,如下圖:
https://ithelp.ithome.com.tw/upload/images/20210913/20100951iAZujxDa7d.png

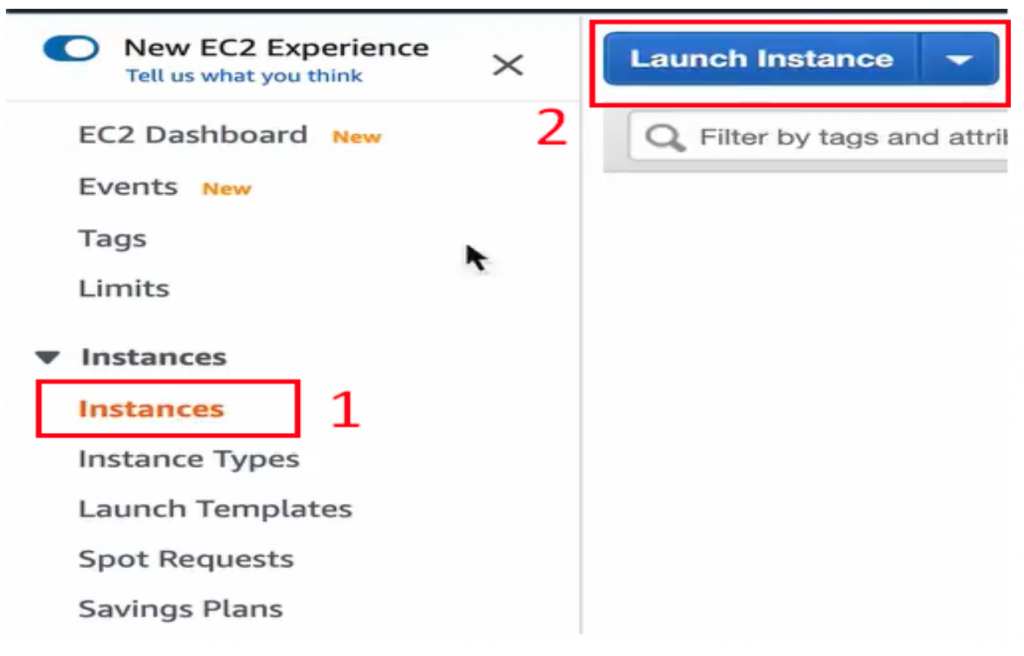
建立 Instance 的步驟與詳細介紹可參考〖實作示範〗EC2儲存資源 — EBS Volume 建立與使用 part 1,本篇只做簡單介紹。

Step1: 選擇 Quick Start 的第一個 Linux AMI,如下圖:
https://ithelp.ithome.com.tw/upload/images/20210913/20100951QeHJztp25g.png

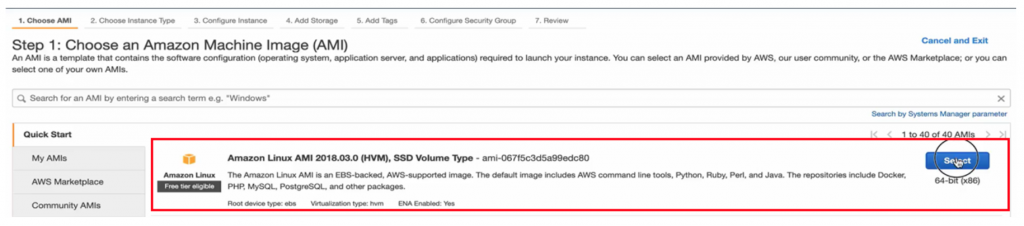
Step2: Instance Type 預設即可,不做調整。

Step3: VPC 使用上面建立的(vpc-iam-demo)(圖#1),並給他一個 Public IP (圖#2),這邊特別注意到,本篇的重點是 IAM Role,要將剛剛建議的 IAM Role 套用到這台 EC2 Instance 上面(圖#3),所以選擇創立的 ec2role-s3fullaccess,如下圖:
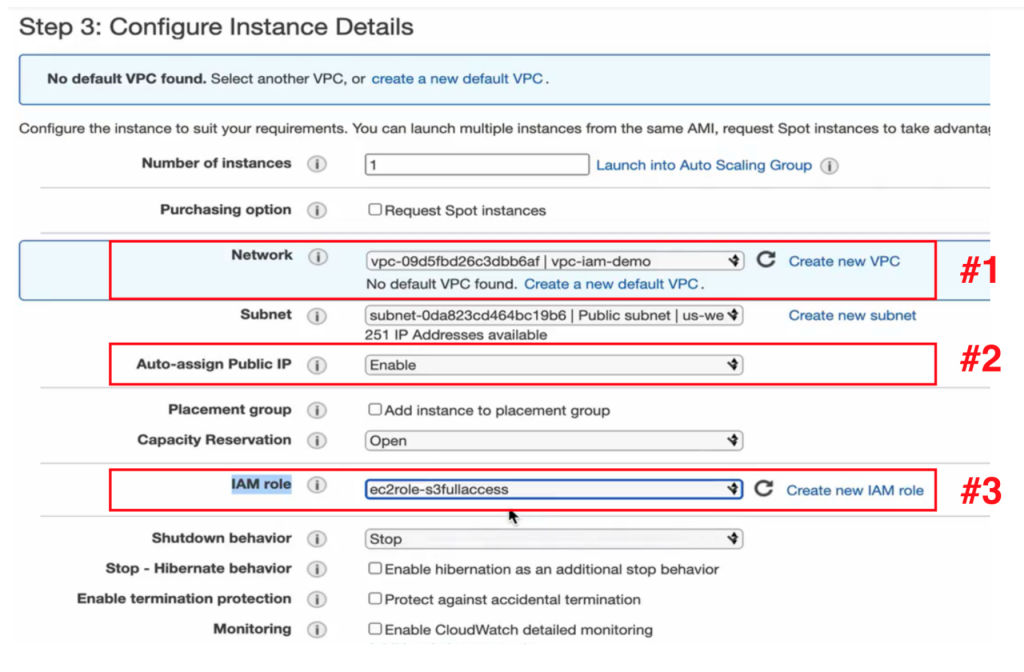
https://ithelp.ithome.com.tw/upload/images/20210913/20100951UrQRdsDr6d.png

Step4、Step5: 預設即可。

Step6: Security Group 有預設的 SSH 就夠用了,如下圖:
https://ithelp.ithome.com.tw/upload/images/20210913/20100951bBTxDvCgLE.png

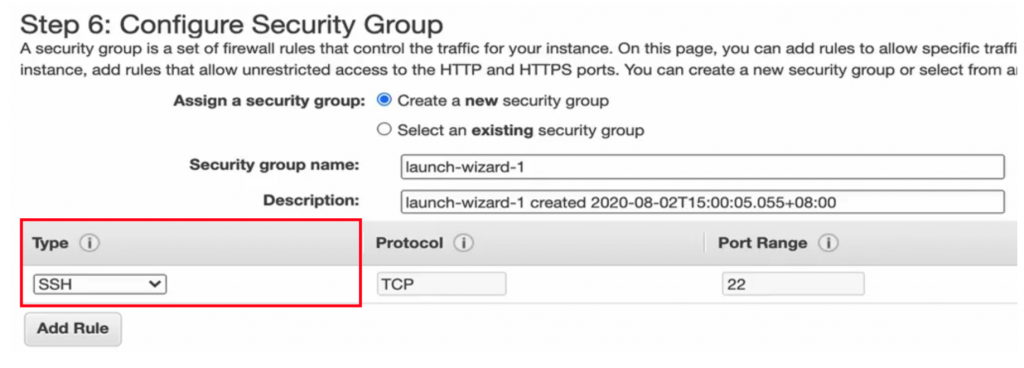
Step7: 按下 Launch 後 (圖#1),給他一個新的 Key pair,我叫他 keypair-iam-demo-001 (圖#2),記得 Download Key Pair,之後會用到。好了之後按 Launch Instnces (圖#3)
https://ithelp.ithome.com.tw/upload/images/20210913/20100951CoT80FAlLP.png

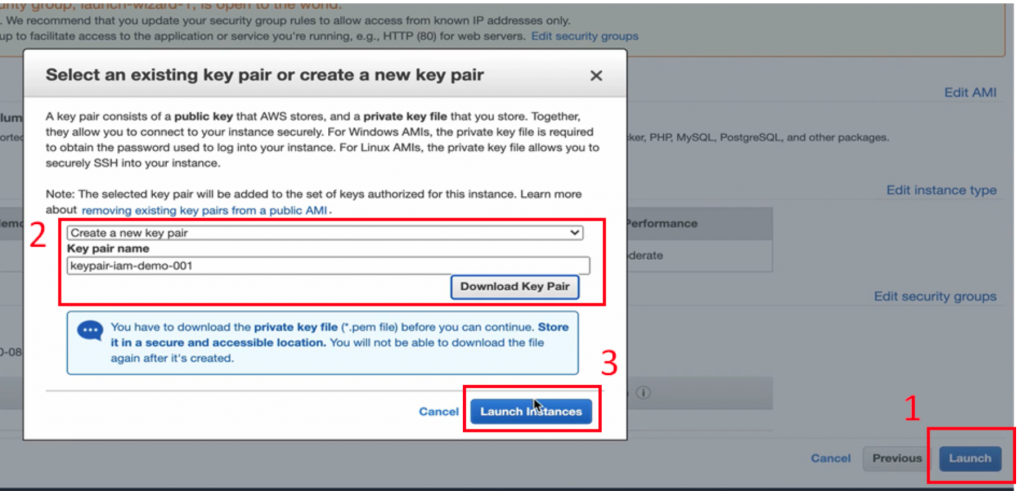
按下 View Instance 後,就看到 EC2 啟起來了,狀態為 running (圖#1),並在同一個頁面下方的解釋欄用滾輪往下拉,就會看到有一條 IAM Role,是我們剛剛所套用上去的,他將會給這台 EC2 Instance 去使用 S3 服務的權限(圖#2)。
https://ithelp.ithome.com.tw/upload/images/20210913/20100951hBOuxHVTyE.png

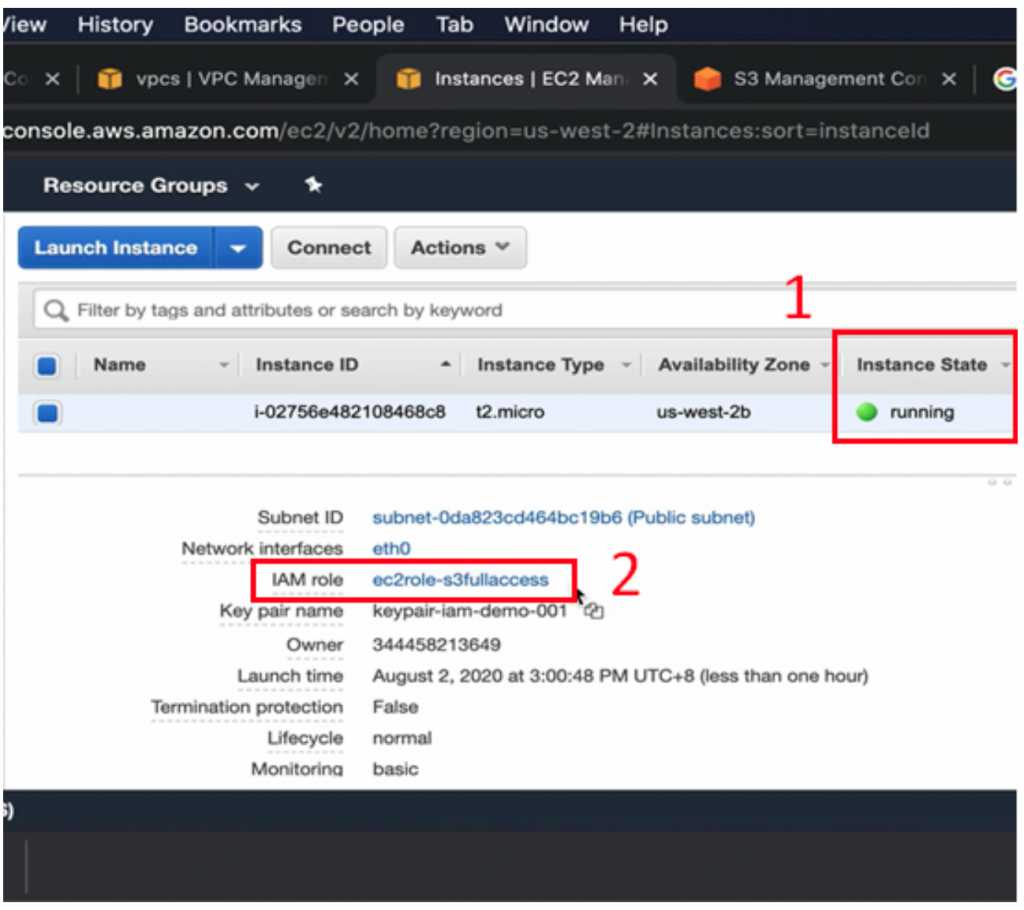
開啟 Terminal,cd 到下載 .pem File 的地方(我的是在 Download 資料夾裡面),如下圖:
https://ithelp.ithome.com.tw/upload/images/20210913/20100951K5Kv6E3nCZ.png

回到 EC2 頁面,點 Connect (圖#1),並複製 chmod 指令(圖#2)
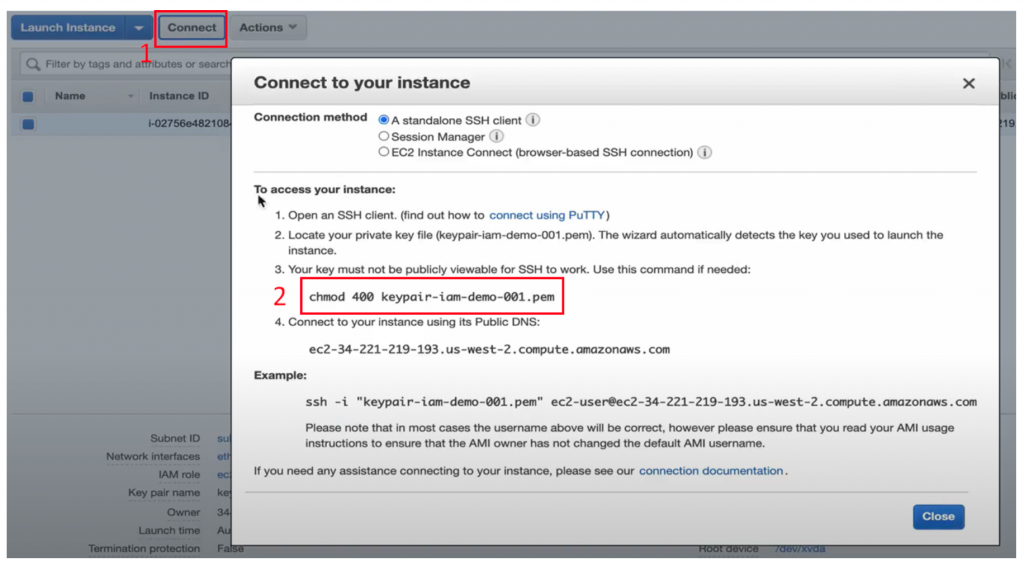
https://ithelp.ithome.com.tw/upload/images/20210913/20100951VJU0J4efMP.png

再回到 Terminal 貼上執行。
https://ithelp.ithome.com.tw/upload/images/20210913/20100951NRbtQiQPnr.png

再次回到 EC2 介面複製 SSH 指令,如下圖。
https://ithelp.ithome.com.tw/upload/images/20210913/20100951brgyi17WCK.png

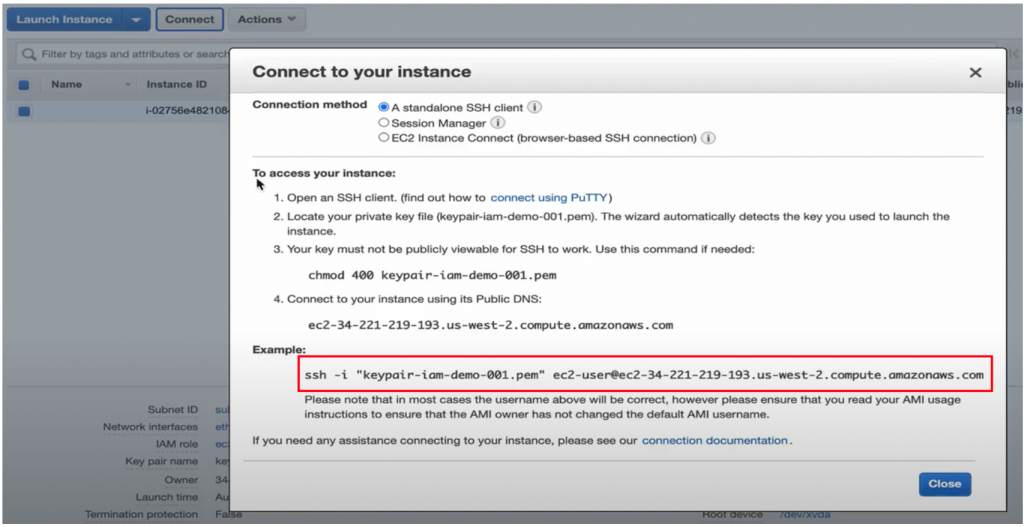
再回到 Terminal 貼上執行,打上 yes,看到 Amazon Linux AMI 就成功連進去這台 EC2 Instance 了,如下圖:
https://ithelp.ithome.com.tw/upload/images/20210913/201009519QtAVkoGxu.png

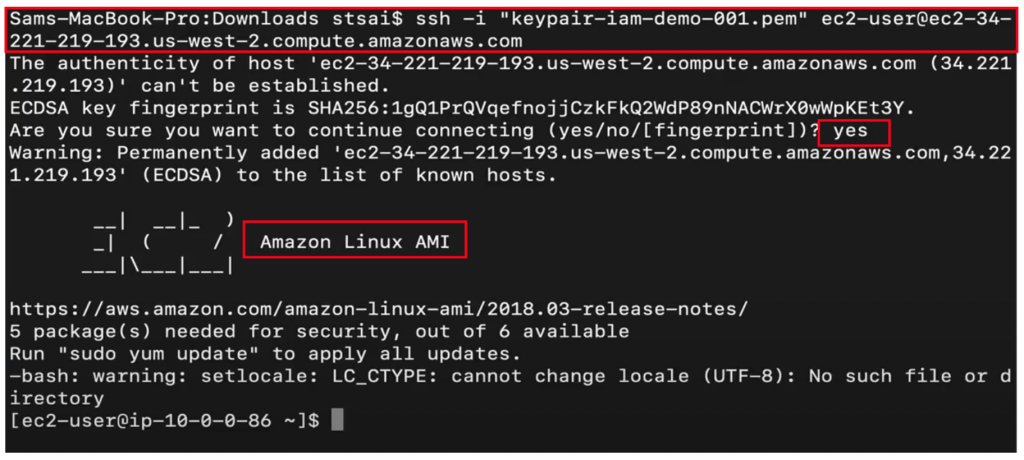
接著要用 AWS CLI 指令的方式,來將 EC2 Instance 裡面對 S3 這個服務進行使用,打上 aws s3api list-buckets,這個指令會告訴我 S3 上總共有哪些 Bucket,按下執行後會看到,這個指令成功拿了一連串的 Bucket 名稱回來(目前有4個),就代表 EC2 Instance 已經有權限可以使用S3的服務了,如下圖:
https://ithelp.ithome.com.tw/upload/images/20210913/20100951Ui69d4QQVN.png

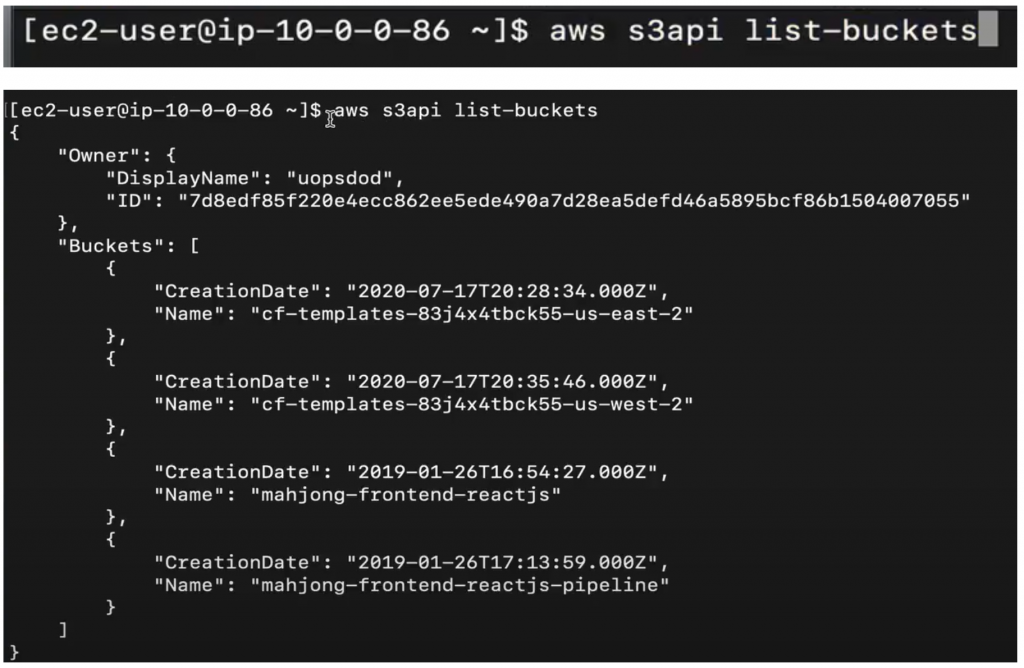
接著,我要用 aws s3api create-bucket 這個指令來讓 EC2 去創建一個新的 S3 Bucket,名稱我叫他 uopsdod-iam-role-demo-bucket-001,Region 使用 us-west-2 (跟 EC2 在同一個 Region 上),另外這邊特別加上一個參數,LocationConstraint 也要使用 us-west-2,如下圖:
https://ithelp.ithome.com.tw/upload/images/20210913/201009519L9HnQN1DA.png

執行完後,看到 Location 就代表成功建立了新的 S3 Bucket,如下圖:
https://ithelp.ithome.com.tw/upload/images/20210913/201009517SUqXFiUPF.png

再使用一次 s3api list-buckets 看看 Bucket 數量是否有增加,也的確 Bucket 數量從 4 個增加到 5 個,如下圖:
https://ithelp.ithome.com.tw/upload/images/20210913/20100951dDpr9KMRXO.png

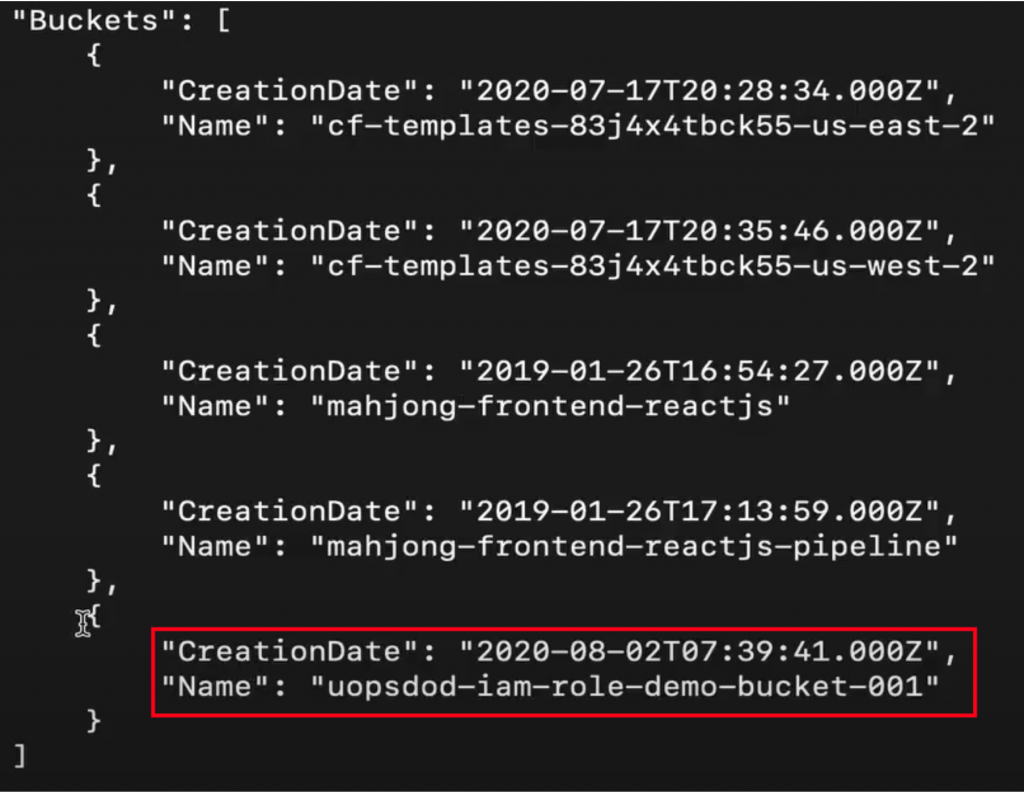
最後回到 S3 Bucket,能看到確實創立出來了。
https://ithelp.ithome.com.tw/upload/images/20210913/20100951SVx9NuOnk2.png

小結

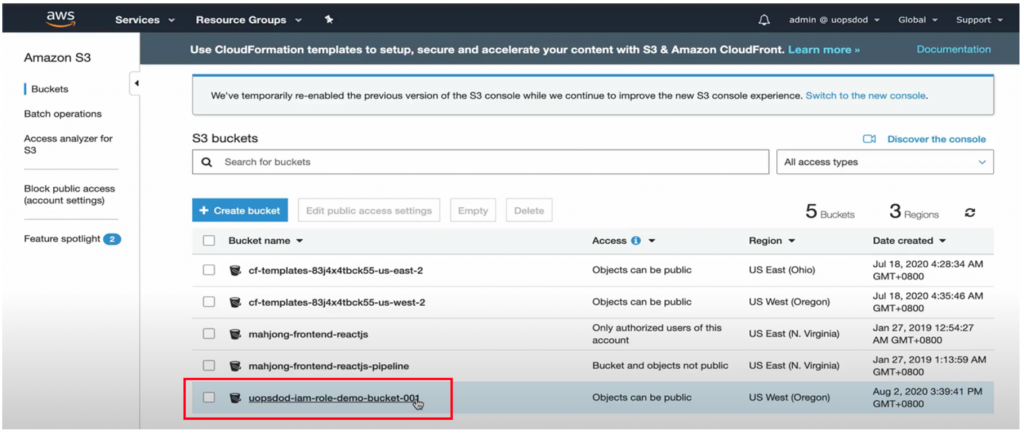
IAM Role,能讓 EC2 這個服務透過 IAM Role,嵌入到 IAM 的整個服務體系之中,在這篇的實作演練中更具體來說,最後讓 EC2 Instance 擁有了使用 S3 服務的權限。

那以上,是針對IAM Role的介紹。

What's Next?

那麼明天,我們將接著看到「整合寶石:【Lab】建構三層式雲端架構(上)」!


上一篇
Day 27 權限寶石:IAM Group 建立與使用
下一篇
Day 29 整合寶石:【Lab】建構三層式雲端架構 (EC2+VPC+S3+RDS+IAM) (上)
系列文
無限手套 AWS 版:掌控一切的 5 + 1 雲端必學主題30
圖片
  直播研討會
圖片
{{ item.channelVendor }} {{ item.webinarstarted }} |
{{ formatDate(item.duration) }}
直播中

尚未有邦友留言

立即登入留言