
一個表單沒有良好的 keyboard 操作,怎麼能說是一個好表單!!!!
接續 Day23 + Day24
到目前為止遇到三個問題 :
- 鍵盤上的 next go 要做什麼用呢?
- 刻完畫面竟然被鍵盤擋住了 :(
- 人家鍵盤都可以自己收起來 我為什麼不行?
今天來處理 keyboard 右下角的 next and go 設定
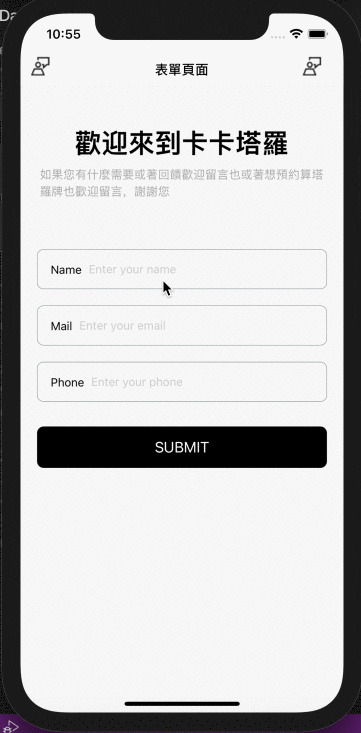
前兩天的表單頁面讓我們來前讓我們來前情提要一下吧~
有幾個選項可以放在裡面分別為 cross-platform 跟一些符合 OS-specific.像是 email input 裡我們寫上"next" 這個選項,他的意思是他會將 focus 移動到下一個 input,"go" 這個選項會啟動 submit 的 function,而這些事件需要另外來寫,所以就是我們今天所要學習的項目唷!
<Input
    label='mail'
    placeholder='Enter your email'
    autoCapitalize='none'
    autoCompleteType='email'
    keyboardType='email-address'
    keyboardAppearance='dark'
    // here
    returnKeyType='next'
    returnKeyLabel='next'
/>
import React, { useRef } from 'react';

const phone = useRef(null);
const email = useRef(null);
// 只有第一個input不需要
<Input
    // ...
    label='Name'
    returnKeyType='next'
    returnKeyLabel='next'
    // 加入
    onSubmitEditing={() => mail.current?.focus()}
/>
<Input
    // 加入
    ref={mail}
    label='Mail'
    // ...
    returnKeyType='next'
    returnKeyLabel='next'
    // 加入
    onSubmitEditing={() => phone.current?.focus()}
/>
<Input
    // 加入
    ref={phone}
    label="Phone"
    // ...
    returnKeyType='next'
    returnKeyLabel='next'
/>
接著你會發現 simulator 為 warning,這是因為我們的 Input 是客製的,所以我們需要做一些處理。
引入 forwardRef 於 components/ Input.js
forwardRef 是一個自動將 ref 傳給一個 children component 的技術,而我的現在需要的就是將 ref 從 Formik.js 傳遞到 Input.
import React, { forwardRef } from 'react';
 import React, {forwardRef} from 'react';
 import {TextInput as RNTextInput, View, StyleSheet, Text} from 'react-native';

 const Input =
  // forwardRef 包起來 start
  forwardRef(
     ({label, error, touched, ...otherProps}, ref) => {
     const validationColor = !touched ? '#223e4b' : error ? '#FF5A5F' : '#223e4b';
         return (
         <View style={[styles.input, {borderColor: validationColor}]}>
             <View style={{padding: 8}}>
                 <Text>{label}</Text>
             </View>
             <View style={{flex: 1}}>
                 <RNTextInput
                     underlineColorAndroid="transparent"
                     placeholderTextColor="#ccc"
                     // 加入 ref
                     ref={ref}
                     {...otherProps}
                 />
             </View>
         </View>
         );
     }
   );
  // forwardRef 包起來 end

const styles = StyleSheet.create({
 input: {
 flexDirection: 'row',
 alignItems: 'center',
 height: 48,
 borderRadius: 8,
 borderWidth: StyleSheet.hairlineWidth,
 padding: 8,
 marginVertical: 10,
 },
});
export default Input;
現在按下 "next" 按鈕,他將會 focus 下一個 input!
上面處理好 "next" 按鈕,現在來處理"go"按鈕
onSubmitEditing={() => handleSubmit()}
import React, {useRef} from 'react';
import {StyleSheet, View, Text, ScrollView} from 'react-native';

import {fonts} from '@src/constants';
import {useFormik} from 'formik';
import Input from '../components/Input';
import Button from '../components/Button';
import {object as yupObject, string as yupString, ValidationError} from 'yup';

const Formik = () => {
  const phone = useRef(null);
  const email = useRef(null);
  const phoneRegExp =
    /^((\\+[1-9]{1,4}[ \\-]*)|(\\([0-9]{2,3}\\)[ \\-]*)|([0-9]{2,4})[ \\-]*)*?[0-9]{3,4}?[ \\-]*[0-9]{3,4}?$/;

  const Schema = yupObject().shape({
    name: yupString().required('Required'),
    email: yupString().email('Invalid email').required('Required'),
    phone: yupString()
      .matches(phoneRegExp, 'Phone number is not valid')
      .required('Required'),
  });
  const {handleChange, handleSubmit, handleBlur, values, errors, touched} =
    useFormik({
      validationSchema: Schema,
      initialValues: {name: '', email: '', phone: ''},
      onSubmit: values =>
        alert(
          `Name: ${values.name},Email: ${values.email}, phone: ${values.phone}`,
        ),
    });
  return (
    <ScrollView style={styles.container}>
      <View style={styles.textBox}>
        <Text style={[styles.text, fonts.h1]}>歡迎來到卡卡塔羅</Text>
        <Text style={(fonts.p, styles.textContent)}>
          如果您有什麼需要或著回饋歡迎留言也或著想預約算塔羅牌也歡迎留言,謝謝您
        </Text>
      </View>

      <View style={styles.formBox}>
        <Input
          onChangeText={handleChange('name')}
          label="Name"
          placeholder="Enter your name"
          autoCapitalize="none"
          autoCompleteType="email"
          keyboardType="default"
          keyboardAppearance="dark"
          onBlur={handleBlur('name')}
          error={errors.name}
          touched={touched.name}
          returnKeyType="next"
          returnKeyLabel="next"
          onSubmitEditing={() => email.current?.focus()}
        />
        <Input
          ref={email}
          onChangeText={handleChange('email')}
          label="Mail"
          placeholder="Enter your email"
          autoCapitalize="none"
          autoCompleteType="email"
          keyboardType="email-address"
          keyboardAppearance="dark"
          onBlur={handleBlur('email')}
          error={errors.email}
          touched={touched.email}
          returnKeyType="next"
          returnKeyLabel="next"
          onSubmitEditing={() => phone.current?.focus()}
        />
        <Input
          ref={phone}
          onChangeText={handleChange('phone')}
          label="Phone"
          placeholder="Enter your phone"
          autoCompleteType="phone-pad"
          autoCapitalize="none"
          keyboardAppearance="dark"
          onBlur={handleBlur('phone')}
          error={errors.phone}
          touched={touched.phone}
          returnKeyType="go"
          returnKeyLabel="go"
          onSubmitEditing={() => handleSubmit()}
        />
        <Button label="submit" color="maroon" onPress={handleSubmit} />
      </View>
    </ScrollView>
  );
};

const styles = StyleSheet.create({
  container: {
    flex: 1,
    backgroundColor: 'rgb(246,246,246)',
    paddingHorizontal: 20,
  },
  textBox: {
    justifyContent: 'center',
    alignItems: 'center',
    paddingVertical: 50,
  },
  textTitle: {color: '#aaa'},
  textContent: {color: '#aaa', lineHeight: 20, marginTop: 10},
  formBox: {
    width: '100%',
    alignItems: 'center',
    justifyContent: 'center',
  },
  input: {
    width: '100%',
    textAlign: 'center',
    borderWidth: 1,
    borderColor: '#ddd',
    padding: 10,
    fontSize: 18,
    margin: 10,
  },
  errorText: {
    textAlign: 'center',
    color: 'crimson',
    marginBottom: 10,
  },
});

export default Formik;
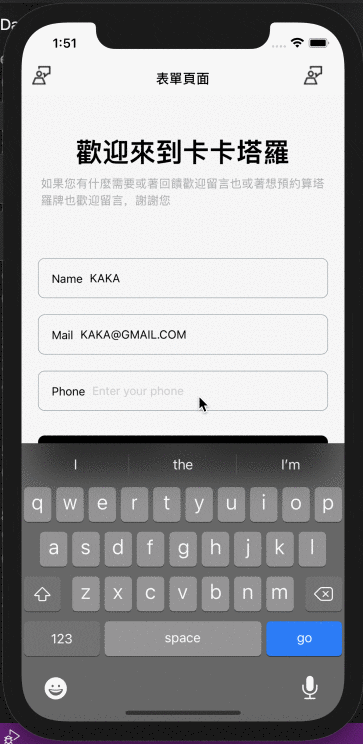
Formik 搭配 Yup 的驗證是一個簡單又容易了解的方法,Formik 的不斷的更新連 Hook 的方式都有!Yup API 也提供了很多驗證給表單元件!以及最後教使用 ref 來控制 keyboard,雖然這個設定並不是必須的,但這樣一用,感覺也提高了使用者的體驗!
到現在有沒有發現
下一章節就繼續來解決 keyboard 系列的問題嚕!
Day 25 done~~~ 請多多指教
