
本文收錄在 Titansoft GOJira! 技術傳教士篇 中 歡迎詳閱~
今天我遇到寫 iThome 鐵人寫文章最大危機,就是我確診兩條線了。
昨天公司舉行運動會,其實當時我就有點累,所以晚上的 After party 就忍痛(真的是忍痛啊,好想喝酒)取消,回到家後很早就睡了。睡到半夜被發燒叫醒,一驗快篩清楚的兩條線!!我就在半夜拖著病體一方面吃藥喝水,一方面取消白天行程,還做了上班日的任務變動安排。
話說,原本白天的行程是找機會練習比較難的 Automation 術式,但無奈 Covid 19 領域展開,我根本無力招架,整個白天大都在昏睡,清醒時只是為了吃飯、吃藥,終於睡到晚上八點多時,大腦還算是清楚,身體除了喉嚨痛外沒有其他的症狀,於是趕快跳下床打開 iThome 編輯器。
個人做事個人擔,小叮做事小叮噹,今天就來設定 Auto-assign to whoever created the issue,就是 誰開單但又沒有assign別人,就自己負責!
在分享今天的功課前,我在 Day4-你不是不好只是太用腦,快啟用 Jira Transitioned Automation assigned,啟用 When an issue is transitioned → then automatically assign 」的 transitioned Automation template ,已經奏效啦!!有圖有真相啦!
首先是先看到 II3D-12 在 [TO DO] 時的內容,可以看到右上角的 [Assignee] 是 Unassigned。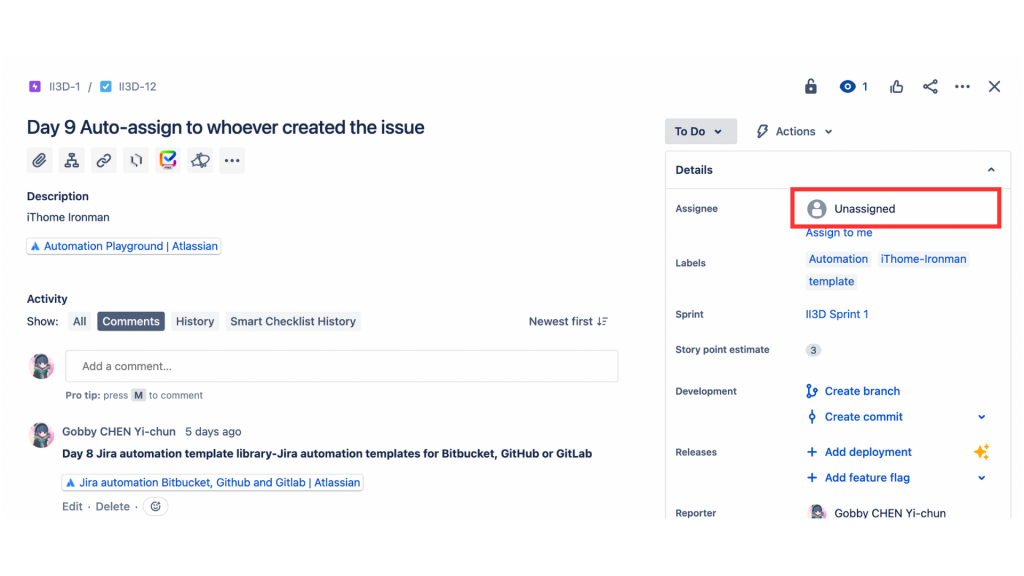
來到 Scrum Board 上,我把 II3D-12 這張票從 [TO DO] 拉到 [In Progress]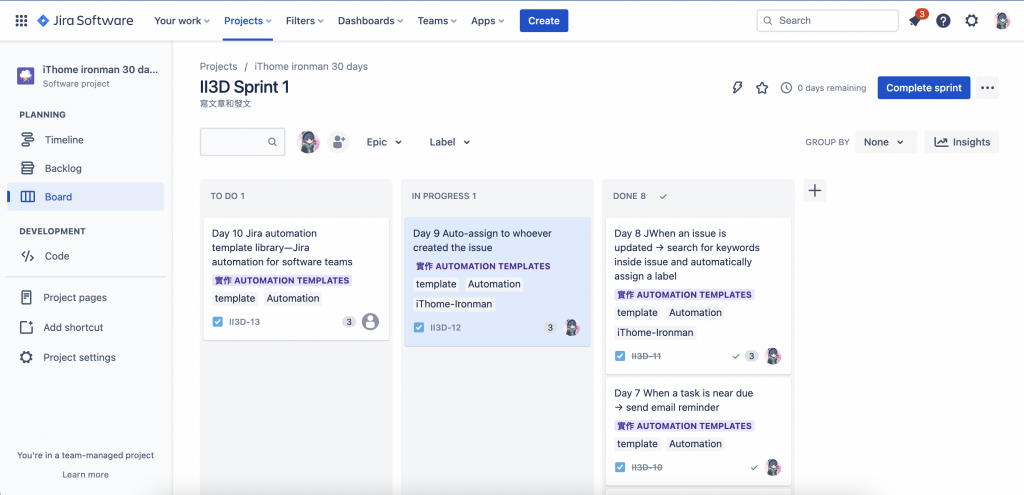
點開 II3D-12 ,可以很清楚看到 右上角的 [Assignee] 已經變更為是 Gobby CHEN Yi-chun,就是本人我啦。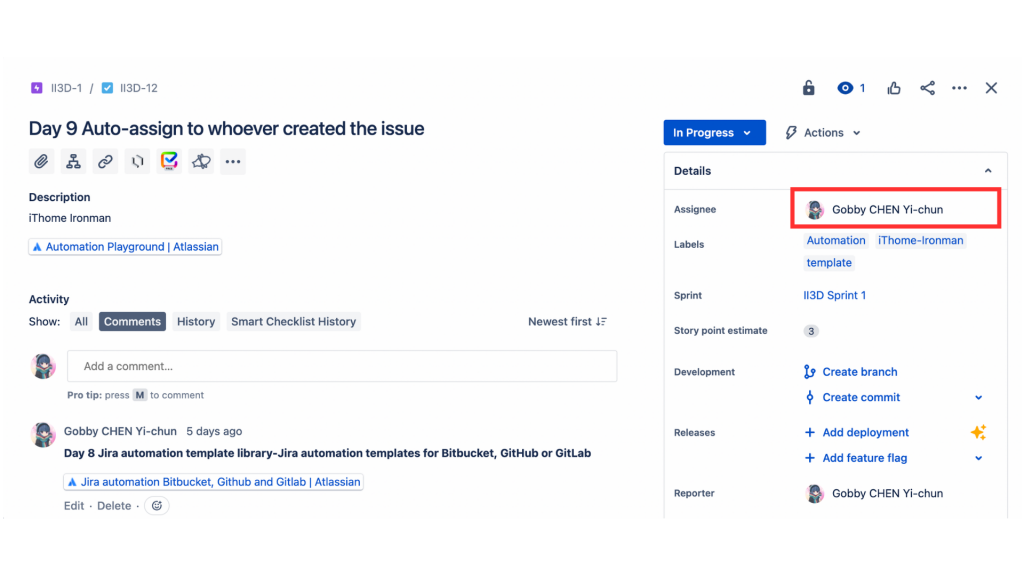
而且,同一個時間,email也收到通知信。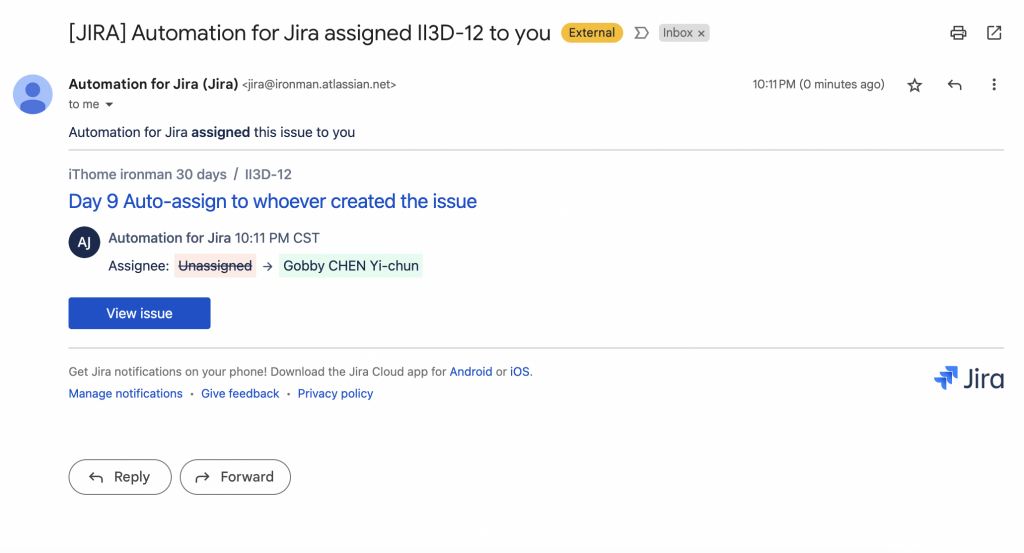
When an issue is transitioned → then automatically assign 」的 transitioned Automation template-->設定成功
回到我們的「又是樸實無華的 Jira 開單日常」系列,今日連載第四期啦!
今日分享主題:當一個 issue 開出來後,有時我們會忘了設定 [Assignee],就開單出去了,這時我們的 Jira 小秘書就會默默幫你把 [Assignee] 自動設定為開單的人,這個就是 個人做事個人擔,小叮做事小叮噹 最好的安排吧!
Smart auto-assign
When an issue is created without an assignee, automatically assign it. Go one better and assign it based on skillset or in a balanced workload.
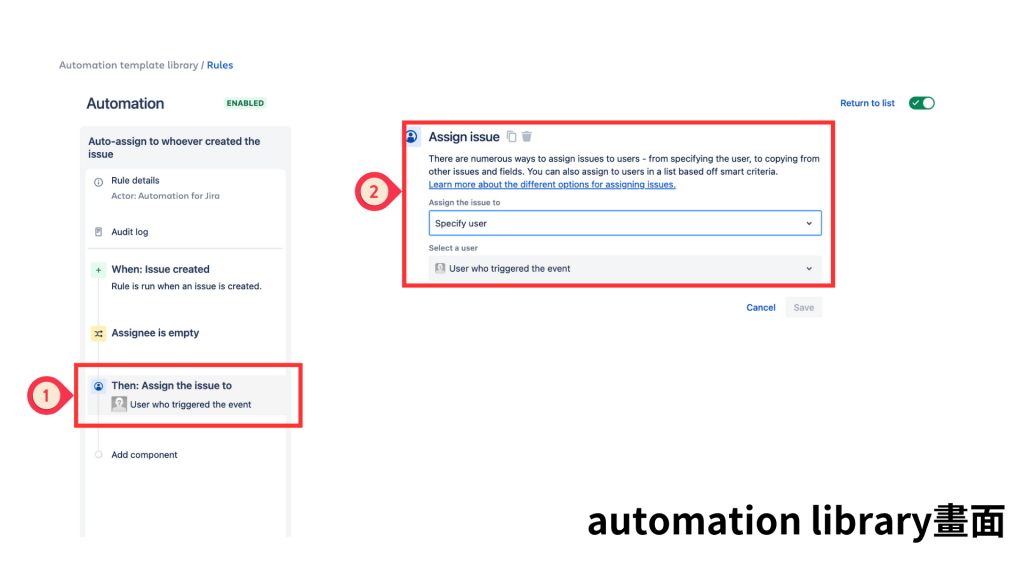
而這個自動化沒有在 template 上,因此,今天我們要來從 automation library 來練習設定喔。(手癢吧!)
拉到頁面最下方,找到 See more templates in our automation library ,並點擊進去。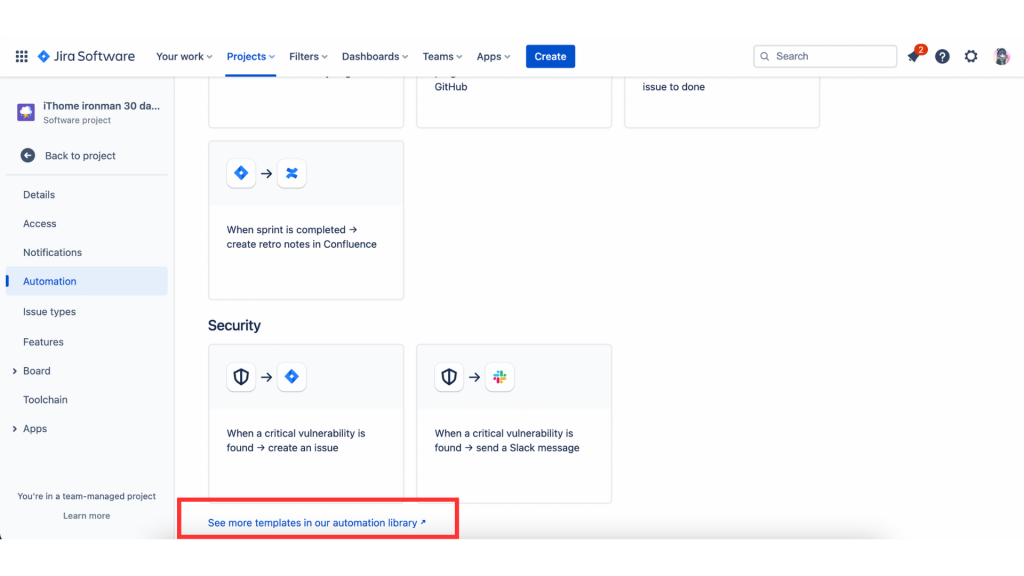
來到了 Jira automation template library 的頁面,我們把頁面向下拉。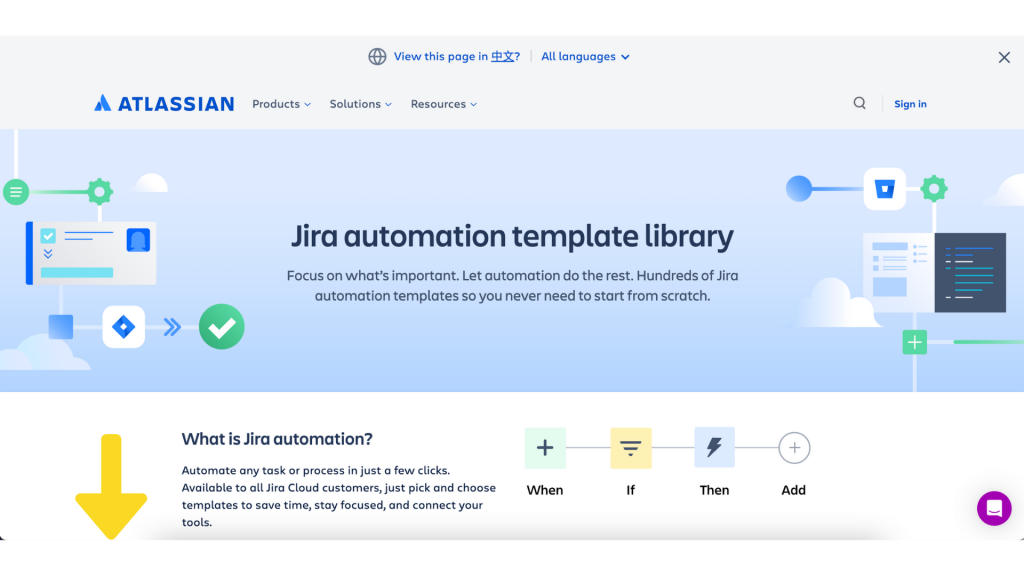
找到 Popular categories 中的 Most popular automation 選單,點擊 [See template -> ]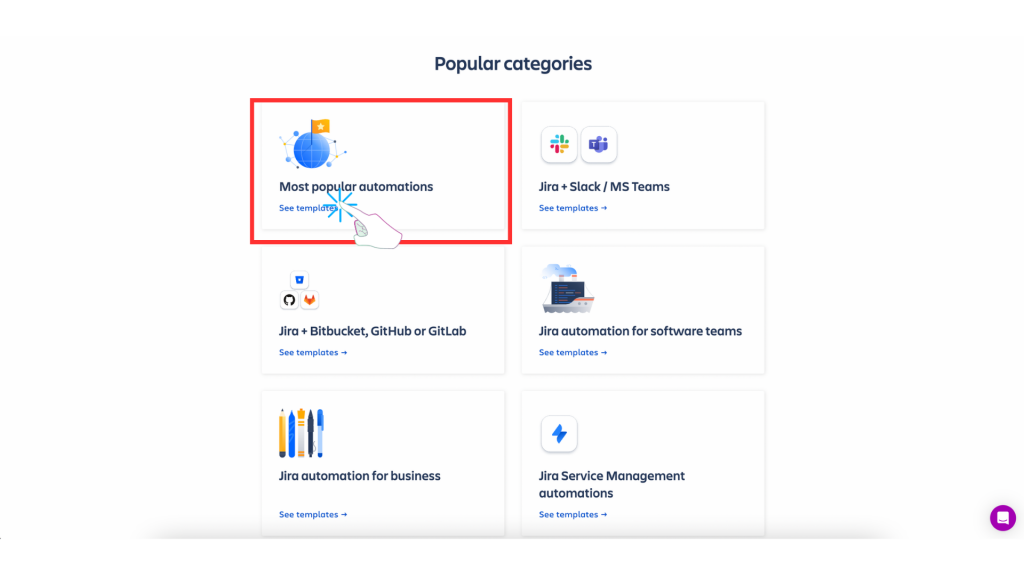
來到了 Most popular Jira automation templates頁面,我們把頁面向下拉,來找到今天的主題。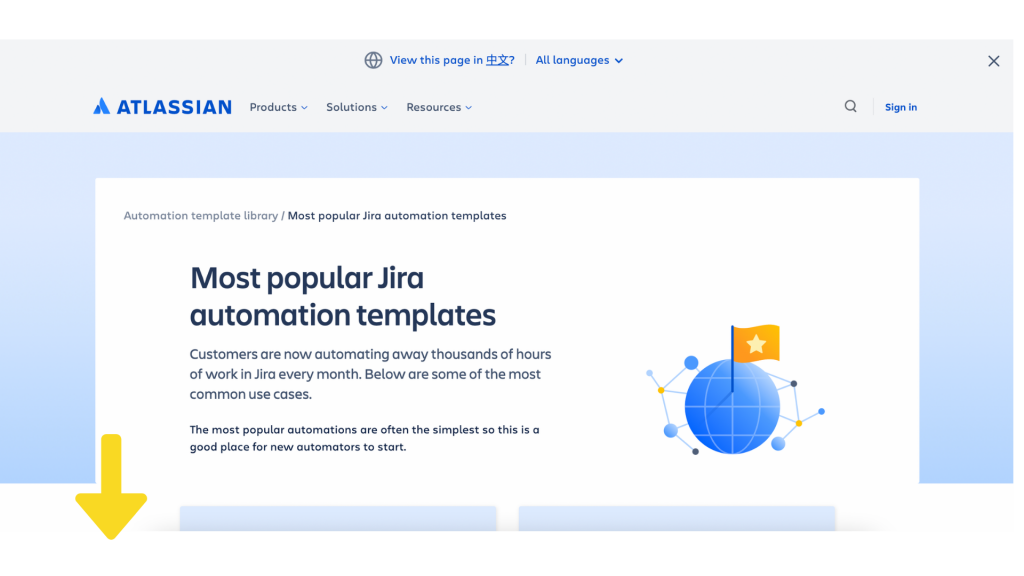
找到今天的主題並 [Go to rule] 。主題為 Smart auto-assign,When an issue is created without an assignee, automatically assign it. Go one better and assign it based on skillset or in a balanced workload.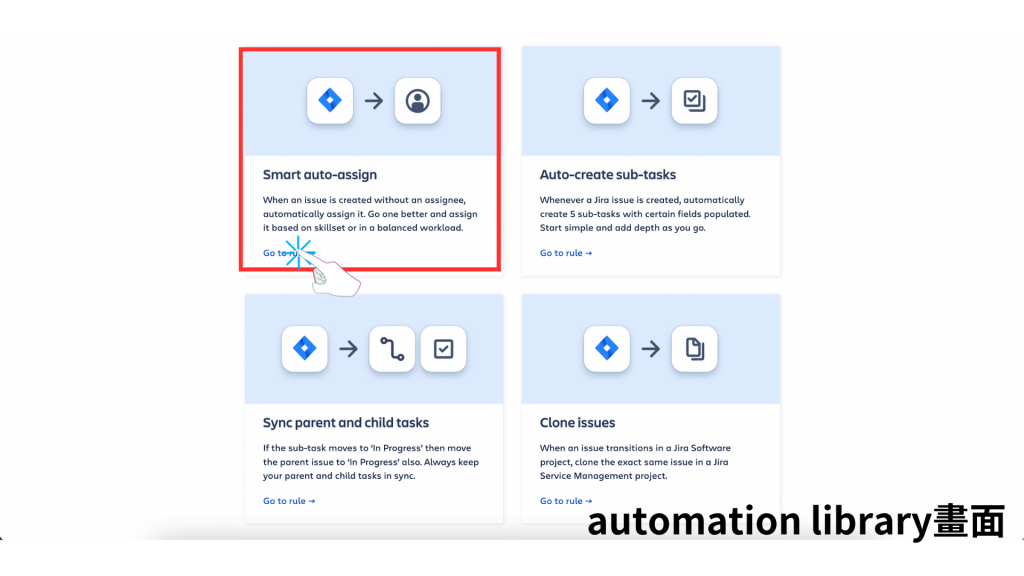
看到設定的步驟及內容後(When,If,Then),記下來後切換頁面到原本的 Automation template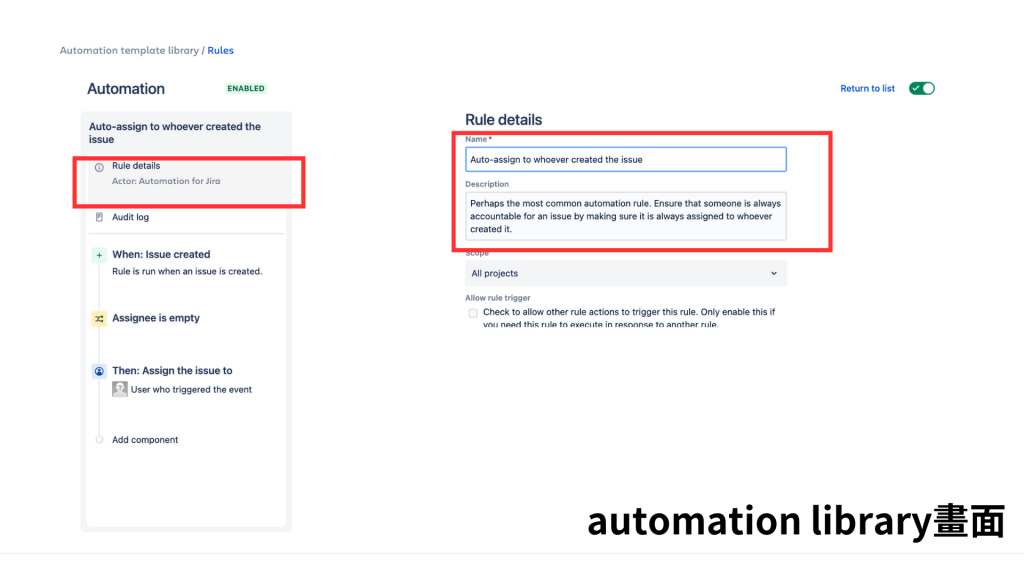
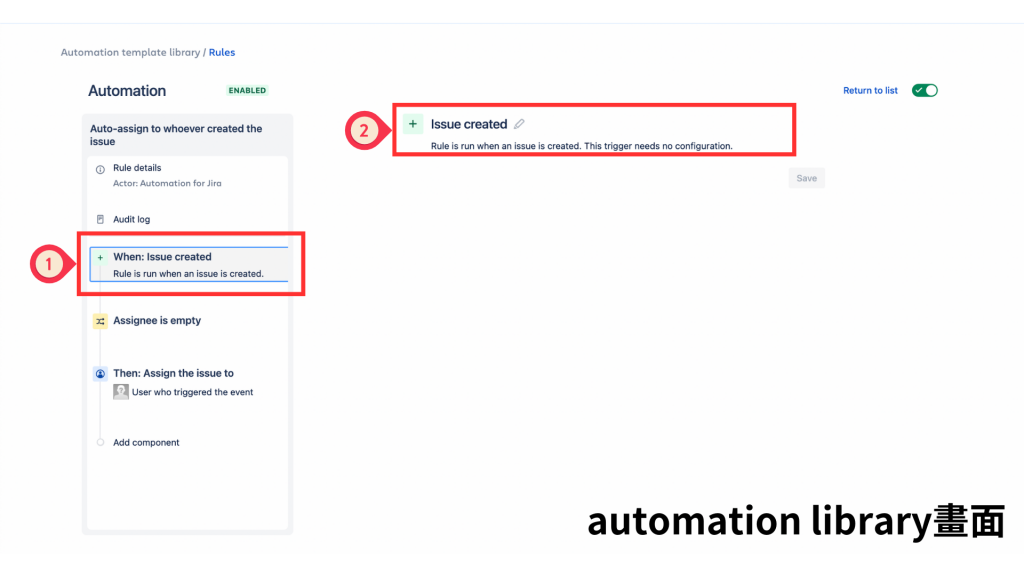
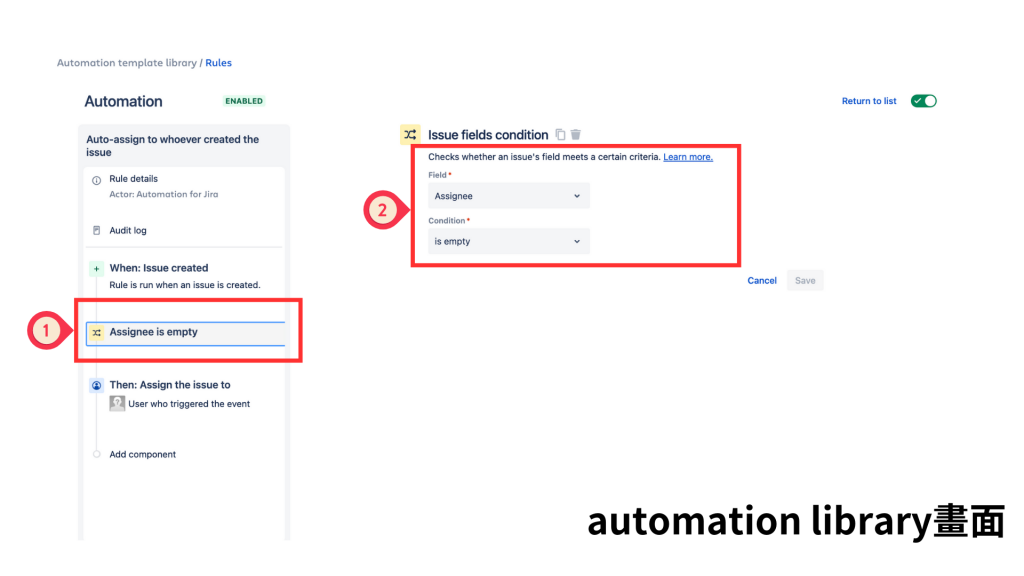
回到 Automation template 頁面,點擊 [Create rule]。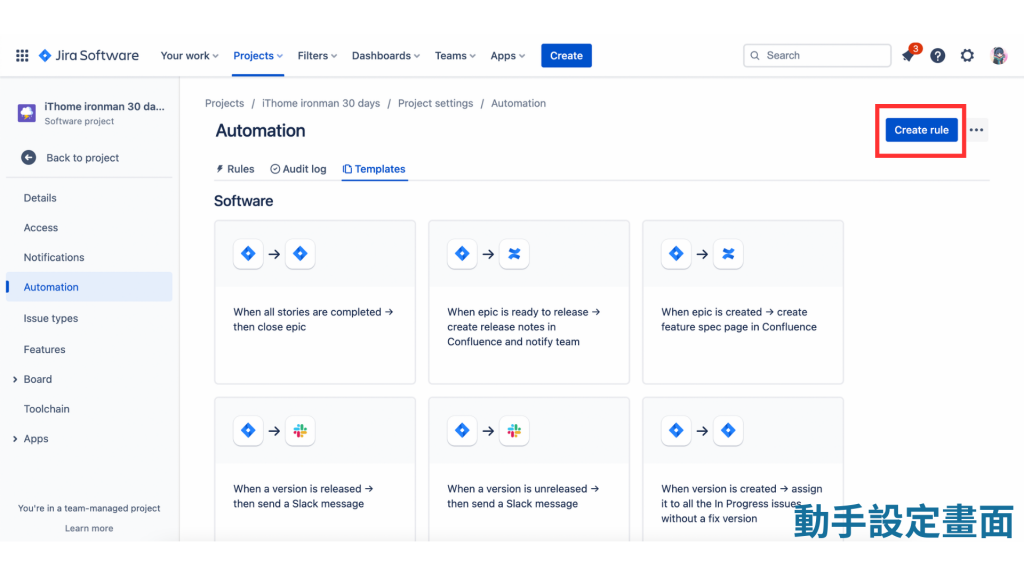
進到 When:Create a trigger,Select an event or schedule.我們把頁面向下拉,來找到 Issue created。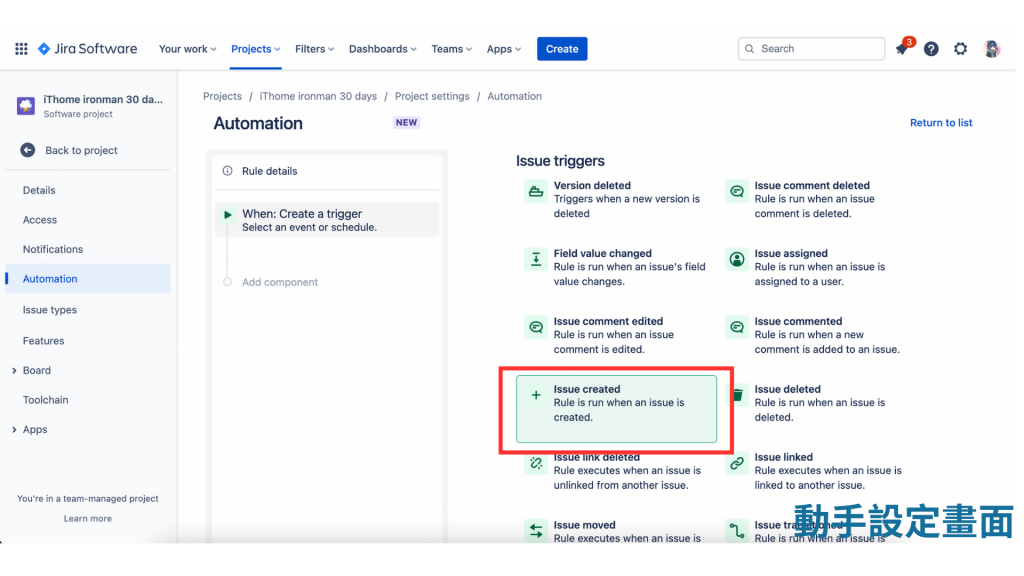
10.完成 When:Issue created Rule is run when an issue is created 設定。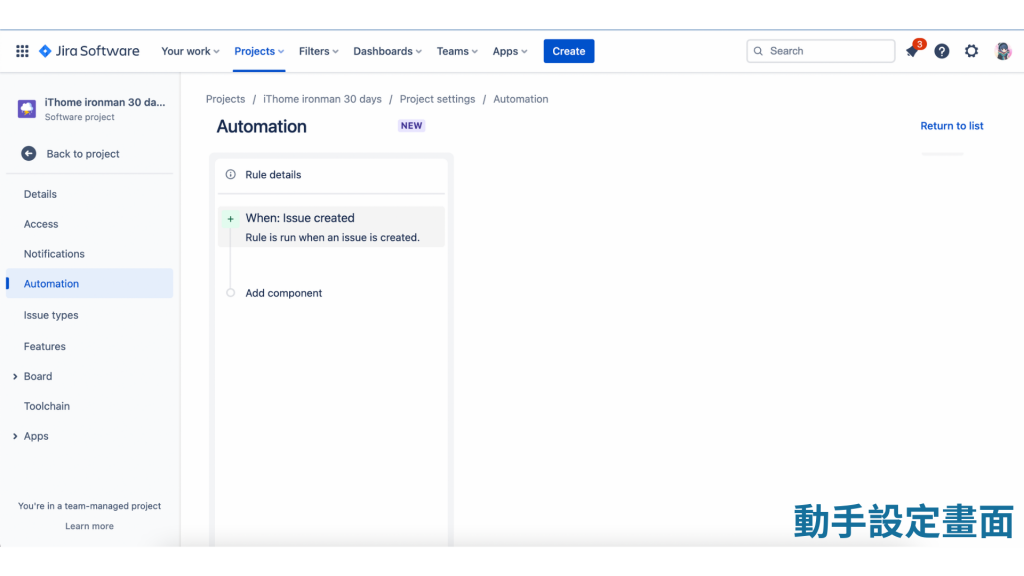
11.設定 If
(1)點擊 [Add component] 後,該 Component 變成 New component Select a new condition or action。
(2)我們選擇 If:ADd a condition 。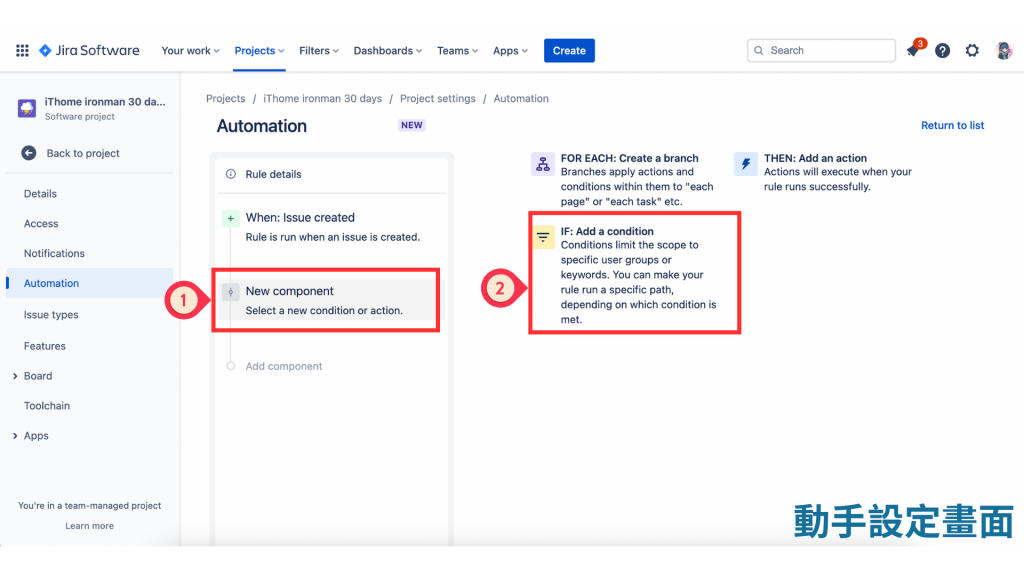
(3)選擇左邊的 Recommended 的 Issue fields condition,這個選項也是自動化設定中很受歡迎的。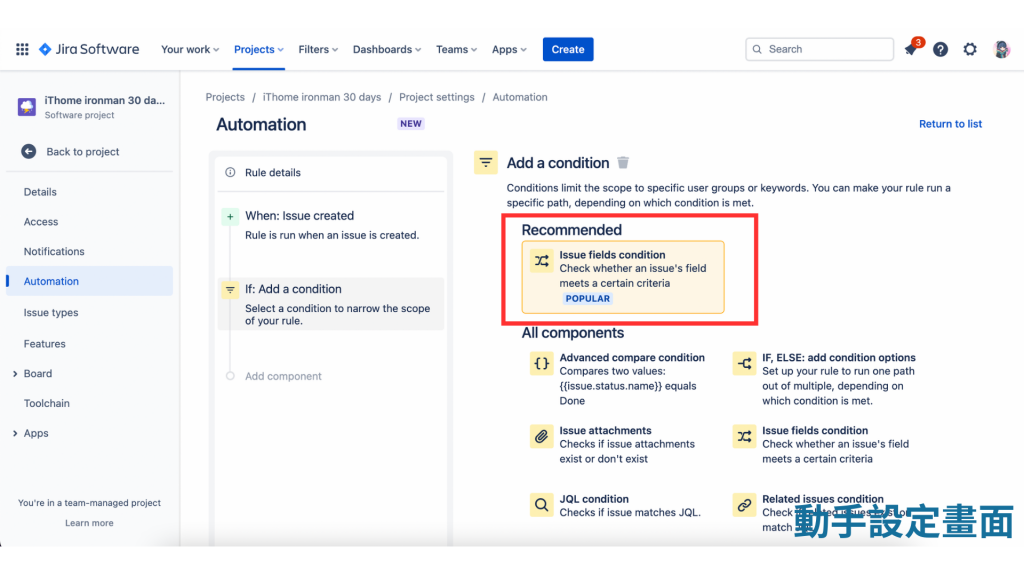
(4)點擊進入 Issue fields condition 後,
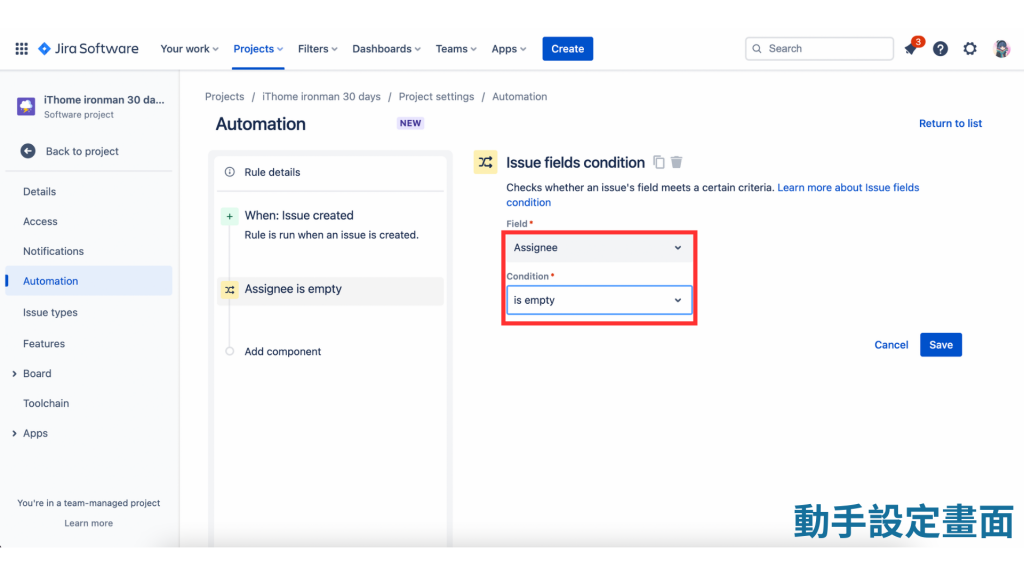
12.設定 Than
(1)點擊 [Add component] 後,該 Component 變成 New component Select a new condition or action。
(2)我們選擇 Than:Add an action 。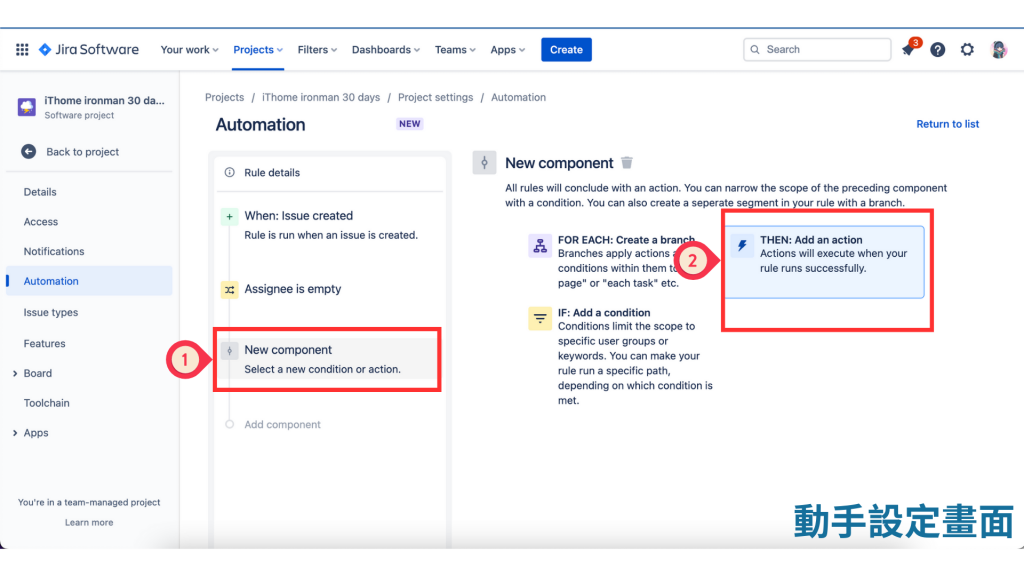
(3)看到左邊的 Assign the issue to的選項,我們從下拉式選單中選出 [Specify user],並按下 [Save]。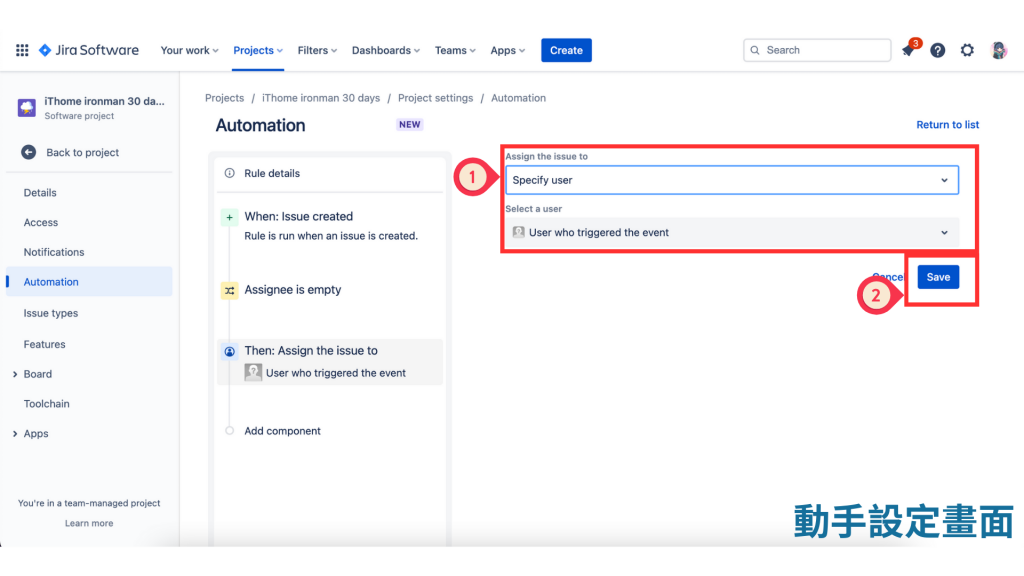
13.為此 Automation 取個名字
(1)我們在右邊的空格內填入 Auto-assign to whoever created the issue 的文字。
(2)填入的文字立即出現在左上方。
(3)按下 [Turn it on]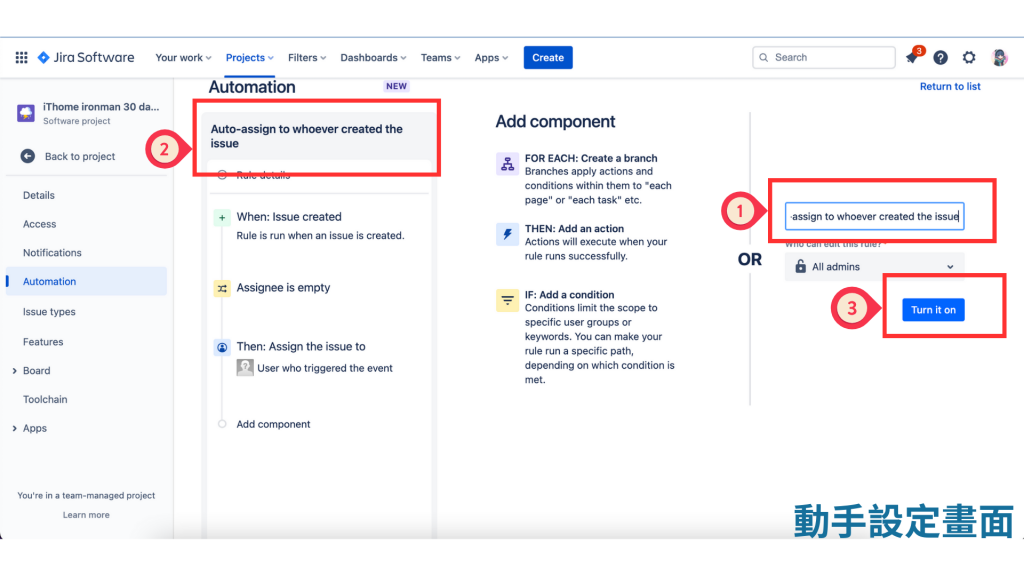
14.回到 Rules list ,這個 Rule 已經設定完成。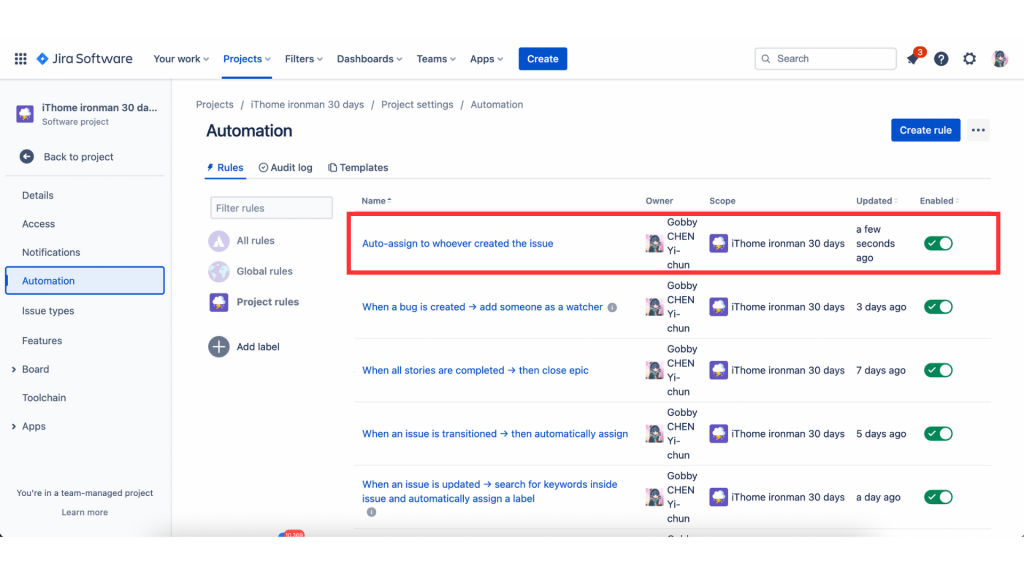
15.驗證 Automation
(1)Create issue:Summry 為 詢問同事 DevOps 設定細節。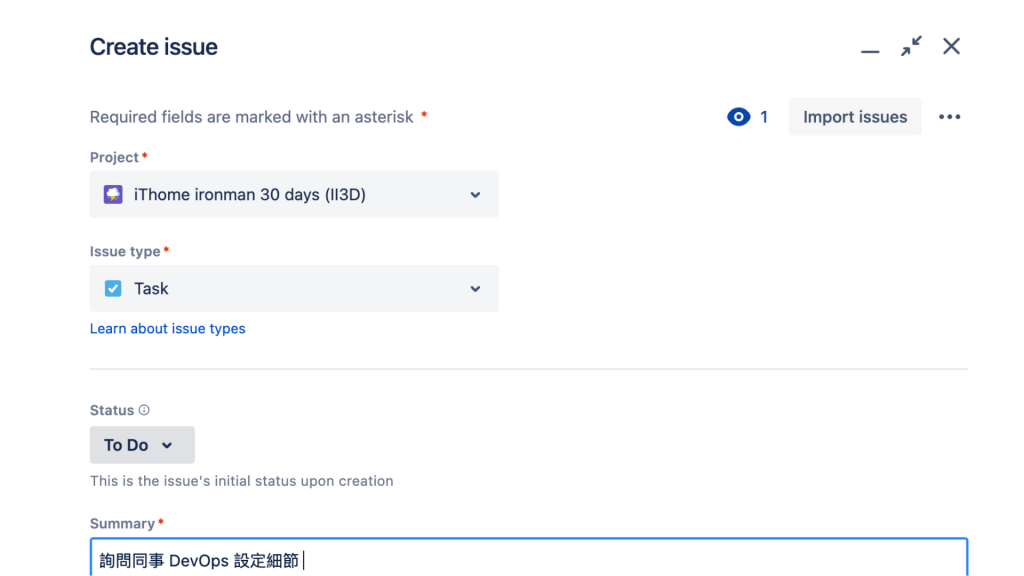
(2)下拉此 ticket 到 [Assignee] ,可以看到目前仍是 Automatic,再按下
[Create] 。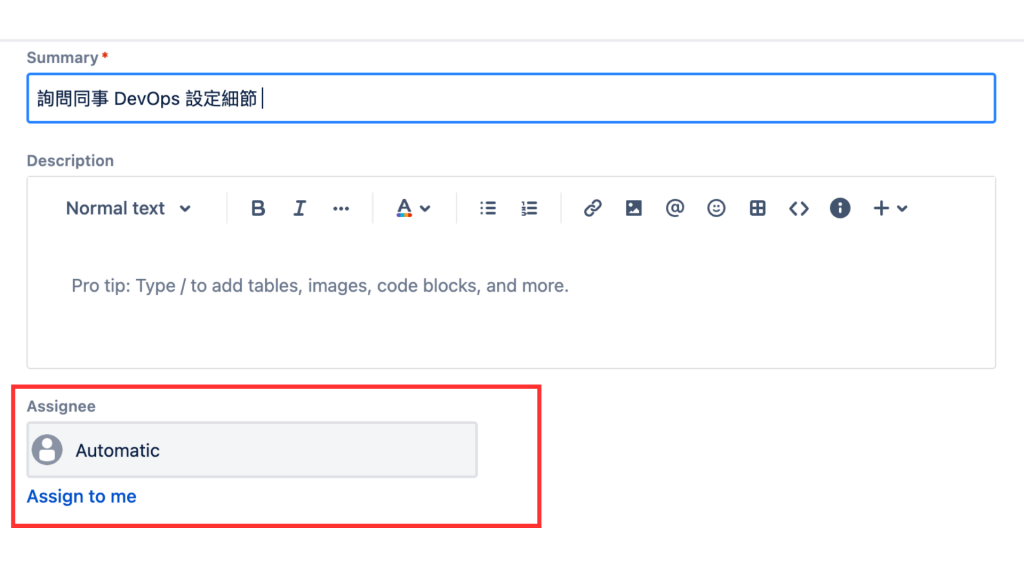
(3)開完票後回來看此票的 [Assignee],已經變更為 Gobby 了。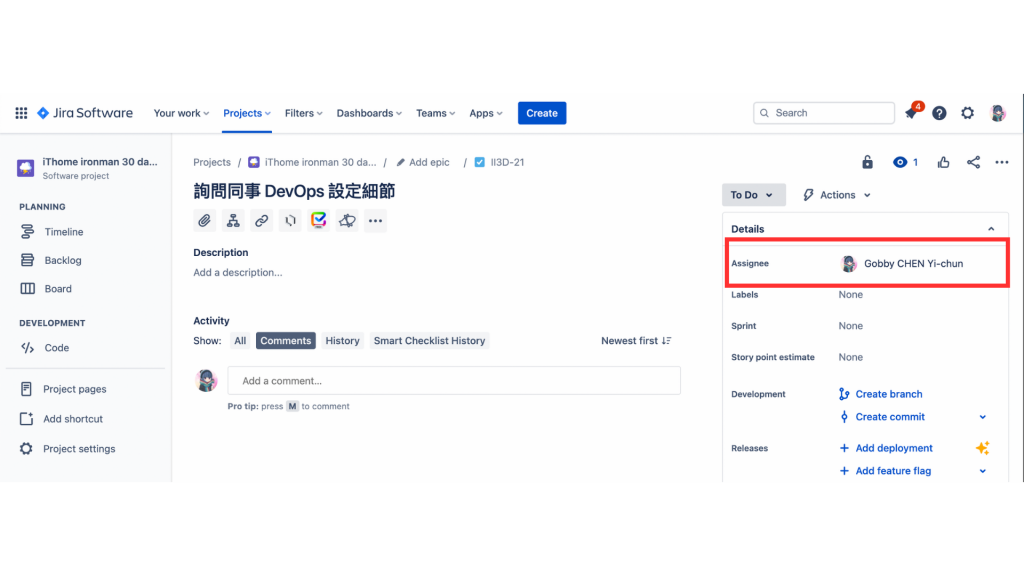
Auto-assign to whoever created the issue-->設定成功

確診還記得發文也太強!辛苦了,祝早日康復~
因為個人做事個人擔,今年一定要完成 30 天文章發文!!!我們一起加油~