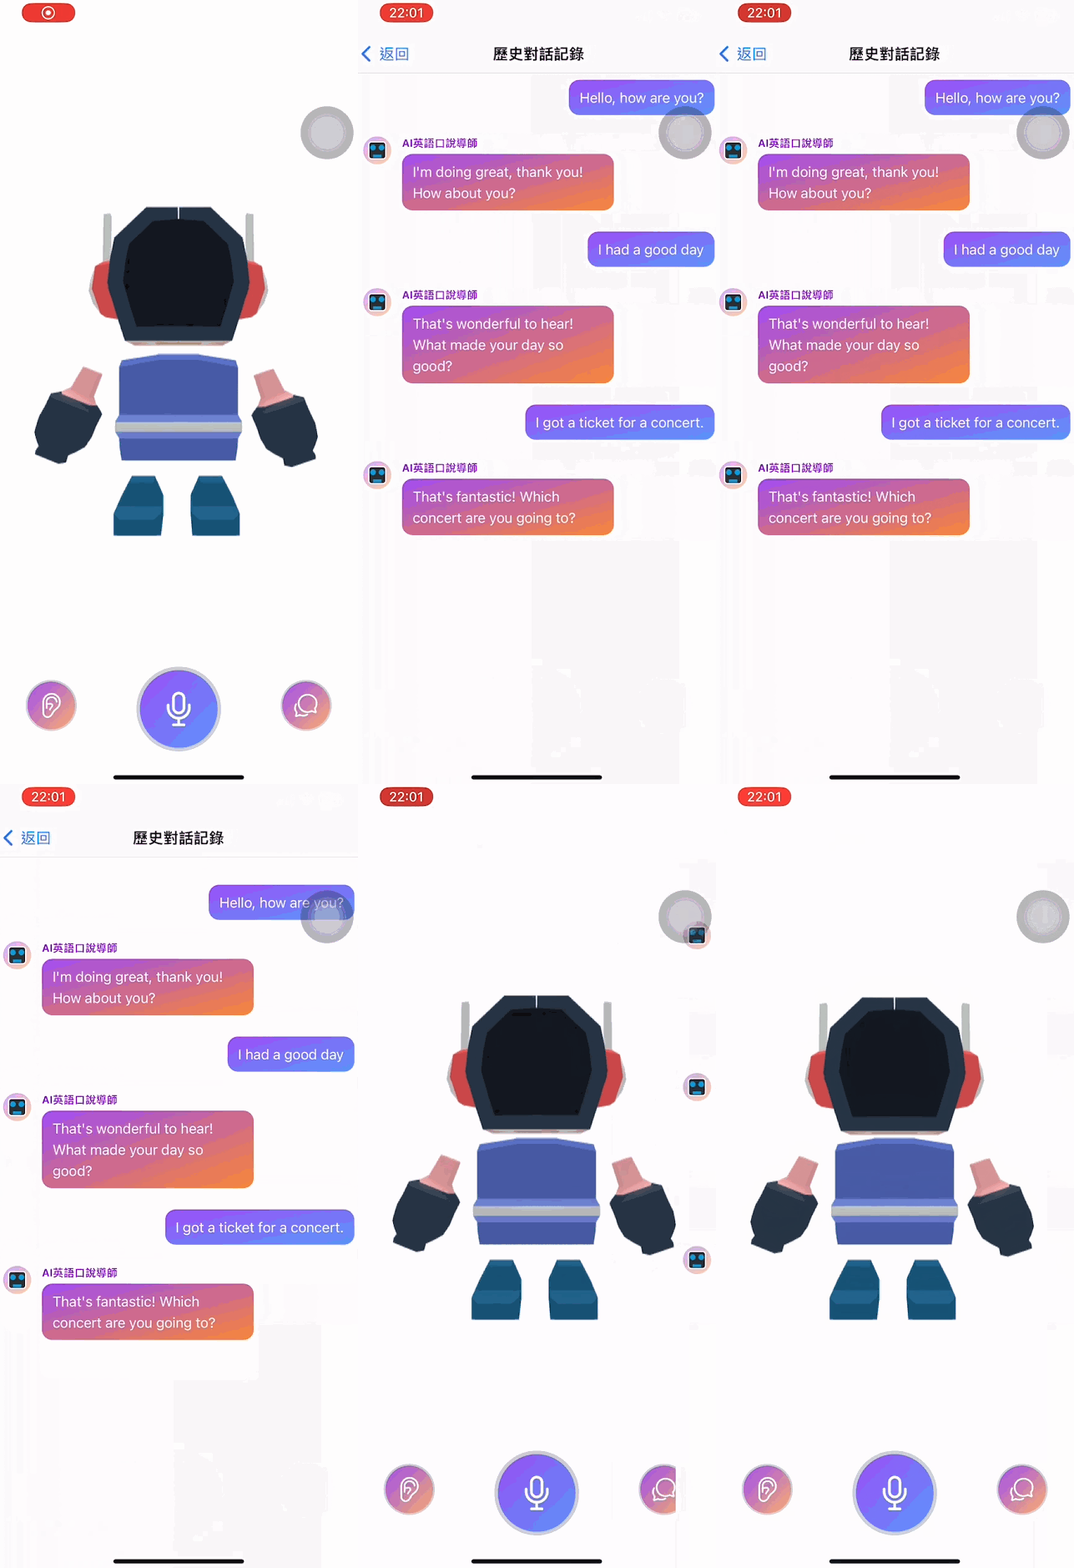
在【Day - 25】我們成功實現了歷史對話的儲存功能,讓我們每次開啟APP都可以延續先前的對話。今天的目標是實現查看對話記錄的功能。在這之前我們已採用Sheet Modal方式來展示互動視窗,而這次我想嘗試使用導航(Navigation)方式進行設計,一方面體驗Ionic的導航功能,同時為整個應用帶來更多不一樣的操作體驗哦!
Ionic建立在Angular之上,提供移動應用開發的框架,並整合了Angular的路由功能,以打造一個適合移動裝置的導航體驗。以下是Ionic在導航上的特點:
另外,導航是透過ion-router-outlet元件,這是Ionic特有的路由出口,用於換頁和顯示內容。當我們設定路由並導航到某個路由地址時,對應的頁面或組件將會在ion-router-outlet中呈現。此外,與Angular的<router-outlet>相比,ion-router-outlet專為移動裝置優化,結合了導航堆疊、轉場動畫和頁面生命週期管理的特性。
首先,我們要建立一個ChatHistory的頁面。在chathistory.page.ts檔案裡,我們需要注入SQLite Service。接著,可以使用chatHistory$來獲得之前的歷史對話資料。此外,透過使用@ViewChild() 裝飾器取得IonContent元件,然後在ngAfterViewInit()中執行scrollToBottom()方法,確保每當進入這個頁面時,畫面會自動滑到最底部,顯示最新的對話紀錄:
@ViewChild('ionContent') ionContent!: IonContent;

constructor(private sqlitedbService: SqlitedbService) { }

get chatHistory$() {
  return this.sqlitedbService.chatHistory$;
}

ngAfterViewInit(): void {
  if (this.ionContent) {
    //確保每次進入頁面都是滑到最底
    this.ionContent.scrollToBottom();
  }
}
以下是chathistory.page.html中的HTML:
<ion-header>
  <ion-toolbar>
    <ion-buttons slot="start">
      <ion-back-button text="返回"></ion-back-button>
    </ion-buttons>
    <ion-title>
      歷史對話記錄
    </ion-title>
  </ion-toolbar>
</ion-header>

<ion-content #ionContent>
  <div class="flex flex-col space-y-6 m-2 mb-5">
    <ng-container *ngFor="let item of (chatHistory$ | async)">
      <div class="flex flex-row items-start justify-start self-end" *ngIf="item.role === 'user' && item.content !== ''">
        <!-- User對話框 -->
        <div class="flex-1 bg-gradient-to-br from-purple-500 to-blue-400 rounded-xl px-3 py-2 text-white max-w-xxs">
          {{ item.content }}
        </div>
      </div>
      <div class="flex flex-row items-start justify-start self-start"
        *ngIf="item.role === 'assistant' && item.content !== ''">
        <!-- AI頭像 -->
        <img class="flex-none w-8 h-8 rounded-full bg-gradient-to-br from-purple-300 to-orange-200 mr-3 flex items-center justify-center"
          src="assets/AI-Avatar.svg">
        <!-- AI對話框 -->
        <div class="flex-1 flex flex-col xl:max-w-4xl max-w-xxs">
          <span class="text-purple-600 text-xs font-bold mb-1">AI英語口說導師</span>
          <div class="bg-gradient-to-br from-purple-500 to-orange-400 rounded-xl px-3 py-2 text-white">
            <p>{{ item.content }}</p>
          </div>
        </div>
      </div>
    </ng-container>
  </div>
</ion-content>
完成建立後,我們需要在app.routes.ts中為ChatHistory頁面添加路由設定。我們使用Lazy Loading策略來載入,這有助於提高效能並加快初次載入的速度:
export const routes: Routes = [
  {
    path: 'home',
    loadComponent: () => import('./home/home.page').then((m) => m.HomePage),
  },
  {
    path: 'chathistory',
    loadComponent: () => import('./chathistory/chathistory.page').then((m) => m.ChathistoryPage),
  },
  {
    path: '',
    redirectTo: 'home',
    pathMatch: 'full',
  },
];
新增一個ChatHistoryButton元件,其功能是讓使用者按下後讓APP導航至指定頁面。Ionic的導航方式與Angular相同,都是透過Router服務實現。所以,在chathistorybutton.component.ts檔案中,我們注入了Router服務,並確保當按鈕被按下時,會跳轉至ChatHistory頁面。
constructor(private router: Router) { }

onChatHistoryClick() {
  this.router.navigateByUrl('/chathistory');
}
<div class="flex items-center justify-center">
  <div class="w-full h-full flex flex-col items-center rounded-full mt-5"
    (click)="onChatHistoryClick()">
    <div
      class="ion-activatable relative overflow-hidden rounded-full bg-gradient-to-br from-purple-500 to-orange-300 border-2 border-gray-300 flex items-center p-3">
      <ion-icon class="text-3xl text-white" name="chatbubbles-outline"></ion-icon>
      <ion-ripple-effect></ion-ripple-effect>
    </div>
  </div>
</div>
最後將元件添加到Home主頁上:
<div class="w-full h-full bg-white" id="main-content">
  <div class="flex flex-col w-full h-full">
    <div class="flex-none flex justify-center items-center">
      <!-- 文法提示 -->
      <app-grammermistake></app-grammermistake>
    </div>
    <div class="relative flex flex-col w-full h-full">
      <!-- 3D機器人動畫 -->
      <app-robot3d class="flex-grow flex-shrink w-full pb-10"></app-robot3d>
    </div>
    <div class="flex-none flex flex-row justify-between items-center pb-10 relative">
      <div class="flex-grow">
        <!-- 重播按鈕 -->
        <app-replayaudio></app-replayaudio>
      </div>
      <div class="flex-grow">
        <!-- 錄音按鈕 -->
        <app-voicerecording (getRecordingBase64Text)="OnGetRecordingBase64Text($event)"></app-voicerecording>
      </div>
      <div class="flex-grow">
        <!-- 歷史對話 -->
        <app-chathistorybutton></app-chathistorybutton>
      </div>
    </div>
  </div>
</div>
在實體機上的測試後,Ionic讓頁面切換變得簡單且直觀。而且我們不需要再額外編寫或添加任何動畫,就已經實現流暢且具有原生感的轉場動畫。
從開發者工具中可以觀察到,從Home主頁切換到ChatHistory頁面時,app-home元件並未被銷毀,這與【Day - 3】中所提到的生命週期是相符的。因此,當我們回到app-home時,ngOnInit並不會再被重新觸發。
今天,我們初步瞭解了Ionic中導航的基礎概念並成功建立查看歷史對話的功能。透過Router服務,我們可以輕鬆實現導航的需求。但在Ionic的導航中,由於頁面不會立刻被銷毀,對於生命週期的管理就很重要。尤其多頁面的導航環境下,我們需要對頁面的生命週期事件有深入的了解,確保資料更新的正確性以及APP的流暢運行哦!
Github專案程式碼:Ionic結合ChatGPT - Day26
