前言介紹
Retrofit是一個在Android應用程式中用於處理網絡請求的庫。它是一個強大而靈活的HTTP客戶端庫,旨在使網絡請求和響應的處理變得簡單而高效。Retrofit的主要目標是將RESTful API的使用變得容易,讓開發者能夠輕鬆地發送HTTP請求並處理服務器的響應數據。
以下是Retrofit的一些核心概念和特點:
基於注解的API定義:Retrofit允許你使用注解來定義API接口,這樣你可以清晰地描述每個HTTP端點的功能,包括HTTP方法(GET、POST、PUT、DELETE等)和路徑。這樣的設計使得API接口的定義非常直觀且易於維護。
自動化的HTTP請求構建:Retrofit可以根據API接口的定義自動構建HTTP請求。你只需要指定請求的參數,如路徑、查詢參數、請求主體等,Retrofit就會負責生成相應的HTTP請求。
異步和同步請求:Retrofit支持異步和同步的HTTP請求。你可以選擇在後台線程中執行請求,以避免阻塞主UI線程。
內建的JSON轉換:Retrofit內置了JSON轉換功能,可以將服務器響應的JSON數據映射到Java對象,或將Java對象轉換為JSON數據。這樣你可以使用Java對象來處理服務器數據,而無需手動解析JSON。
可擴展性:Retrofit允許你使用自定義的HTTP客戶端,以滿足特定的需求。你可以根據需要替換HTTP客戶端實現,並擴展Retrofit的功能。
支援不同的請求格式:除了JSON,Retrofit還支援其他請求格式,如XML、Form表單等。
總的來說,Retrofit是一個強大的工具,可以簡化Android應用程式中的網絡請求處理,使開發者能夠更容易地與遠程服務器進行通信。這使得開發具有網絡功能的Android應用程式變得更加高效和可維護。
功能
這裡我會用Jasonplaceholder來製作網路連線請求的部分。
如下步驟
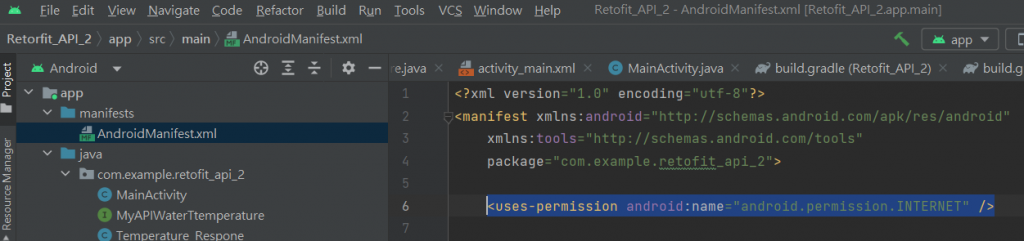
<uses-permission android:name="android.permission.INTERNET" />
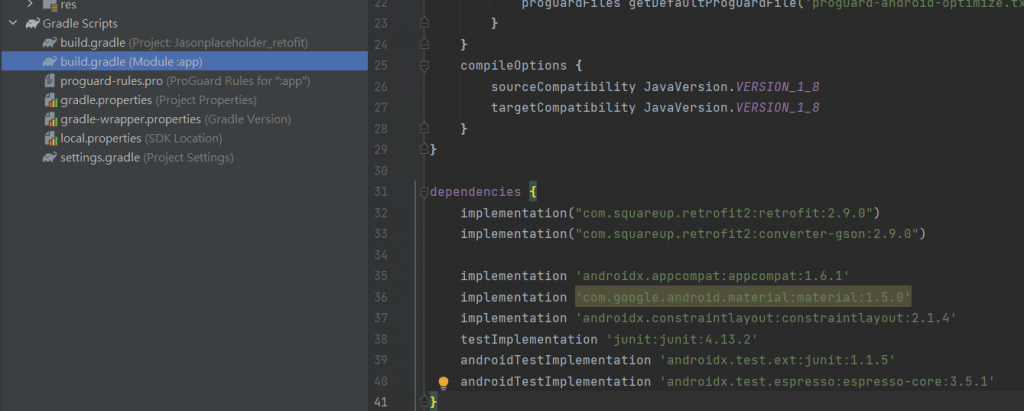
2. 在Gradle Scripts/build.gradle(Module :app)的dependencies{}加入兩這行
    implementation("com.squareup.retrofit2:retrofit:2.9.0")
    implementation("com.squareup.retrofit2:converter-gson:2.9.0")
3. 創立API的interface
package com.example.jasonplaceholder_retofit;

import java.util.List;

import retrofit2.Call;
import retrofit2.http.GET;

public interface MyApiSever {
    @GET("posts")
    Call< List<Response> > getJsonPlaceHolderData();
}
package com.example.jasonplaceholder_retofit;

public class Response {
    private String userId;
    private String id;
    private String title;
    private String body;

    public String getUserId() {
        return userId;
    }

    public String getId() {
        return id;
    }

    public String getTitle() {
        return title;
    }

    public String getBody() {
        return body;
    }
}

<?xml version="1.0" encoding="utf-8"?>
<androidx.constraintlayout.widget.ConstraintLayout xmlns:android="http://schemas.android.com/apk/res/android"
    xmlns:app="http://schemas.android.com/apk/res-auto"
    xmlns:tools="http://schemas.android.com/tools"
    android:layout_width="match_parent"
    android:layout_height="match_parent"
    tools:context=".MainActivity">

    <LinearLayout
        android:layout_width="404dp"
        android:layout_height="677dp"
        android:orientation="vertical"
        app:layout_constraintEnd_toEndOf="parent"
        app:layout_constraintHorizontal_bias="0.0"
        app:layout_constraintStart_toStartOf="parent"
        app:layout_constraintTop_toTopOf="parent">

        <TextView
            android:id="@+id/textView2"
            android:layout_width="match_parent"
            android:layout_height="0dp"
            android:layout_weight="1"
            android:text="JasonPlaceHolderDemo"
            android:textSize="36sp" />

        <TextView
            android:id="@+id/id_textView"
            android:layout_width="match_parent"
            android:layout_height="0dp"
            android:layout_weight="1"
            android:textSize="40sp"
            android:gravity="center"
            android:text="id:" />

        <TextView
            android:id="@+id/userId_textView"
            android:layout_width="match_parent"
            android:layout_height="0dp"
            android:layout_weight="1"
            android:textSize="36sp"
            android:gravity="center"
            android:text="UserID:" />

        <TextView
            android:id="@+id/title_textView"
            android:layout_width="match_parent"
            android:layout_height="0dp"
            android:layout_weight="3"
            android:textSize="20sp"
            android:text="title:" />

        <TextView
            android:id="@+id/body_textView"
            android:layout_width="match_parent"
            android:layout_height="0dp"
            android:layout_weight="3"
            android:textSize="20sp"
            android:text="body:" />

        <LinearLayout
            android:layout_width="match_parent"
            android:layout_height="0dp"
            android:layout_weight="1"
            android:orientation="horizontal">

            <Spinner
                android:id="@+id/spinner2"
                android:layout_width="0dp"
                android:layout_height="match_parent"
                android:layout_weight="1" />

            <Button
                android:id="@+id/button"
                android:layout_width="0dp"
                android:layout_height="match_parent"
                android:layout_weight="1"
                android:text="抓取資料" />
        </LinearLayout>
    </LinearLayout>
</androidx.constraintlayout.widget.ConstraintLayout>
MainActivity Class
package com.example.jasonplaceholder_retofit;

import androidx.appcompat.app.AppCompatActivity;

import android.os.Bundle;
import android.util.Log;
import android.view.View;
import android.widget.Button;
import android.widget.TextView;

import java.util.List;

import retrofit2.Call;
import retrofit2.Callback;
import retrofit2.Retrofit;
import retrofit2.converter.gson.GsonConverterFactory;

public class MainActivity extends AppCompatActivity {
    private final String BASE_URL = "https://jsonplaceholder.typicode.com/";
    //宣告MyAPIService
    private MyApiSever MyApiSever;
    private TextView id_textView,userId_textView,title_textView,body_textView;
    private Button getData_Button;
    private String out_id,userId,out_title,out_body;
    @Override
    protected void onCreate(Bundle savedInstanceState) {
        super.onCreate(savedInstanceState);
        setContentView(R.layout.activity_main);
        initialize();//初始化設定
        createMySeverConnect();//建立網路連練
        setGetData_Button();//拿取Sever端資料
    }

    //綁定元建
    private void ById(){
        id_textView = findViewById(R.id.id_textView);
        userId_textView = findViewById(R.id.userId_textView);
        title_textView = findViewById(R.id.title_textView);
        body_textView = findViewById(R.id.body_textView);
        getData_Button = findViewById(R.id.button);
    }
    //初始化設定
    private void initialize(){
        ById();//綁定元建
    }
    //建立網路連練
    private void createMySeverConnect(){
        //設置baseUrl即要連的網站,addConverterFactory用Gson作為資料處理Converter
        Retrofit retrofit = new Retrofit.Builder()
                .baseUrl(BASE_URL)
                .addConverterFactory(GsonConverterFactory.create())
                .build();
        MyApiSever = retrofit.create(MyApiSever.class);
    }
    //點擊按鈕拿取SeverData
    private void setGetData_Button(){
        getData_Button.setOnClickListener(new View.OnClickListener() {
            @Override
            public void onClick(View view) {
                getSeverData();//拿取Sever端資料
            }
        });

    }
    //拿取Sever端資料
    private void getSeverData(){
        MyApiSever.getJsonPlaceHolderData().enqueue(new Callback<List<Response>>() {
            @Override
            public void onResponse(Call<List<Response>> call, retrofit2.Response<List<Response>> response) {
                Log.d("Response","Success");
                Log.d("size",Integer.toString(response.body().size()));
                String id = response.body().get(0).getId();
                String user_id = response.body().get(0).getUserId();
                String title = response.body().get(0).getTitle();
                String body = response.body().get(0).getBody();
                out_id = id;
                userId = user_id;
                out_title = title;
                out_body = body;
                showMyInformation();//展示資料
            }

            @Override
            public void onFailure(Call<List<Response>> call, Throwable t) {
                Log.d("Response","Failing");
            }
        });

    }

    //設定TextView
    private void showMyInformation(){
        id_textView.setText("id:"+out_id);
        userId_textView.setText("UserID:"+userId);
        title_textView.setText("title:"+out_title);
        body_textView.setText("body:"+out_body);
    }

}
程式碼解說
因為篇幅問題我就說有關網路的部分,置於Button(按鈕)和TextView的部分就不做討論了
MainActivityClass的部分:
a. Retrofit retrofit = new Retrofit.Builder():這一行代碼創建了一個Retrofit實例。Retrofit是一個用於處理網絡請求的庫,它需要配置一些信息以建立與服務器的連接。
b. .baseUrl(BASE_URL):這一行設置了Retrofit的基本URL,也就是你要連接的網站的根地址。BASE_URL應該是一個字符串,例如"https://api.example.com/"。 Retrofit將使用這個基本URL來構建具體的請求URL。
c. .addConverterFactory(GsonConverterFactory.create()):這一行設置了數據轉換器(ConverterFactory)。在進行網絡請求時,服務器通常返回JSON數據,我們需要將其轉換為Java對象。這裡使用了GsonConverterFactory,它是Retrofit的一個內置轉換器,用於處理JSON數據轉換。如果服務器返回的數據不是JSON,你可以選擇適當的轉換器。
d. .build():這一行是用來構建Retrofit實例,並返回它。一旦建立,Retrofit實例就可以用於創建API接口。
e. MyApiSever = retrofit.create(MyApiSever.class):這一行創建了一個API接口的實例。MyApiSever是一個介面,它描述了你將要對服務器進行的具體HTTP請求操作。Retrofit會根據這個介面來生成具體的請求代碼。
總的來說,這個函式的目的是初始化Retrofit並設置一些必要的配置,然後創建一個API接口的實例,以便你可以使用它來發送HTTP請求。建立了這個連接之後,你就可以使用Retrofit來簡化網絡請求的處理,包括請求的建立、數據的處理和回應的解析。
a. MyApiSever.getJsonPlaceHolderData().enqueue(new Callback<List>() {...}):這一行代 碼使用MyApiSever介面中的getJsonPlaceHolderData()方法來發送HTTP GET請求。enqueue方法是Retrofit 提供的一種非同步方式,它接受一個回調(Callback)來處理請求的響應。
b. onResponse(Call<List> call, retrofit2.Response<List> response):這是當請 求成功時執行的回調方法。它接收兩個參數:Call對象(用於取消請求)和Response對象(包含服務器的響應數 據)。
c. onFailure(Call<List> call, Throwable t):這是當請求失敗時執行的回調方法。它接收兩個參數:Call對象和失敗的原因(Throwable)。
*在這個回調中,我們打印出"Failing"表示請求失敗。
總之,這個程式碼片段使用Retrofit來發送一個HTTP GET請求,並在成功時提取並處理服務器的響應數據,然後展示這些數據。如果請求失敗,則簡單地打印出錯誤消息。這是一個基本的網絡請求示例,可用於從服務器獲取數據,例如從API端點獲取JSON數據。
總結
Retrofit是一個用於處理網絡請求的庫,旨在簡化與服務器的通信。
主要概念包括使用注解定義API接口、自動化的HTTP請求構建、支持異步和同步請求、內建的JSON轉換和可擴展性。
程式碼示例中,我們使用Retrofit從JSONPlaceholder API獲取數據,然後顯示該數據在應用程式的TextView中。
步驟概述:


 iThome鐵人賽