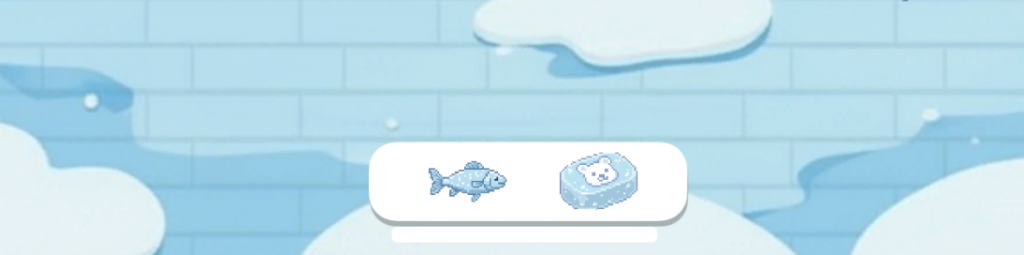
還記得我們的下方有一個可以拖拉道具出來的 UI 欄位嗎 ?
這一章, 我們來實作拖拉道具出來的效果:
Prompt:
實作代碼: 下方有一個 UI Scroll View 欄位, 可以拖拽食物和玩具給北極熊玩
1. Scroll View Content 裡面有兩個道具 - Fish, Soap
2. Content 裡面的道具目前是以 Image 的方式擺放的
3. 滑鼠點擊 Image 的道具的時候, 可以拖拽出來變成 Sprite Renderer 放到場景
4. 拖拽的時候, Scroll View 的 UI 會半透明, 放開拖拽的時候恢復
Code:
using UnityEngine;
using UnityEngine.EventSystems;
using UnityEngine.UI;

/// <summary>
/// 掛在 Scroll View Content 內每個道具 Image 上:
/// - PointerDown 開始拖拽:在場景生成對應的 Prefab(含 SpriteRenderer 與相應 Item 腳本,如 FishItem/SoapItem)。
/// - 拖拽期間使指定的 Scroll Rect CanvasGroup 半透明;結束時恢復。
/// - 支援將新生成物件以指定 Z 放到場景,並由 DraggableItem 接手跟隨滑鼠。
/// 設計:使用 EventSystem 事件,避免每幀輪詢;僅在拖拽期間有狀態。
/// </summary>
public class UIDragSpawnItem : MonoBehaviour, IPointerDownHandler, IBeginDragHandler, IDragHandler, IEndDragHandler
{
	[Header("Spawn Settings")]
	[Tooltip("要生成到場景的 Prefab,需包含 SpriteRenderer 與 DraggableItem 派生類(如 FishItem/SoapItem)")]
	[SerializeField] private GameObject spawnPrefab;
	[Tooltip("生成時放置到此父物件(可為場景中的容器),留空則放在場景根層級")]
	[SerializeField] private Transform worldParent;
	[Tooltip("拖拽時使用的世界 Z 軸(決定渲染排序深度)")]
	[SerializeField] private float dragWorldZ = 0f;
	[Tooltip("將滑鼠轉世界座標使用的相機,若留空將使用 Camera.main")]
	[SerializeField] private Camera targetCamera;

	[Header("UI Fade During Drag")]
	[Tooltip("拖拽時變半透明的 CanvasGroup(建議掛在 Scroll View 或其父物件)")]
	[SerializeField] private CanvasGroup fadeCanvasGroup;
	[SerializeField] [Range(0f, 1f)] private float draggingAlpha = 0.5f;

	private GameObject spawned;
	private DraggableItem spawnedDraggable;
	private float originalAlpha = 1f;
	private bool dragging;

	private void Awake()
	{
		if (targetCamera == null)
		{
			targetCamera = Camera.main;
		}
		if (fadeCanvasGroup != null)
		{
			originalAlpha = fadeCanvasGroup.alpha;
		}
	}

	/// <summary>
	/// 使用者在 UI Image 上按下,標記可能開始拖拽。
	/// </summary>
	public void OnPointerDown(PointerEventData eventData)
	{
		// 不生成於 PointerDown,等 BeginDrag 確認拖拽再生成,避免誤觸。
	}

	/// <summary>
	/// 真正開始拖拽時才生成場景物件並交給 DraggableItem 接管移動。
	/// </summary>
	public void OnBeginDrag(PointerEventData eventData)
	{
		if (dragging) return;
		if (spawnPrefab == null) return;

		spawned = Object.Instantiate(spawnPrefab, worldParent);
		spawnedDraggable = spawned != null ? spawned.GetComponent<DraggableItem>() : null;
		if (spawnedDraggable != null)
		{
			spawnedDraggable.BeginDragFromUI(targetCamera, dragWorldZ, true);
			dragging = true;
			SetUIFade(true);
		}
		else
		{
			// 若 Prefab 缺少 DraggableItem,直接取消拖拽
			CleanupSpawned();
		}
	}

	/// <summary>
	/// 拖拽過程不需要額外處理,由 DraggableItem 自動跟隨滑鼠。
	/// 但為了確保事件持續,保留空實作。
	/// </summary>
	public void OnDrag(PointerEventData eventData)
	{
		// no-op
	}

	/// <summary>
	/// 放開拖拽:恢復 UI 透明度,並通知 DraggableItem 結束拖拽(模擬滑鼠放開)。
	/// </summary>
	public void OnEndDrag(PointerEventData eventData)
	{
		if (!dragging)
		{
			SetUIFade(false);
			return;
		}

		// DraggableItem 會在 Update 偵測到 MouseUp 自行結束;這裡只負責 UI 狀態恢復。
		SetUIFade(false);
		dragging = false;
		spawned = null;
		spawnedDraggable = null;
	}

	private void SetUIFade(bool isDragging)
	{
		if (fadeCanvasGroup == null) return;
		fadeCanvasGroup.alpha = isDragging ? draggingAlpha : originalAlpha;
	}

	private void CleanupSpawned()
	{
		if (spawned != null)
		{
			Object.Destroy(spawned);
			spawned = null;
		}
		spawnedDraggable = null;
		dragging = false;
		SetUIFade(false);
	}
}
一開始, 我們可以先把場景中的道具先製作成 Prefabs
變成 Prefabs 後的道具, 就可以不斷的重複使用生成, 而且會保留原本的設定值
在 Resources 中新增一個資料夾, 就叫 Prefabs
把場景中的道具拉下來, 就會變成 Prefab
接著把 Canvas 底下, Scroll View / Viewport / Content 裡的圖片道具
全部加上 UI Drag Spawn Item 的代碼, 再把對應的道具 Prefab拉上去
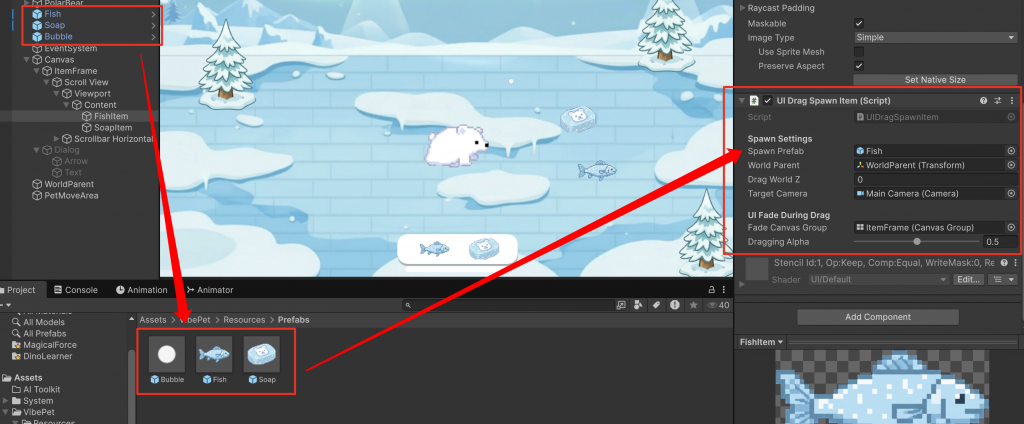
接下來播放遊戲進行測試
你就可以把 UI 的道具直接拖到場景中啦
下一章, 我們來實現最後的小功能 - 北極熊的移動 !

