
在前幾天的準備之後,我們終於要開始規劃APP的畫面了。首先,根據【Day - 1】所設立的目標,第一步就是要在首頁中央放置一個3D模型機器人。提到3D模型,我們第一個想到的就是Three.js,這個知名套件在前幾屆的鐵人賽中也有許多大神介紹。因此,我的重點將放在如何巧妙的將Ionic和Three.js完美整合。讓我們開始吧!
首先使用以下指令進行套件的安裝:
npm i three
此外,對於Ionic專案,還需要安裝Three.js的TypeScript型別定義:
npm i --save-dev @types/three
我們建立一個Robot3D的元件。然後,在robot3d.component.html中,我們要加入一個div標籤,內部包含一個canvas標籤。這兩個標籤都分別宣告一個範本參考變數(Template Reference Variables):
<div #divElement class="relative flex flex-col w-full h-full">
  <canvas #canvasElement class="flex-grow flex-shrink w-full"></canvas>
</div>
GLTF(GL Transmission Format)是一種為3D場景和模型創建的開放標準。它被設計用來提供跨平台、可互操作性、擴展性和高效率的3D模型格式,有時也被稱為三維圖像的JPEG。它可以快速、高效的載入和呈現,因此非常適合用作Web應用上。Three.js官方文件中也推薦我們使用GLTF檔案格式的3D模型。GLTF目前有兩種檔案格式類型:
我從官方提供的Sketchfab上找了一個可以免費使用的機器人3D模型來使用,這個還模型包含了4個動作(動畫)。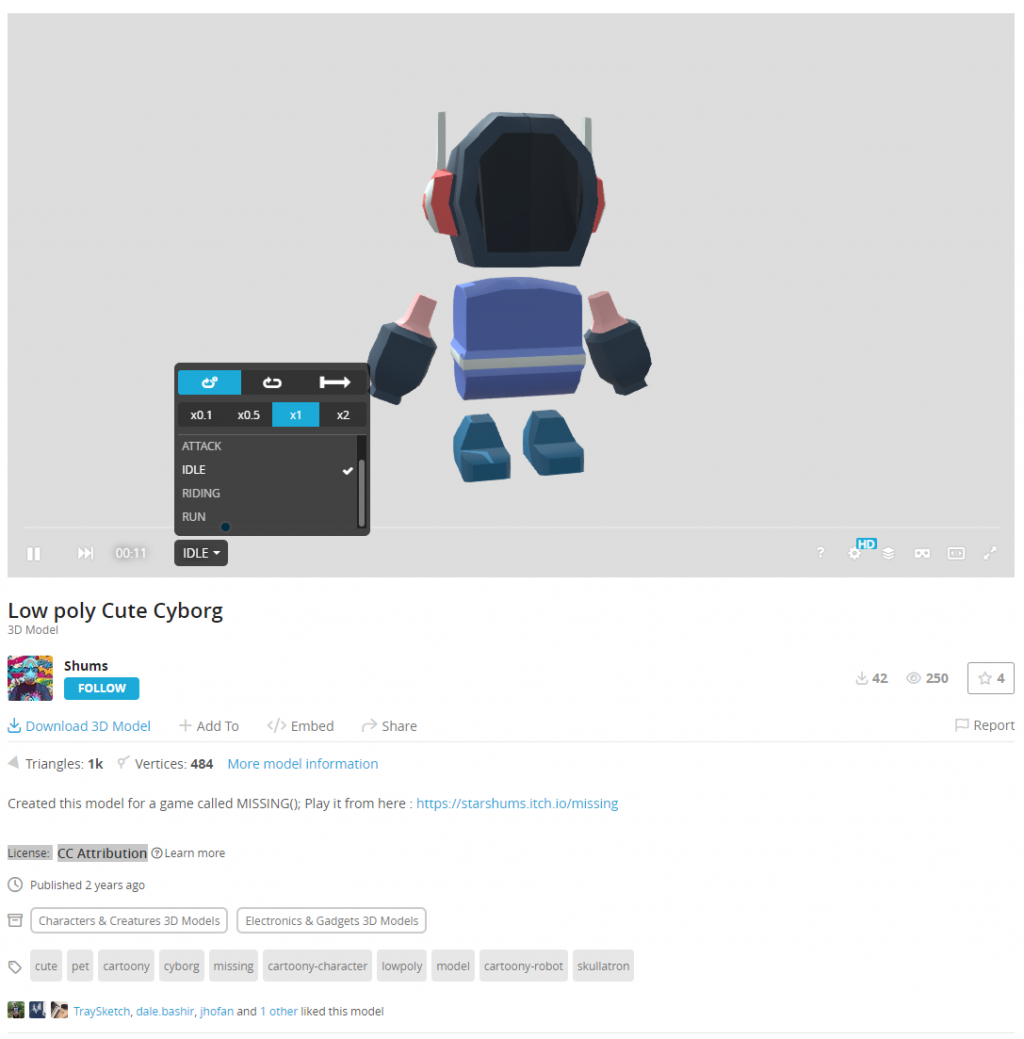
這個作品基於"Low poly Cute Cyborg"( https://sketchfab.com/3d-models/low-poly-cute-cyborg-d2046c1fa5c141c287971d6de62dc796 )by Shums( https://sketchfab.com/starshums ),並根據CC-BY-4.0許可證( http://creativecommons.org/licenses/by/4.0/ )授權。
下載後直接解壓縮到src\assets資料夾下即可。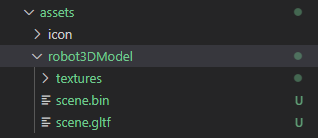
在robot3d.component.ts檔案中使用@ViewChild裝飾器來取得剛才宣告的兩個範本參考變數:
@ViewChild('divElement') private divElementRef: ElementRef | undefined;
@ViewChild('canvasElement') private canvasElementRef: ElementRef | undefined;

private get div(): HTMLDivElement {
  return this.divElementRef?.nativeElement;
}

private get canvas(): HTMLCanvasElement {
  return this.canvasElementRef?.nativeElement;
}
我們需要將Three.js的相關元件都匯入,並且宣告3D模型所需的物件:
import * as THREE from 'three';
import { GLTF, GLTFLoader } from 'three/examples/jsm/loaders/GLTFLoader';
import { CSS2DRenderer } from 'three/examples/jsm/renderers/CSS2DRenderer';
import { OrbitControls } from 'three/examples/jsm/controls/OrbitControls';
.
.
.
.
private scene!: THREE.Scene; //場景空間
private clock!: THREE.Clock; //時間追蹤
private camera!: THREE.PerspectiveCamera; //透視的攝影機
private renderer!: THREE.WebGLRenderer; //渲染器的核心
private gltfLoader!: GLTFLoader; //GLTF讀取器
private mixer!: THREE.AnimationMixer; //管理動畫的物件
private animationAction!: THREE.AnimationAction; //動畫類別
private css2DRenderer!: CSS2DRenderer; //三維物體和HTML標籤結合渲染器
private controls!: OrbitControls; //攝影機控制器(旋轉、縮放、平移)
建立一個createScene()的方法,該方法用於設置場景、攝影機和光源:
private createScene() {
  this.clock = new THREE.Clock();
  this.scene = new THREE.Scene();

  //設定透明背景,因此這裡需要null
  this.scene.background = null;

  //fov:視野角度
  //aspect:攝影機視場的寬度與高度的比例
  //near:近裁面距離,任何距離攝影機小於0.1的物體都不會被渲染
  //far:遠裁面距離,任何距離攝影機大於1000的物體都不會被渲染
  this.camera = new THREE.PerspectiveCamera(55, 0.7, 0.1, 1000);

  //攝影機位置
  this.camera.position.set(0, 0, 15);
  this.camera.updateMatrix();

  //環境光:注意!無陰影的光源!
  let ambientLight = new THREE.AmbientLight(0xffffff, 2);
  this.scene.add(ambientLight);

  //方向光:是一種有方向性的光源
  let directionLight = new THREE.DirectionalLight(0xffffff, 1);
  directionLight.position.set(0, 1, 0);
  directionLight.castShadow = true;
  this.scene.add(directionLight);
}
建立一個createGLTF3DModel()的方法,此方法負責讀取3D模型的GLTF檔案,並設定座標、旋轉角和動畫:
private createGLTF3DModel() {
  this.gltfLoader = new GLTFLoader();
  //使用GLTF讀取器加載3D模型
  this.gltfLoader.load('assets/robot3DModel/scene.gltf',
    (gltf: GLTF) => {
      //設定3D模型座標位置
      gltf.scene.position.set(1.5, -5, 0);
      //設定3D模型旋轉角度
      gltf.scene.rotation.y = Math.PI;
      //添加模型到場景中
      this.scene.add(gltf.scene);
      //管理3D模型的動畫
      this.mixer = new THREE.AnimationMixer(gltf.scene);
      gltf.animations.forEach((clip: THREE.AnimationClip) => {
        //先將名字為"IDLE"的動畫抓出來顯示
        if (clip.name === "IDLE") {
          this.animationAction = this.mixer.clipAction(clip);
          this.animationAction.play();
        }
      });
    }, function (xhr) {
      console.log((xhr.loaded / xhr.total * 100) + '% loaded');
    }, function (error) {
      console.log(error);
    }
  );
}
建立一個startRendering()的方法,這個方法將負責畫面渲染設定的工作:
private startRendering() {
  //canvas:canvas HTMLCanvasElement
  //antialias:抗鋸齒
  //alpha:透明度
  this.renderer = new THREE.WebGLRenderer({
    canvas: this.canvas,
    antialias: true,
    alpha: true
  });
  //官方說使用GLTF檔案,必須要關閉
  this.renderer.useLegacyLights = false;
  //設定輸出色彩空間
  this.renderer.outputColorSpace = THREE.SRGBColorSpace;
  //設置透明度0,讓場景背景透明用
  this.renderer.setClearColor(0x000000, 0);
  //同步渲染器的像素
  this.renderer.setPixelRatio(window.devicePixelRatio);

  let thisComponent: Robot3dComponent = this;
  //立即調用的函數表達式(Immediately Invoked Function Expression,縮寫IIFE)
  (function render() {
    //Web API
    requestAnimationFrame(render);
    if (thisComponent.mixer) {
      //根據時間差更新動畫
      const delta = thisComponent.clock.getDelta();
      thisComponent.mixer.update(delta);
    }
    thisComponent.renderer.render(thisComponent.scene, thisComponent.camera);
  }());
}
建立一個addControls()的方法,這個方法會添加鏡頭控制功能,讓我們可以自由選擇攝影機的角度:
private addControls() {
  this.css2DRenderer = new CSS2DRenderer();
  this.css2DRenderer.domElement.style.position = 'absolute';
  this.css2DRenderer.domElement.style.top = '0px';
  this.css2DRenderer.domElement.style.width = '100%';
  this.css2DRenderer.domElement.style.height = '100%';
  this.div.appendChild(this.css2DRenderer.domElement);
  this.controls = new OrbitControls(this.camera, this.css2DRenderer.domElement);
  //禁用縮放
  this.controls.enableZoom = false;
  //禁用平移
  this.controls.enablePan = false;
  //限制y軸旋轉角度
  this.controls.minPolarAngle = Math.PI * 60 / 180;
  this.controls.maxPolarAngle = Math.PI / 2;
  //限制x軸旋轉角度
  this.controls.minAzimuthAngle = -Math.PI * 40 / 180;
  this.controls.maxAzimuthAngle = Math.PI * 40 / 180;
  //更新控制器
  this.controls.update();
}
最後,我們在AfterViewInit()內,加入以上建立的所有方法:
ngAfterViewInit(): void {
  //設置場景、攝影機和光源
  this.createScene();
  //讀取3D模型、設定座標、旋轉角和動畫
  this.createGLTF3DModel();
  //畫面渲染
  this.startRendering();
  //鏡頭控制
  this.addControls();
}
我們將以下HTML和Robot3D元件添加到Home主頁的home.page.html中,編譯後就可以來查看實際的效果:
<div class="w-full h-full bg-white">
  <!-- 3D機器人動畫 -->
  <app-robot3d class="flex-grow flex-shrink w-full py-20"></app-robot3d>
</div>
這樣就成功在Ionic上建立一個簡單可互動的3D模型囉!
在這個不斷進步和變革的時代,有了WebGL和GLTF檔案格式的協助,即使我沒有任何的3D基礎知識,也能輕鬆的涉足3D世界。Three.js的加入為APP帶來了豐富而且引人注目的3D效果,讓我深深感受到Ionic加入Three.js後,所帶來的無窮可能性!
Github專案程式碼:Ionic結合ChatGPT - Day5
