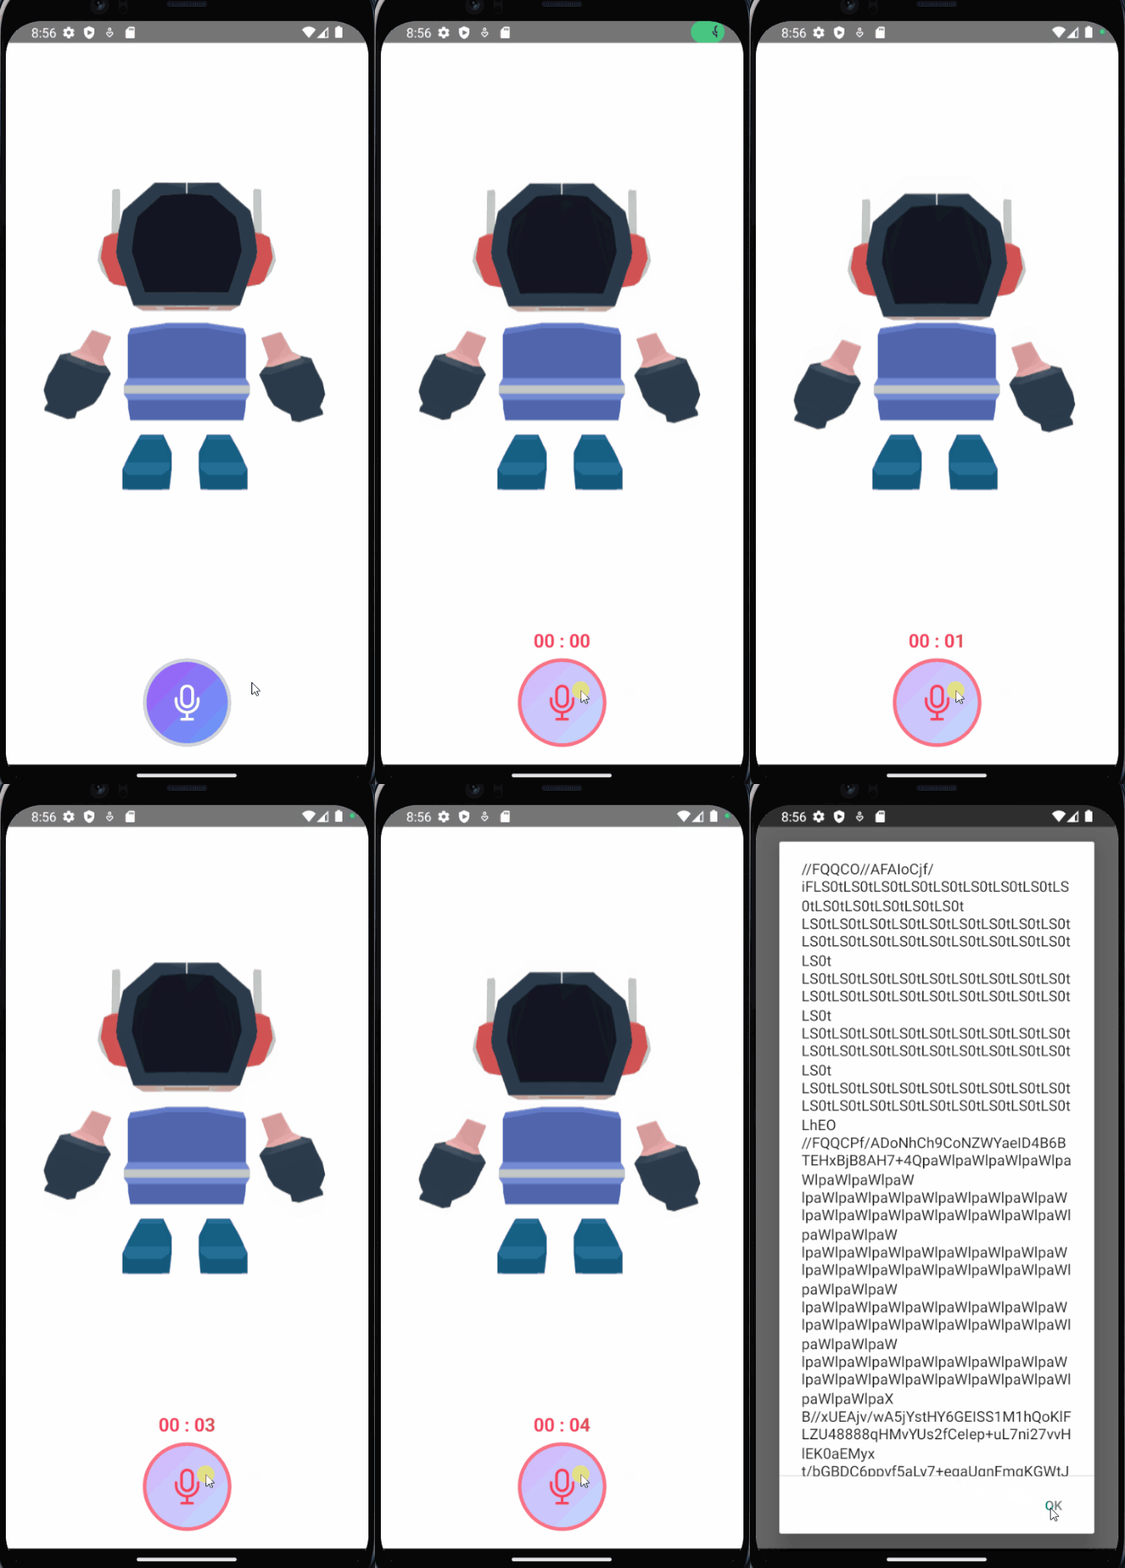
在【Day - 6】中,我們已經完成了一個基本的錄音功能,目前的操作方式是:按下按鈕開始錄音,再次按下則停止錄音。不過,今天我打算調整一下這種操作方式。我的目標是讓按鈕在被長按時進行錄音,一旦手指放開就停止錄音。除了改變錄音的觸發方式外,我還想增加Haptic(觸覺反饋)功能,以增強與APP的互動體驗。這樣的設計能讓APP更具交互性和真實感。
Ionic官方提供的Gesture功能讓我們能夠以簡單並快速的方式建立和管理各種不同的手勢,例如:「拖曳」、「滑動」、「縮放」等。而它包含了一個Gesture Controller服務,我們可以透過注入它,來定義並設置手勢的相關行為。這不僅大大簡化了手勢管理的複雜度,更讓我們能專注於提升APP的互動體驗。
首先,在voicerecording.component.html中,我們要取消掉【Day - 6】添加的OnStartRecording()和OnStopRecording()的事件繫結。然後,在按鈕上添加#recordingButtonElement的範本參考變數:
<div class="flex flex-col items-center">
  <div class="text-xl font-bold text-rose-500 h-8 w-full text-center">
    <span *ngIf="(isRecording$ | async)">{{ (timer$ | async)?.minutes }} : {{ (timer$ | async)?.seconds }}</span>
  </div>
  <div #recordingButtonElement
    class="w-24 h-24 flex flex-col items-center rounded-full">
    <ng-container *ngIf="(isRecording$ | async) else isNotRecordingTemplate">
      <div
        class="rounded-full bg-gradient-to-br from-purple-300 to-blue-200 border-4 border-rose-400 flex items-center p-5">
        <ion-icon class="text-5xl text-rose-500" name="mic-outline"></ion-icon>
      </div>
    </ng-container>
    <ng-template #isNotRecordingTemplate>
      <div
        class="rounded-full bg-gradient-to-br from-purple-500 to-blue-400 border-4 border-gray-300 flex items-center p-5">
        <ion-icon class="text-5xl text-white" name="mic-outline"></ion-icon>
      </div>
    </ng-template>
  </div>
</div>
接下來在voicerecording.component.ts檔案中,使用@ViewChild裝飾器來取得剛才在HTML中宣告的範本參考變數,同時修改一下OnStartRecordingClick()和OnStopRecordingClick()的命名:
@ViewChild('recordingButtonElement') recordingButtonElementRef!: ElementRef;
.
.
.
private get recordingButton(): HTMLDivElement {
  return this.recordingButtonElementRef?.nativeElement;
}
.
.
.
startRecording() {
  .
  .
  .
}

stopRecording() {
  .
  .
  .
}
接著透過注入GestureController服務的方式,建立一個能夠長按(Long Press)的手勢:
private longPressGesture!: Gesture;
.
.
.
constructor(private gestureCtrl: GestureController) { }
在ngAfterViewInit()方法中,建立Gesture物件。同時,將【Day - 6】建立的ngOnInit()內的請求權限requestAudioRecordingPermission()功能移至ngAfterViewInit()內。這樣可以先詢問或檢查是否有錄音的權限後,再決定是否啟動該手勢功能:
ngAfterViewInit(): void {
  //建立長按手勢物件
  this.longPressGesture = this.gestureCtrl.create({
    el: this.recordingButton, //目標元素
    gestureName: 'LongPressGesture', //手勢的命名
    threshold: 0, //設置觸發手勢的閾值,0表示觸摸到就觸發
    onStart: (detail: GestureDetail) => {
      //手勢開始時的事件
      this.startRecording();
    },
    onEnd: (detail: GestureDetail) => {
      //手勢結束時的事件
      this.stopRecording();
    }
  }, true);
  //檢查並請求權限
  VoiceRecorder.requestAudioRecordingPermission().then((result: GenericResponse) => {
    if (result.value) {
      //啟用長按手勢
      this.longPressGesture.enable();
    }
  });
}
完成並編譯後,便可以實現長按手勢功能囉!
雖然目前已經能按下後開始錄音並放開後結束錄音,但這樣的互動卻顯得有些單調。因此,我打算透過裝置的觸覺反饋增加互動性,讓APP提供更直觀且有趣的體驗。利用Capacitor官方提供的Haptics插件,我們可以根據不同場景和需求,觸發各種震動反饋,例如我們可以使用接下來要介紹的Impact(衝擊反饋)來創造震動效果。
使用以下指令安裝插件,並同步Android和iOS專案:
npm i @capacitor/haptics
npx cap sync
在Haptic和ImpactStyle匯入後,在手勢物件中的OnStart()和OnEnd()內加入Impact震動效果:
import { Haptics } from '@capacitor/haptics';
import { ImpactStyle } from '@capacitor/haptics/dist/esm/definitions';
.
.
.
ngAfterViewInit(): void {
  this.longPressGesture = this.gestureCtrl.create({
    el: this.recordingButton, //目標元素
    gestureName: 'LongPressGesture', //手勢的命名
    threshold: 0, //設置觸發手勢的閾值,0表示觸摸到就觸發
    onStart: (detail: GestureDetail) => {
      //震動反饋,震動程度有輕微(Light)、重度(Heavy)、中等(Medium)可以選擇
      Haptics.impact({ style: ImpactStyle.Medium });
      //手勢開始時的事件
      this.startRecording();
    },
    onEnd: (detail: GestureDetail) => {
      //震動反饋,震動程度有輕微(Light)、重度(Heavy)、中等(Medium)可以選擇
      Haptics.impact({ style: ImpactStyle.Medium });
      //手勢結束時的事件
      this.stopRecording();
    }
  }, true);
  //檢查是否有權限
  VoiceRecorder.requestAudioRecordingPermission().then((result: GenericResponse) => {
    if (result.value) {
      //啟用長按手勢
      this.longPressGesture.enable();
    }
  });
}
觸覺反饋需要在實體機上才能進行測試,所以大家可以親自嘗試實作,並體驗「Light」、「Medium」、「Heavy」這三種不同震動程度帶來的觸覺體驗哦!
透過Ionic的自定義手勢和Capacitor的Haptics觸覺反饋插件,我們完成了一個更直覺的操作方式:當長按按鈕時開始錄音,並且伴隨著震動提示,當放開按鈕時則停止錄音並再次觸發震動。這不僅提升了整體的使用者體驗,使APP的操作更符合自然直覺,更增添了互動性!
Github專案程式碼:Ionic結合ChatGPT - Day7
