【Day - 11】我們成功將服務運行並部署在雲端,今天我們會將服務與我們的APP進行完整串接,以完成整個語音轉文字的功能。除此之外,今天我們也會在APP上加入讀取動畫,以提升整個APP的使用體驗。
首先,我們要建立Audio Convert API的Request和Response的Model:
export interface AudioConvertRequestModel {
  aacBase64Data: string;
}

export interface AudioConvertResponseModel {
  m4aBase64Data: string;
}
我們需要調整【Day - 9】中的OnGetRecordingBase64Text()方法,以便與我們已經部署好的服務進行串接:
//建立Http header
private headers = new HttpHeaders({
  'Authorization': 'Bearer {你的Token}'
});

constructor(private http: HttpClient) { }

OnGetRecordingBase64Text(recordingBase64Data: RecordingData) {
  const requestData: AudioConvertRequestModel = {
    aacBase64Data: recordingBase64Data.value.recordDataBase64
  };
  //Audio Convert API
  this.http.post<AudioConvertResponseModel>('你的Web APP URL/AudioConvert/aac2m4a', requestData).pipe(
    switchMap(audioAPIResult => {
      //將Base64字串轉為Blob
      const byteCharacters = atob(audioAPIResult.m4aBase64Data);
      const byteNumbers = new Array(byteCharacters.length);
      for (let i = 0; i < byteCharacters.length; i++) {
        byteNumbers[i] = byteCharacters.charCodeAt(i);
      }
      const byteArray = new Uint8Array(byteNumbers);
      const blob = new Blob([byteArray], { type: 'audio/m4a' });
      //建立FormData
      const formData = new FormData();
      formData.append('file', blob, 'audio.m4a');
      formData.append('model', 'whisper-1');
      formData.append('language', 'en');

      //Whisper API
      return this.http.post<WhisperResponseModel>('https://api.openai.com/v1/audio/transcriptions', formData, { headers: this.headers })
    })
  ).subscribe(result => alert(result.text));
}
經過調整後,我們便可在實體設備上進行測試。這次的過程非常順利,成功的將語音轉換成了文字!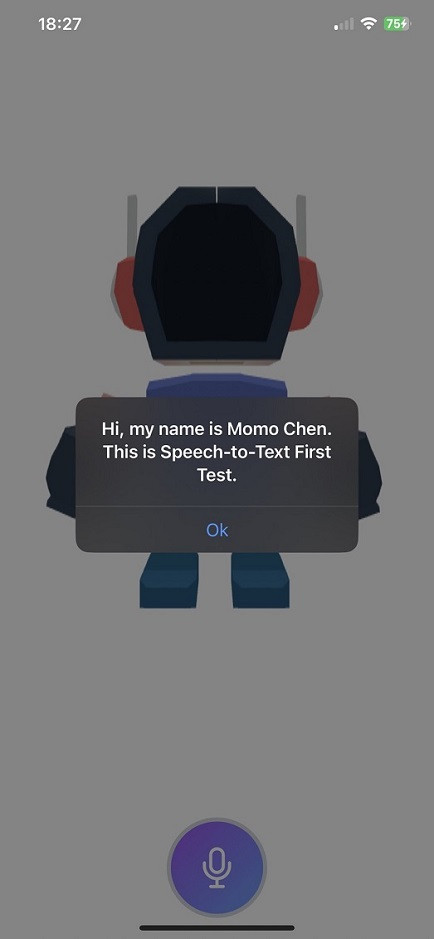
考慮到在打API時,畫面上缺乏互動可能會影響使用者體驗(UX),因此我們將增加一個讀取的動畫。首先,在新建立的服務status.service.ts裡面添加一個儲存讀取狀態的isLoadingSubject$和相關的方法:
//讀取狀態
private isLoadingSubject$ = new BehaviorSubject<boolean>(false);

get isLoading$(): Observable<boolean> {
  return this.isLoadingSubject$.asObservable();
}

public startLoading() {
  this.isLoadingSubject$.next(true);
}

public stopLoading() {
  this.isLoadingSubject$.next(false);
}
在voicerecording.component.ts檔案內,我們要注入Status Service,並取得isLoading$。這樣可以讓我們在需要的時候接收和觸發讀取動畫:
//解除訂閱用
private destroy$ = new Subject();
.
.
.
constructor(private gestureCtrl: GestureController,
  private statusService: StatusService) { }

get isLoading$(): Observable<boolean> {
  return this.statusService.isLoading$;
}
在OnInit()方法中,我們訂閱了讀取狀態。當讀取時,將長按手勢開啟和關閉,以防止在讀取過程中被觸發。為了確保資源得以正確釋放,我們還必須在OnDestroy()方法中手動解除這個讀取狀態的訂閱:
ngOnInit(): void {
  //訂閱讀取狀態
  this.statusService.isLoading$.pipe(
    takeUntil(this.destroy$)
  ).subscribe(loadingState => {
    if (this.longPressGesture) {
      if (loadingState) {
        this.longPressGesture.enable(false);
      } else {
        this.longPressGesture.enable();
      }
    }
  });
}

ngOnDestroy(): void {
  //解除讀取狀態的訂閱
  this.destroy$.next(null);
  this.destroy$.complete();
}
然後我們在voicerecording.component.html,通過使用ng-if將讀取畫面與其他界面區隔開。在讀取的區塊內,我們利用名為<span class="loader">的元素來實現一個讀取中的CSS動畫:
<div class="flex flex-col items-center">
  <div class="text-xl font-bold text-rose-500 h-8 w-full text-center">
    <span *ngIf="(isRecording$ | async)">{{ (timer$ | async)?.minutes }} : {{ (timer$ | async)?.seconds }}</span>
  </div>
  <div #recordingButtonElement
    class="w-24 h-24 flex flex-col items-center rounded-full">
    <ng-container *ngIf="(isLoading$ | async) else isNotLoadingTemplate">
      <!--讀取時-->
      <div
        class="rounded-full bg-gradient-to-br from-gray-300 to-gray-200 border-4 border-gray-100 flex items-center p-5">
        <span class="loader"></span>
      </div>
    </ng-container>
    <ng-template #isNotLoadingTemplate>
      <ng-container *ngIf="(isRecording$ | async) else isNotRecordingTemplate">
        <div
          class="rounded-full bg-gradient-to-br from-purple-300 to-blue-200 border-4 border-rose-400 flex items-center p-5">
          <ion-icon class="text-5xl text-rose-500" name="mic-outline"></ion-icon>
        </div>
      </ng-container>
      <ng-template #isNotRecordingTemplate>
        <div
          class="rounded-full bg-gradient-to-br from-purple-500 to-blue-400 border-4 border-gray-300 flex items-center p-5">
          <ion-icon class="text-5xl text-white" name="mic-outline"></ion-icon>
        </div>
      </ng-template>
    </ng-template>
  </div>
</div>
這個CSS動畫是直接使用這個網站提供的:
.loader {
  position: relative;
  width: 50px;
  height: 50px;
  background-repeat: no-repeat;
  background-image: linear-gradient(#749ed4 50px, transparent 0),
    linear-gradient(#749ed4 50px, transparent 0),
    linear-gradient(#749ed4 50px, transparent 0),
    linear-gradient(#749ed4 50px, transparent 0),
    linear-gradient(#749ed4 50px, transparent 0),
    linear-gradient(#749ed4 50px, transparent 0);
  background-position: 0px center, 15px center, 30px center, 45px center, 60px center, 75px center, 90px center;
  animation: rikSpikeRoll 0.85s linear infinite alternate;
}

@keyframes rikSpikeRoll {
  0% {
    background-size: 10px 3px;
  }

  16% {
    background-size: 10px 50px, 10px 3px, 10px 3px, 10px 3px, 10px 3px, 10px 3px
  }

  33% {
    background-size: 10px 30px, 10px 50px, 10px 3px, 10px 3px, 10px 3px, 10px 3px
  }

  50% {
    background-size: 10px 10px, 10px 30px, 10px 50px, 10px 3px, 10px 3px, 10px 3px
  }

  66% {
    background-size: 10px 3px, 10px 10px, 10px 30px, 10px 50px, 10px 3px, 10px 3px
  }

  83% {
    background-size: 10px 3px, 10px 3px, 10px 10px, 10px 30px, 10px 50px, 10px 3px
  }

  100% {
    background-size: 10px 3px, 10px 3px, 10px 3px, 10px 10px, 10px 30px, 10px 50px
  }
}
最後在Home主頁的home.page.ts中注入Status Service,並在呼叫API的起始與結束點,加上讀取開和關的控制:
//建立Http header
private headers = new HttpHeaders({
  'Authorization': 'Bearer {你的Token}'
});

constructor(private http: HttpClient,
    private statusService: StatusService) { }

OnGetRecordingBase64Text(recordingBase64Data: RecordingData) {
  const requestData: AudioConvertRequestModel = {
    aacBase64Data: recordingBase64Data.value.recordDataBase64
  };
  //啟動讀取
  this.statusService.startLoading();
  //Audio Convert API
  this.http.post<AudioConvertResponseModel>('你的Web APP URL/AudioConvert/aac2m4a', requestData).pipe(
    switchMap(audioAPIResult => {
      //將Base64字串轉為Blob
      const byteCharacters = atob(audioAPIResult.m4aBase64Data);
      const byteNumbers = new Array(byteCharacters.length);
      for (let i = 0; i < byteCharacters.length; i++) {
        byteNumbers[i] = byteCharacters.charCodeAt(i);
      }
      const byteArray = new Uint8Array(byteNumbers);
      const blob = new Blob([byteArray], { type: 'audio/m4a' });
      //建立FormData
      const formData = new FormData();
      formData.append('file', blob, 'audio.m4a');
      formData.append('model', 'whisper-1');
      formData.append('language', 'en');

      //Whisper API
      return this.http.post<WhisperResponseModel>('https://api.openai.com/v1/audio/transcriptions', formData, { headers: this.headers })
    }),
	finalize(() => {
	  //停止讀取
	  this.statusService.stopLoading();
	})
  ).subscribe(result => alert(result.text));
}
最後,讓我們來看看完成的成果吧!
在解決一系列的困難後,我們成功的實現了語音轉文字的功能,並且也掌握了API的開發和雲端服務的建立。另外,今天測試時,發現一個有趣的現象,由於Whisper API具有先進的神經網絡支援,它能夠在語音模糊的情況下仍進行精確轉寫。例如,當你說「I going to the park」時,Whisper API能智慧的修正為「I'm going to the park」實在是很厲害呢!在成功將語音轉為文字後,我們為下一步的工作:「串接ChatGPT」做好了準備。我們明天見!
Github專案程式碼:Ionic結合ChatGPT - Day12


 iThome鐵人賽