iT邦幫忙

2023 iThome 鐵人賽

DAY 18
0
Mobile Development

React Native CLI 開發心法系列 第 18

DAY 18 React Native iOS 上架前哨戰 - 使用 Apple Test Flight 發布測試

  • 分享至 

  • xImage
  •  

本篇將分享如何使用 Apple 的 Test Flighter 發佈你要測試的應用程式。基本上前半段會與 DAY 13 React Native iOS 打包 - IPA 雷同。

情境:

APP 的開發到一個段落了,即將要上架,想要在上架前做最後的確認。

目標:

將應用程式打包成正式環境的 ipa 檔案,上傳至 Apple Store,並且使用 Test Flight 分發給測試人員。


設定應用程式版本號碼

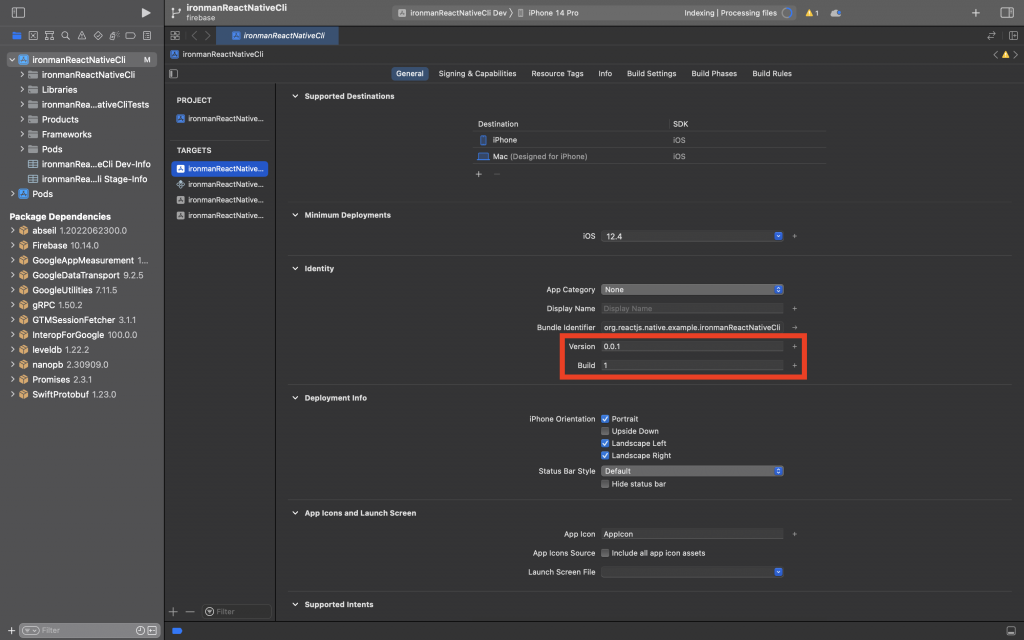
在 Xcode 的 target/General/Identiy 中可以找到 Version 跟 Build 欄位。

https://ithelp.ithome.com.tw/upload/images/20230919/20162496qNSuZoFQYW.png

  • Version:就是在應用程式在 Apple store 的版本號碼。
  • Build:Build number 主要是用來標示不同的建構版本。

使用 Xcode 上傳 ipa

存檔(archive)

https://ithelp.ithome.com.tw/upload/images/20230919/20162496Mrnq2YPK1b.png

存檔的步驟,基本上跟 DAY 13 React Native iOS 打包 - IPA 一樣,只是這邊選擇的 APP scheme 就會是你正式要上架的那一份。

{
"build_archive:prod": xcodebuild -workspace ./ios/你的Xcode workspace 文件的名稱.xcworkspace -scheme 你的應用程式方案名稱 -sdk iphoneos -configuration Release Provisioning_Profile=授權文件名稱_adhoc Development_Team=你的開發團隊ID archive -archivePath ./ios_ipa_build/你的文件名稱.xcarchive archive
}
yarn build_archive:prod

發布應用程式(Disribute App)

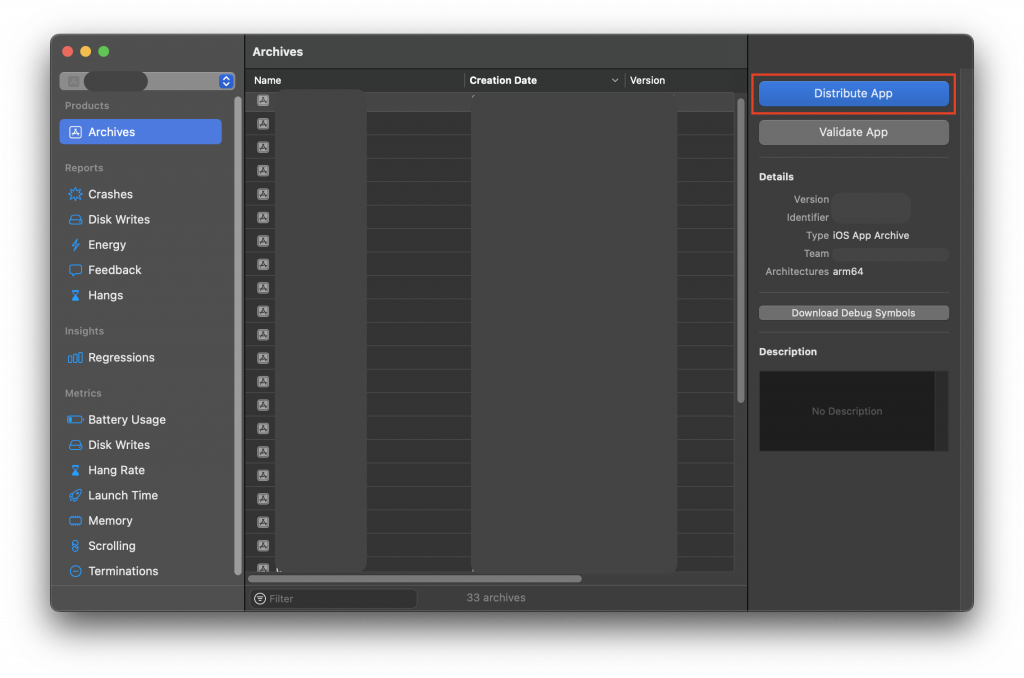
存檔完成一樣選擇 Distrbute APP 。

https://ithelp.ithome.com.tw/upload/images/20230919/20162496XOUUkCKugB.png

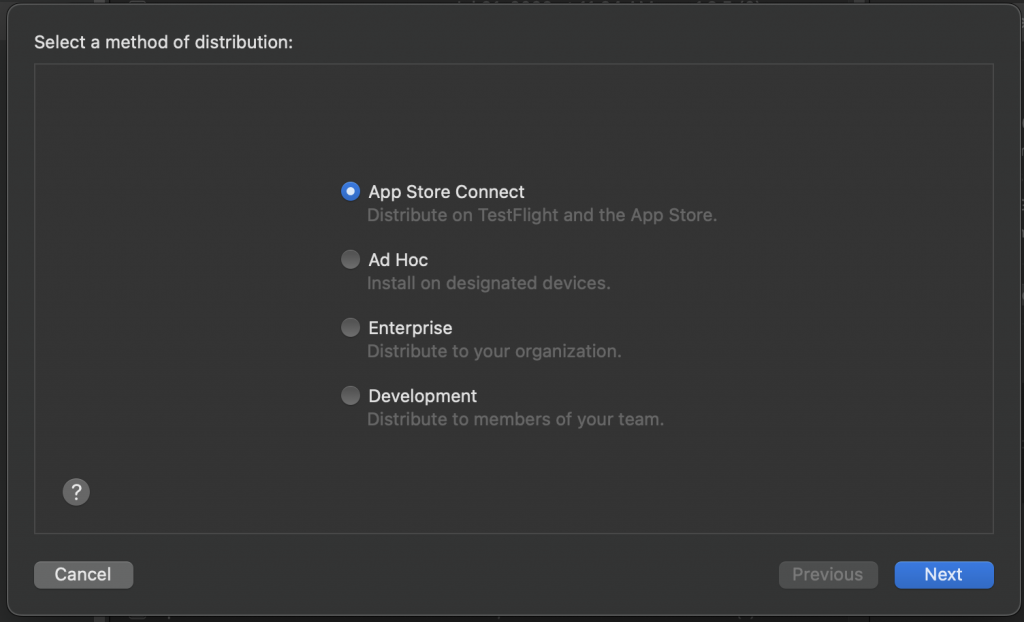
選擇第一個 App Store Connect ,把應用程式上傳到 Apple 。

https://ithelp.ithome.com.tw/upload/images/20230919/20162496hDeFUicHwl.png

https://ithelp.ithome.com.tw/upload/images/20230919/20162496XBd0dxhz3v.png

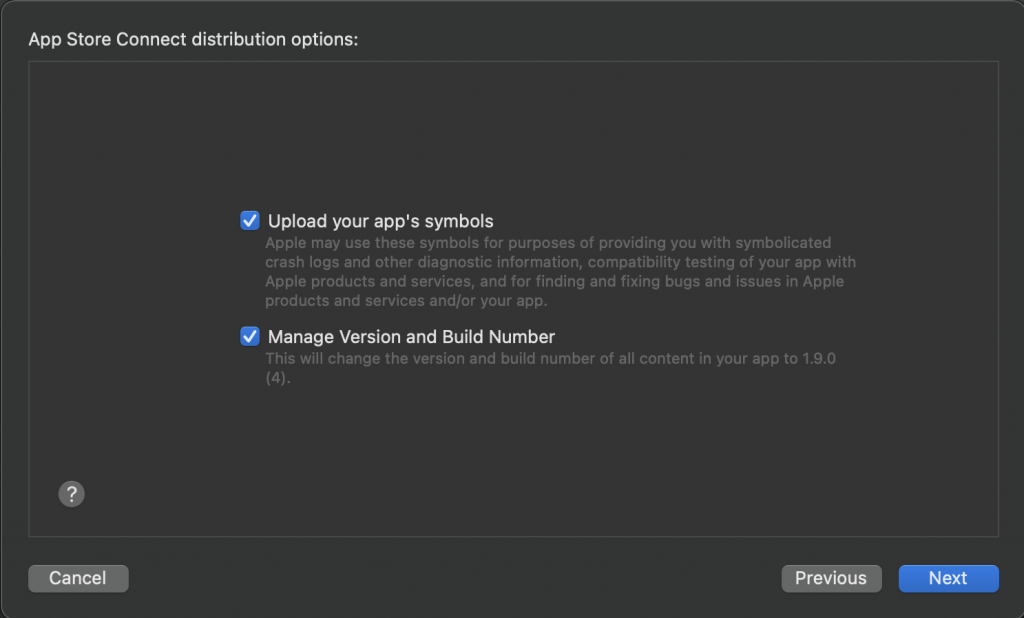
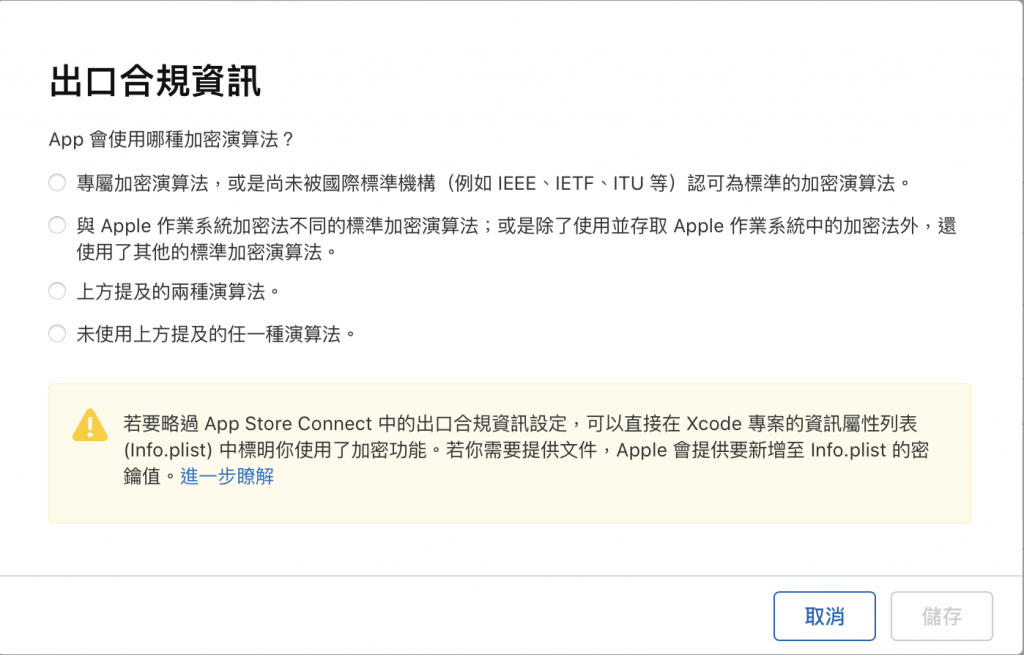
確定用來追蹤 crash log 的 symbols 已經上傳、檢查版號是否正確。

https://ithelp.ithome.com.tw/upload/images/20230919/20162496khLBAknMWr.png

自動簽署分發的憑證。
https://ithelp.ithome.com.tw/upload/images/20230919/20162496rZO2PsSeG1.png

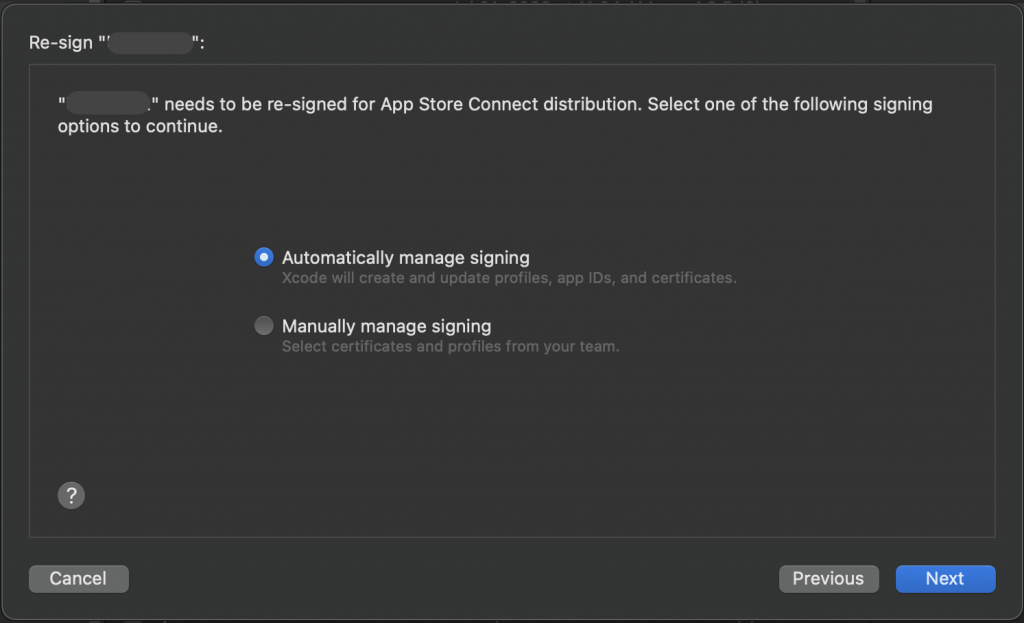
ipa 打包完成,接下來是上傳到 Apple Store。
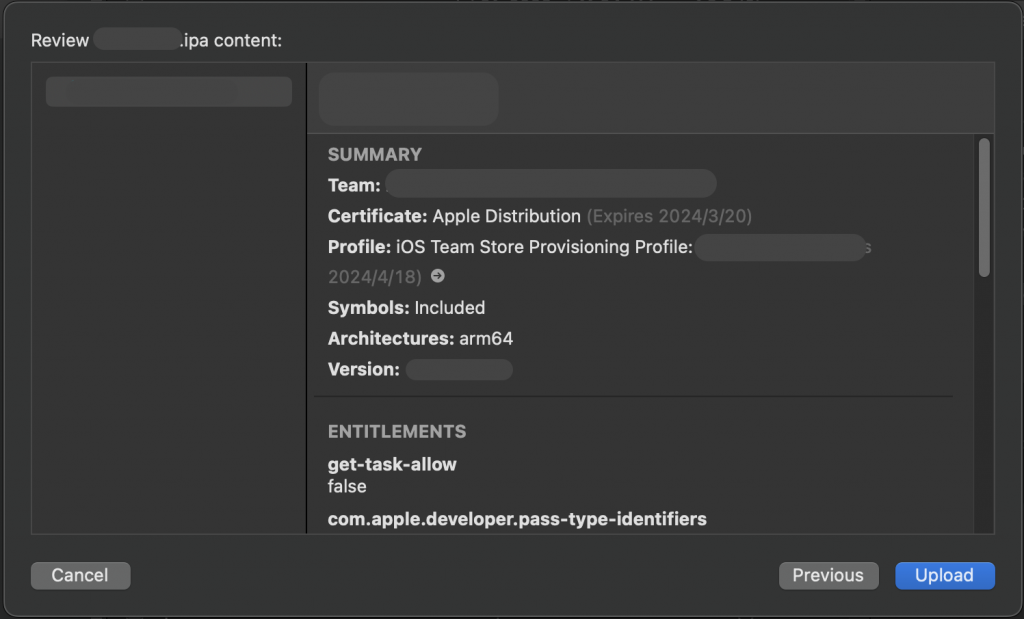
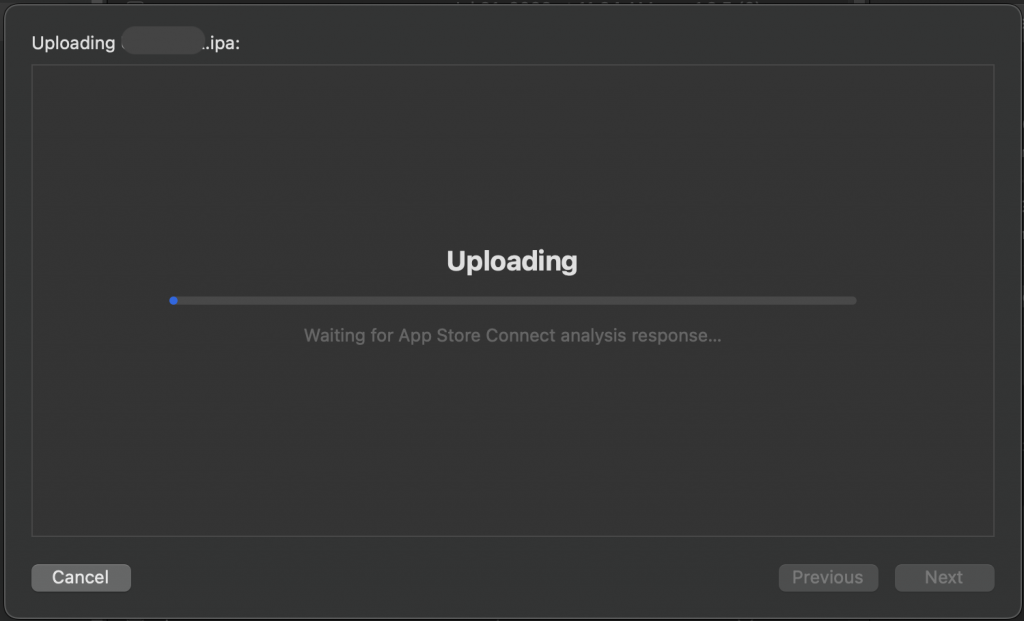
https://ithelp.ithome.com.tw/upload/images/20230919/20162496Fv9GGj05W8.png

https://ithelp.ithome.com.tw/upload/images/20230919/20162496LNSrkOhTQN.png

上傳成功!
https://ithelp.ithome.com.tw/upload/images/20230919/201624969jBuWt9IiF.png

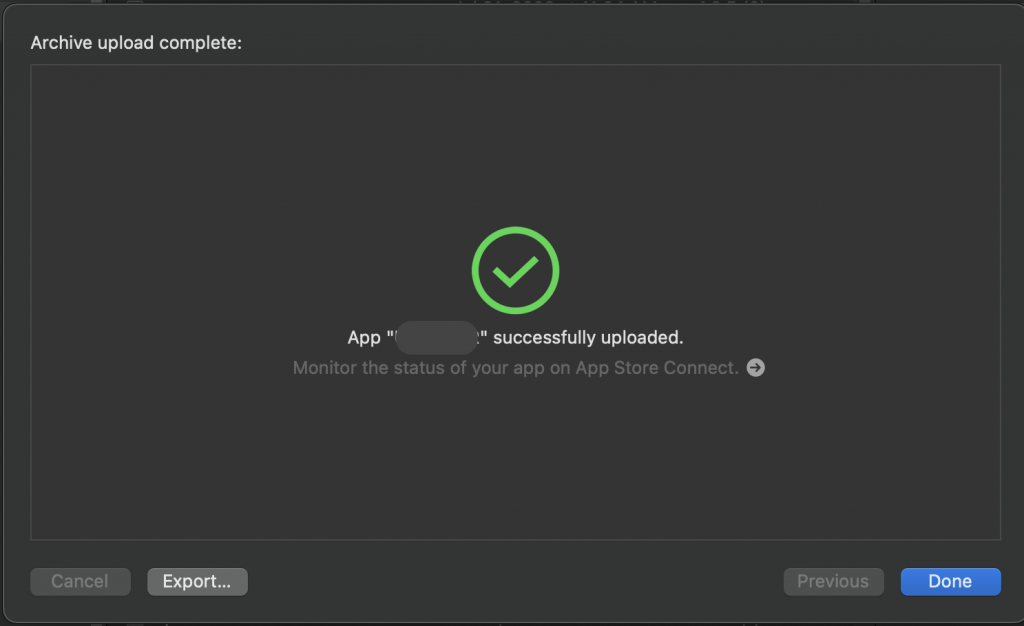
這時打開 Apple Store Connect 的 TestFlight 中,可以看到剛剛上傳的建置版本正在處理中。根據筆者經驗,通常從上傳到處理完成需要花 20 分鐘到 30 分鐘處理。
https://ithelp.ithome.com.tw/upload/images/20230919/20162496Hy70iwfEsl.png

設定測試人員

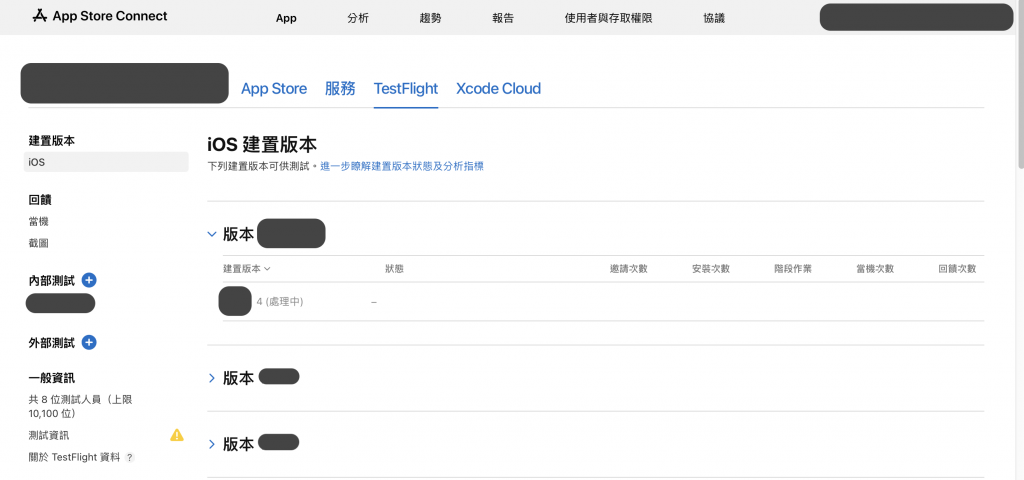
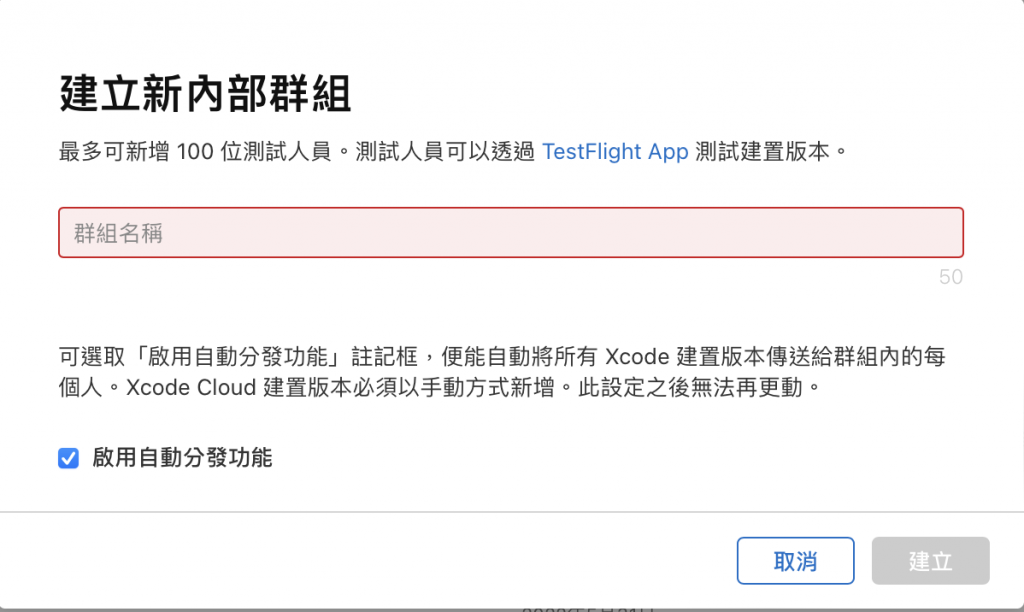
測試的方式可以分成:內部測試與外部測試,這邊主要示範的是內部測試。

內部測試

加入使用者與存取權限

內部測試人員必須先成為團隊的成員,可以從 Apple Store Connect 的使用者與存取權限看到目前的人員,如果需要測試的人尚未加入,可以這新增使用者,而受邀的人會收到來自 Apple 的團隊邀請信,通過驗證後即有專案的存取權限。

邀請測試

點擊 TestFlight 頁面中的左側『內部測試』建立新內部群組。

https://ithelp.ithome.com.tw/upload/images/20230920/20162496ZmIm9aCbdm.png

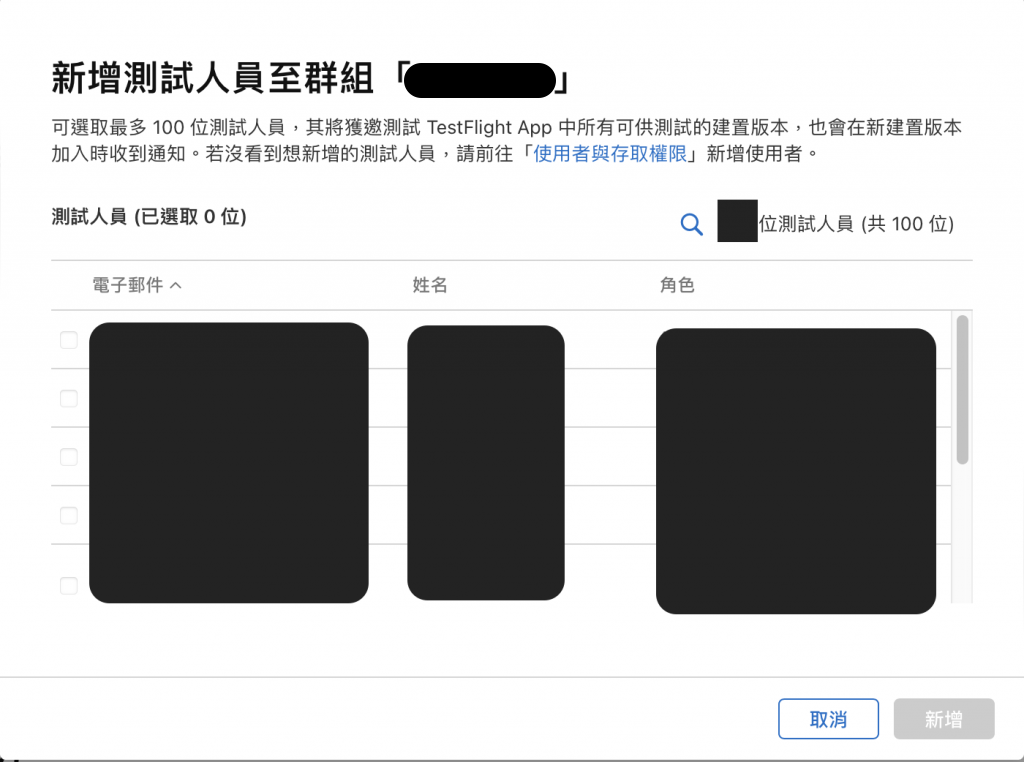
邀請測試人員,同時也要確定測試人員的裝置有在 Certificates, Identifiers & Profiles 的 Devices
註冊 UDID 並且取得 provisioning profile,才可以安裝。這時 Apple 會寄一封測試人員邀請信,記得要去收信才算成功。

https://ithelp.ithome.com.tw/upload/images/20230924/20162496Ld5YDXg5IS.png

分發測試

當應用程式版本上傳完成,這時就可以點擊『管理』。
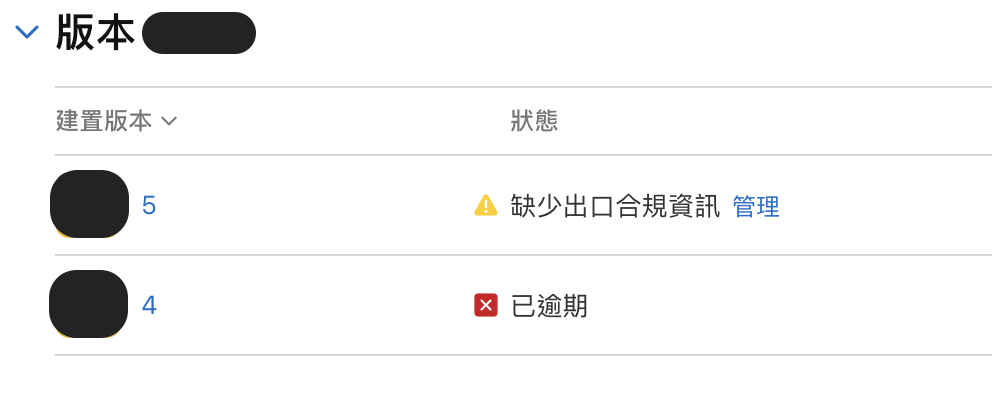
https://ithelp.ithome.com.tw/upload/images/20230920/20162496rZ2EE4OTwK.png

根據專案需求選擇,即可完成測試的分發。

https://ithelp.ithome.com.tw/upload/images/20230920/20162496XnRSHg9Hvs.png

安裝測試

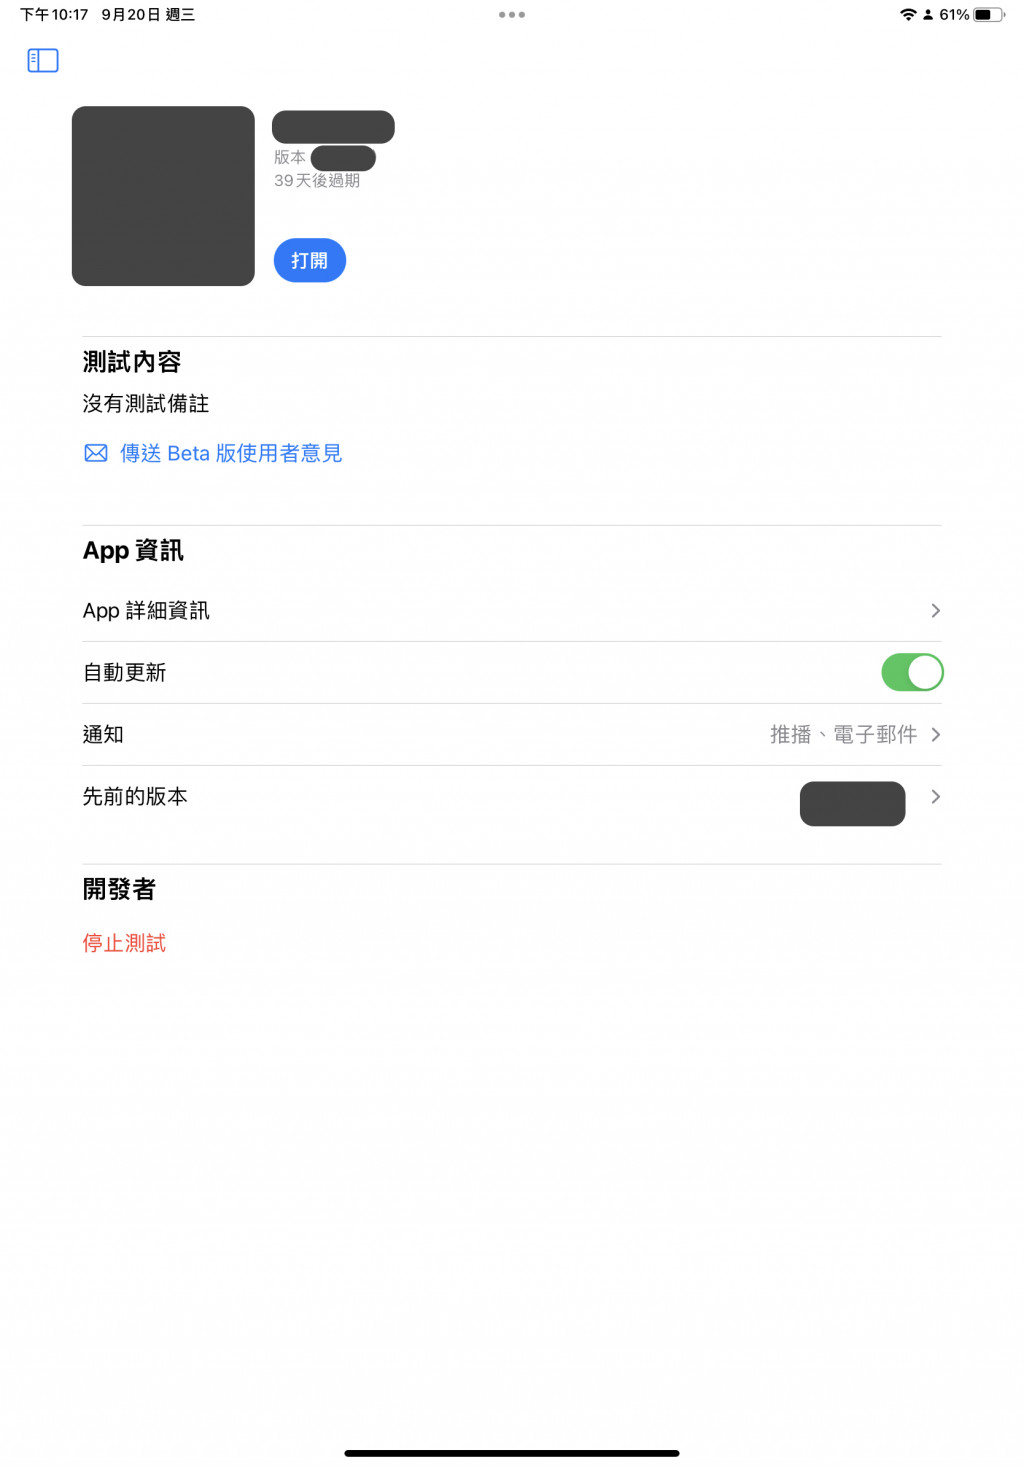
首先,需要安裝 TestFlight,當開發者發佈新的測試版本時就會寄信通知,你就可以透過 TestFlight 去安裝並且管理所有測試中的應用程式與不同的版本。

https://ithelp.ithome.com.tw/upload/images/20230920/20162496A9dXjP0I4U.jpg

Disribute scripts

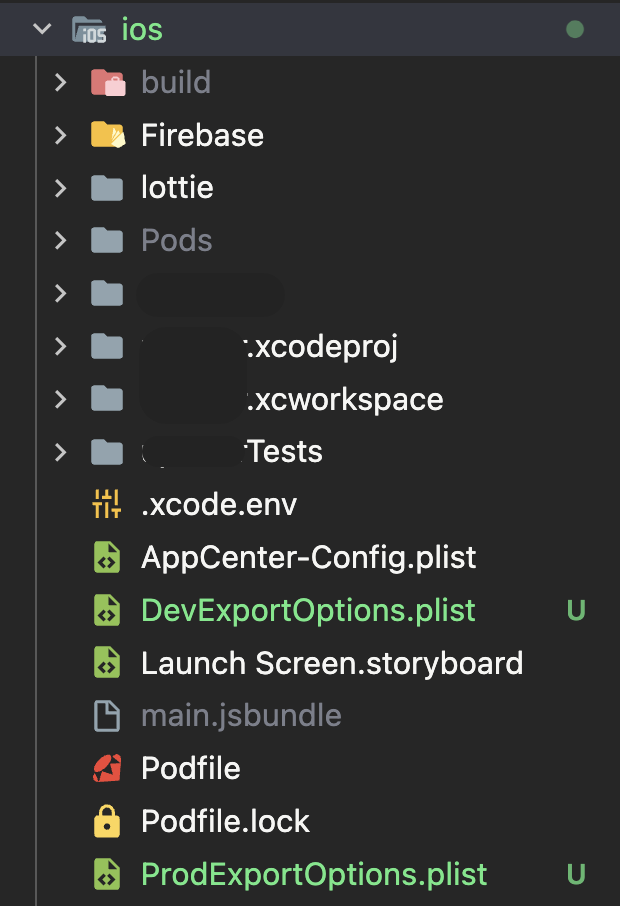
一樣的我們可以在打包成 ipa 檔去取得 ExportOptions.plist,把這個檔案放在 ios/ 的目錄底下,由於上次已經放了 ExportOptions.plist 一個為了區分 production 與 development 的設定檔,便分別重新命名為DevExportOptions.plistProdExportOptions.plist

https://ithelp.ithome.com.tw/upload/images/20230920/20162496IASs4vkJ0i.png

scripts 的部分也要跟著修改成:

package.json

{
"build_ipa:dev": xcodebuild -exportArchive -archivePath ./ios_ipa_build/你的應用程式名稱.xcarchive -exportPath ./ios_ipa_build -exportOptionsPlist ./ios/DevExportOptions.plist
}
"build_ipa:prod": xcodebuild -exportArchive -archivePath ./ios_ipa_build/你的應用程式名稱.xcarchive -exportPath ./ios_ipa_build -exportOptionsPlist ./ios/ProdExportOptions.plist
}

小結: 一鍵打包+上傳 Apple Store 指令

yarn build_archive:prod && build_ipa:prod

上一篇
DAY 17 上架 Android 應用程式到 Google Play Store
下一篇
DAY 19 上架 iOS 應用程式到 Apple Store 與審查被拒絕處理經驗談
系列文
React Native CLI 開發心法31
圖片
  直播研討會
圖片
{{ item.channelVendor }} {{ item.webinarstarted }} |
{{ formatDate(item.duration) }}
直播中

尚未有邦友留言

立即登入留言