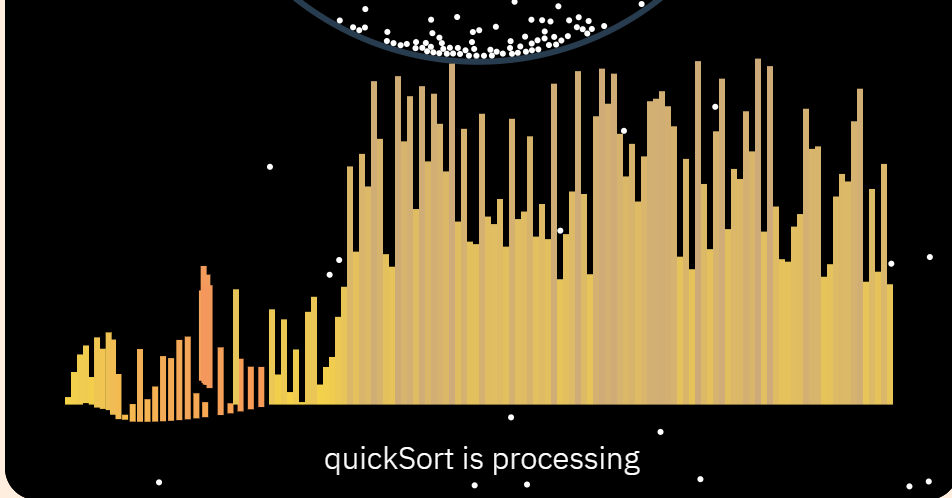
演算法中,遞迴通常是用來處理分治問題的利器,像是快速排序 (QuickSort) 就是其中的典型範例。然而,傳統遞迴有一個問題——當數據集非常龐大時,會因為堆疊過深而導致記憶體溢出。為了解決這個問題,我們可以用迭代來取代遞迴,並通過手動管理堆疊來實現遞迴效果。這樣的解法雖然複雜,但為開發者提供了更高的可控性,並避免了記憶體過載的風險。
在本文中,我們探討了三種不同的快速排序視覺化實現方式,從經典的遞迴到手動管理堆疊,再到使用生成器的優雅解法。這些實現方式各有優缺點,讓我們能更靈活地選擇適合不同場景的解決方案!

這個快速排序的範本是基於遞迴的經典版。它將最後一個元素選作樞軸 (pivot),並將陣列分為兩部分:較小的元素放在左邊,較大的元素放在右邊。然後對兩部分遞迴進行相同的操作。
function quickSort(arr) {
    if (arr.length <= 1) return arr;
    const pivot = arr[arr.length - 1];
    const left = [];
    const right = [];
    for (let i = 0; i < arr.length - 1; i++) {
        if (arr[i] < pivot) left.push(arr[i]);
        else right.push(arr[i]);
    }
    return [...quickSort(left), pivot, ...quickSort(right)];
}
這種實現的優點是易於理解和編寫,直接使用遞迴的方式解決問題。但缺點在於它需要額外的空間來存儲每次遞迴的左右陣列,而且較難植入視覺化的程式碼。
這一版本使用一個模擬遞迴的方式,通過 stack 來保存要處理的子陣列範圍,避免了遞迴調用,對記憶體非常友善。並且不同於範例的版本,我們會透過 pivot 來找到左界和右界,並進行交換,以下是程式的結構,每次執行位於 stack 陣列最上層的排序,接著透過手動管理不同的步驟,決定 pop 和 push 的時機。
class SortAlgorithm{
    quickSortSetting(columns){
        this.stack = [{'left': 0, 'right': columns.length - 1}];
        this.partitionPhase = "0.SetPivot";
        this.pivot = columns.length - 1;
        this.j = 0;
    }
    quickSort(columns){
        const len = this.stack.length;
        const {left, right} = this.stack[len - 1];
        const pivot = this.pivot;
        const frame = 60;
        switch(this.partitionPhase){
            case "0.SetPivot":
            case "1.FindLeftBound":
            case "2.FindRightBound":
            case "3.SwapBoth":
            case "4.EndPartition":
            default:
        }
    }
}
{left: 0, right: columns.length - 1}。這一步從中間位置選出 pivot,並將其移動到右端。這是為了方便後續的分區操作,且中間值通常能夠提供較好的分區效果。
case "0.SetPivot":
    const a = columns[Math.floor((left + right) / 2)];
    const b = columns[right];
    SortAlgorithm.swapColumn(a, b, frame);
    this.leftBound = left;
    this.rightBound = right - 1;
    this.pivot = right;
    this.partitionPhase = "1.FindLeftBound";
    this.j = 0;
    break;
接著程式會從左側開始搜尋,找出一個大於等於 pivot 的元素,這個元素將作為左界 (leftBound)。
case "1.FindLeftBound":
    if(columns[this.leftBound + this.j].height >= columns[pivot].height){
        this.leftBound = this.leftBound + this.j;
        this.partitionPhase = "2.FindRightBound";
        this.j = 0;
        break;
    }
    this.j++;
    break;
在這一步,程式從右側往回搜尋,尋找一個小於等於 pivot 的元素,作為右界 (rightBound)。
case "2.FindRightBound":
    if(columns[pivot].height >= columns[this.rightBound - this.j].height || this.rightBound - this.j <= this.leftBound){
        this.rightBound = this.rightBound - this.j;
        this.partitionPhase = "3.SwapBoth";
        break;
    }
    this.j++;
    break;
此時會有兩個分支,如果左右界仍位於左右兩側,將兩者交換後,會回到第一步重新尋找新的左右界;反之,當左右界交錯,表示已經分區完畢,此時將樞軸和左界交換(樞軸一開始被擺放在最右邊),並結束分區。
case "3.SwapBoth":
    if(this.leftBound < this.rightBound){
        const a = columns[this.leftBound];
        const b = columns[this.rightBound];
        SortAlgorithm.swapColumn(a, b, frame);
        this.partitionPhase = "1.FindLeftBound"
        this.j = 0;
        this.leftBound++;
        this.rightBound--;
    }
    else{
        const a = columns[this.leftBound];
        const b = columns[pivot];
        SortAlgorithm.swapColumn(a, b, frame);
        this.partitionPhase = "4.EndPartition";
        this.pivot = this.leftBound;
    }
    break;
當分區完成後,我們便能根據新的 pivot 將陣列分成左右兩個子陣列,並用物件的形式將其索引範圍推入 stack,繼續進行下一輪的分區。當 stack 為空時,排序過程結束。
case "4.EndPartition":
    this.stack.pop();
    if(left < pivot - 1) this.stack.push({'left': left, 'right': pivot - 1});
    if(pivot + 1 < right) this.stack.push({'left': pivot + 1, 'right': right});
    if(this.stack.length == 0) return true;
    this.partitionPhase = "0.SetPivot";
    break;
這麼做,除了模擬了遞迴,利用棧來記錄子區間。每個子區間在分割後不會創建新的陣列,優化了空間使用。還能把分區過程被分解為幾個步驟,並且允許在每步中進行動畫展示。
這段程式碼介紹了一個簡潔的快速排序解法,使用了 迭代生成器 (Generator Function) 來模擬遞迴過程。與前一版本不同的是,它利用 yield 和 yield* 來達成流程的中斷與繼續,這樣不但能保持程式結構簡潔,同時也便於動畫展示和異步操作。
延續前幾次的做法,回傳值 (true, false) 表示動畫是否結束,由此可以看見我們將停止條件設定在最後一行。並且注意到,遞迴本質上是在函式內呼叫一個新的函式,如果該函式是一個生成器,我們要用 yield* 來呼叫,才能正確使用:
class SortAlgorithmIterable{
    * quickSortMaker(columns, left = 0, right = columns.length - 1) {
        yield false;
        if (left >= right) return;
        const pivotIndex = yield* SortAlgorithm.partition(columns, left, right);
        yield* this.quickSortMaker(columns, left, pivotIndex - 1);
        yield* this.quickSortMaker(columns, pivotIndex + 1, right);
        if(left == 0 && right == columns.length - 1) yield true;
    }
}
在分區的階段,我們採用另一種方法,一次性歷便整個陣列,將值小於 pivot 的都往左側集中,並記錄左側的長度,最後,再把 pivot 移動到左側的末尾,以此達成分區。
class SortAlgorithmIterable{
    static* partition(columns, left, right) {
        const pivot = columns[right];
        let i = left;
        for (let j = left; j < right; j++) {
            yield false;
            if (columns[j].height < pivot.height) {
                SortAlgorithm.swapColumn(columns[i], columns[j], 30);
                i++;
            }
        }
        SortAlgorithm.swapColumn(columns[i], columns[right], 30);
        return i;
    }
}
透過生成器達成有以下幾個優點:
雖然手動管理堆疊的方案沒有生成器版本那樣的簡潔,也缺乏經典遞迴的直觀性,但它仍然是一個非常好的練習方式,特別是展示了如何在不依賴遞迴結構的情況下,實現遞迴的效果。這種方法雖然複雜,卻很有趣,因為它逼迫我們重新思考遞迴的核心概念。
結構上也很像在種一個二元樹,即使它又臭又長,我還是很喜歡它。每一步都有明確的處理流程,對於需要詳細控制的場景非常適用。最重要的是,它不會遇到遞迴層數過深而導致堆疊溢出的問題,因此在處理大數據集時更穩定。
