透過cli快速建置一個Angular的專案。
npm install -g @angular/cli
ng new 專案名稱 --service-worker
後面加上--service-worker會自動安裝Serivce worker需要的套件
3-1. 建立或開啟專案
ng new 專案名稱
3-2. 修改.angular-cli.json檔案
"apps": [
    {
      "serviceWorker": true,
     ...
      }
    }
  ],
在apps裡面新增啟動serviceWorker的設定
3-3. 安裝@angular/service-worker套件
npm install --save @angular/service-worker
src/ngsw-config.json中可以設定
{
  "index": "/index.html",
  "assetGroups": [{
    "name": "app",
    "installMode": "prefetch",
    "resources": {
      "files": [
        "/favicon.ico",
        "/index.html"
      ],
      "versionedFiles": [
        "/*.bundle.css",
        "/*.bundle.js",
        "/*.chunk.js"
      ]
    }
  }, {
    "name": "assets",
    "installMode": "lazy",
    "updateMode": "prefetch",
    "resources": {
      "files": [
        "/assets/**"
      ]
    }
  }]
}
預設設定中,包含兩個部分,一個是index.html,另一部分則是針對assets/的資源。
在assets/資料夾中,新增manifest.json和放入練習用的icons圖檔,
內容用我們這30天練習的稍微作修改一下,
將路徑指向/assets/資料夾底下。
{
    "name": "Angular5 PWA",
    "short_name": "MySPA&PWA",
    "icons": [
        {
            "src": "/assets/icons/demo-icon48.png",
            "type": "image/png",
            "sizes": "48x48"
        }
    ],
    "start_url": "index.html",
    "scope": ".",
    "display": "standalone",
    "orientation": "portrait-primary",
    "background_color": "#68e86e",
    "theme_color": "#f26d6d",
    "description": "Angular5 實作PWA",
    "dir": "ltr",
    "lang": "zh-Hant-TW"
}
ng build --prod
建置完後,會產生dist/資料夾,在裡面會看到ngsw-worker.js和ngsw.json,內容可以看到類似在workbox中看到的,資源一樣都經過hash處理過,和預設快取的資源內容。
在src/app/app.module.ts中
import { ServiceWorkerModule } from '@angular/service-worker';

 @NgModule({
  imports: [
    ServiceWorkerModule.register('/ngsw-worker.js', { enabled: environment.production })
  ]
})
看到Service worker在建置後,會抓取dist/資料夾底下的,/ngsw-worker.js檔案來註冊服務。
cd dist
http-server -p 8080(port 開太多專案port可能會相撞而建置失敗,換一個就可以執行)

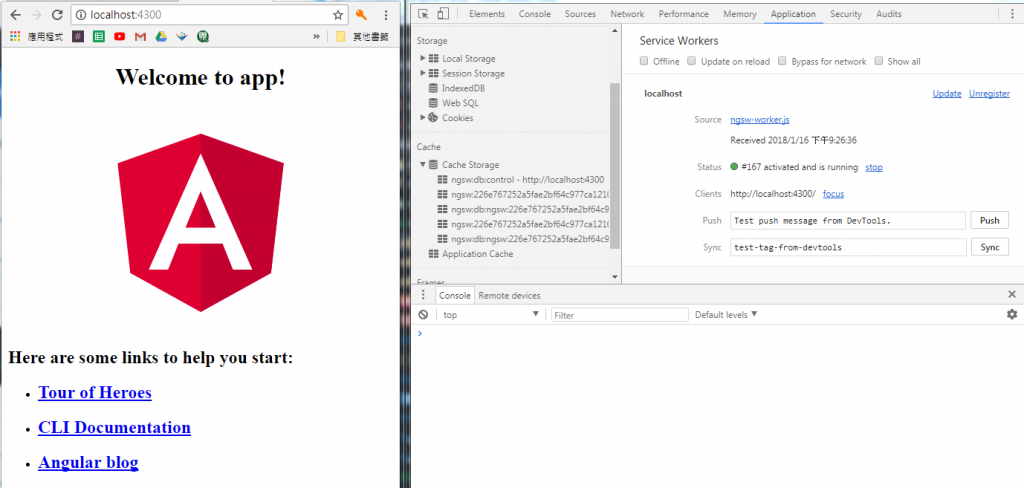
service worker成功註冊。

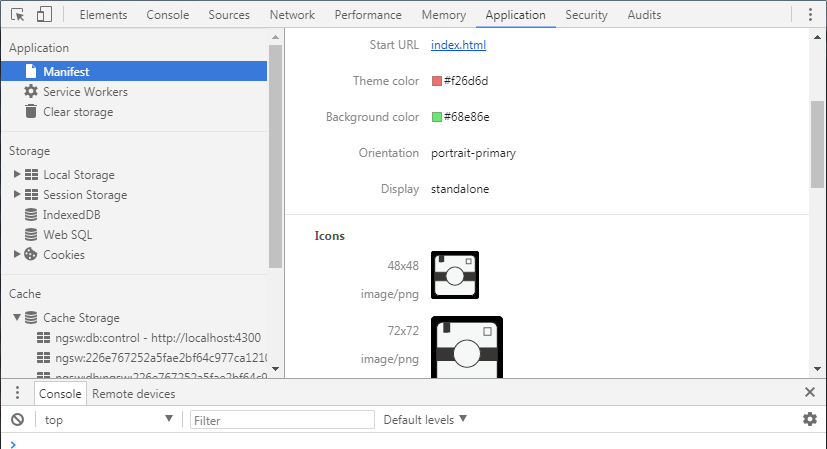
manifest.json也成功讀取

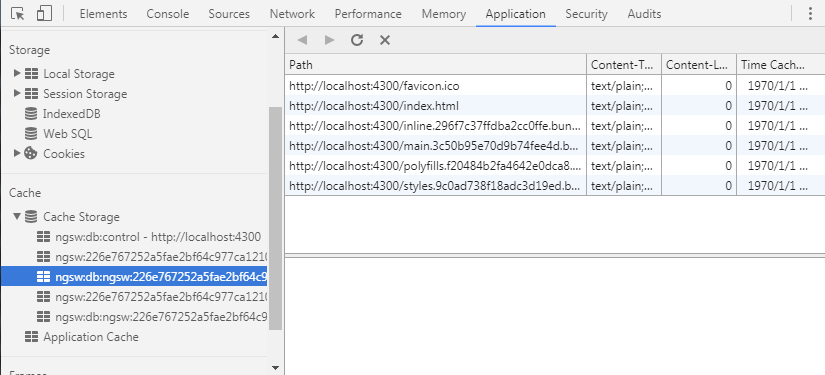
預先快取內容根據預設ngsw-config.json的設定快取資源

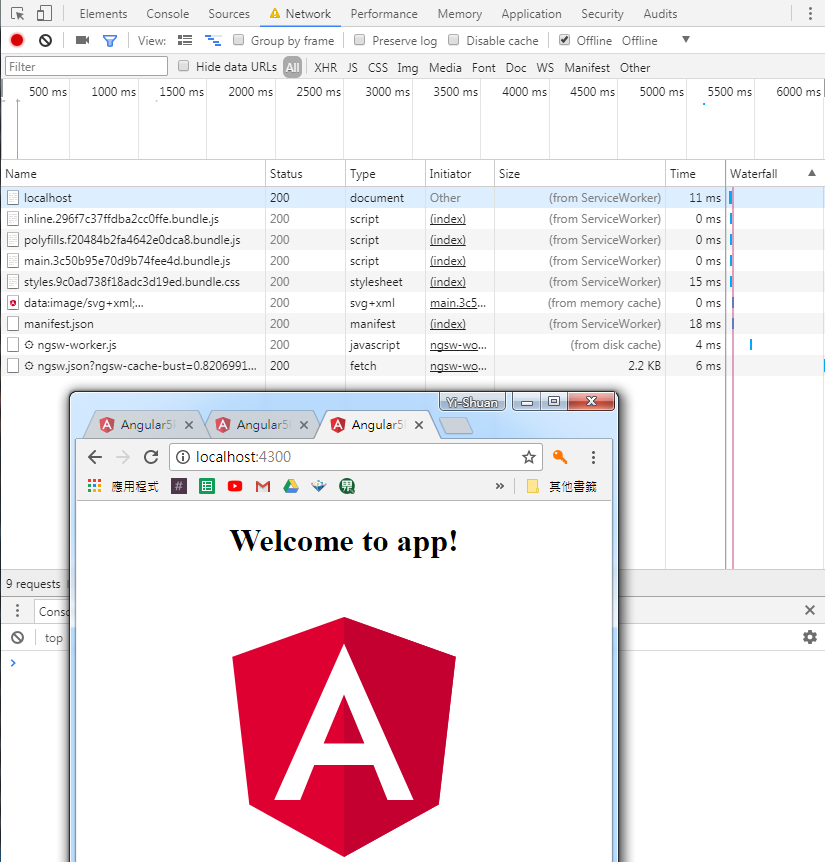
在無網路情況也能正常運行Service worker帶來的好處。
https://github.com/angular/angular-cli#updating-angular-cli
https://angular.io/guide/service-worker-config
https://angular.io/guide/service-worker-getting-started
https://blog.angular-university.io/angular-service-worker/
在最後一天,我們簡單透過幾行指令,就實現SPA搭配PWA的專案,實作起來真的很迅速,
比較多是在偵錯上,會發生的錯誤,例如,建置起來雖然是在localhost,但console視窗卻說
由於是http的關係無法註冊Service worker等等小問題。
不過綜看30天學習的內容
Day1-What and Why Progressive Web Apps?
Day2-關於PWAs核心技術
Day3 - 專案環境建設
Day4 -Web邁向Native App的第一步-Manifest File
Day5 -Manifest File 之 IOS的替代方案及App Install Event實作
Day6- Service Worker終結小恐龍的命運-觀念篇
Day7-Service Worker 走訪Lifecyle-程式篇
Day8-Fetch API與Promise 使用方式介紹
Day9-Service Worker中的Fetch事件
Day10-Cache API -PreCache基礎
Day11-Cache API 能使用的其他方法
Day12-Cache API之動態快取
Day13-Cache API刪除舊快取
Day14-Cache API-策略篇之一
Day15-Cache API-策略篇之二
Day16-Cache Offline Page擊退小恐龍之最後一擊
Day17-動態取得資料-Daynamic Data之使用Firebase實作
Day18-使用idb實作IndexedDB
Day19-IndexedDB之抽成共用檔案
Day20-IndexedDB之流程統整
Day21-Responsive Design
Day22-就是偏要在無網路情況下送表單-Background Sync
Day23-Firebase Function
Day24-Push Notification推播概念篇
Day25-Notification API設定介紹
Day26-Push API與推播互動監聽事件
Day27-Push Notification之成為訂閱用戶
Day28-Push Notification伺服器推播訊息實作
Day29-Workbox Tool
這次主要以圖解加程式實作的方式撰寫文章,寫起來發現其實截圖還蠻花時間的,
像是第一天不是在看程式,是在開AI畫icon![]()
相對的文字解說就變得比較少,有些原本預估濃縮成一天的內容,也因為時間關係切成兩篇,
不過還是盡量在有限的時間,盡量塞入整理後的重點。
本來一直在觀望沒有實際接觸的Progressive Web App,
透過這30天強迫接觸,順便試用Firebase來體驗Service worker,
整個語法使用上不會很困難,用途也很容易理解,
主要重點在整個操作流程和資源的生命週期上的觀念釐清,
還有些新的特色需要時間實作,不過30天鐵人賽終於完賽囉![]()
